
What's inside
- Best Wood Engraving Machines for Beginners
- Quick picks by beginner situation
- Laser or CNC router: the decision that matters most
- Head-to-head comparison for common wood projects
- How the machines handle real beginner projects
- Assembly, software, and focus: where beginners lose time
- A simple cost-per-use calculation
- Ownership realities and maintenance
- Final recommendation
- Related Guides
As an Amazon Associate I earn from qualifying purchases. This post may contain affiliate links at no extra cost to you.
Best Wood Engraving Machines for Beginners
The best wood engraving machine for beginners depends on the project: choose a 10W diode laser for affordable signs and plywood artwork, an enclosed diode laser for cleaner setup and safer operation, or a small CNC router when you want carved lettering and relief rather than a dark surface mark.
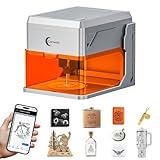
For most first-time users, the xTool S1 10W is the easiest all-round choice if budget allows. It has a useful working area, a more enclosed design than open-frame diode lasers, and software that is less intimidating than a full CNC workflow. The Genmitsu 3018-PROVer V2 is the better choice for physically carved signs, while a compact open-frame machine such as the Ortur Laser Master 3 10W or SCULPFUN S30 Pro 10W keeps the entry price lower.
As an Amazon Associate we earn from qualifying purchases at no extra cost to you.


Quick picks by beginner situation
| Situation | Best fit | Why | Main compromise |
|---|---|---|---|
| Small apartment or shared workshop | xTool S1 10W | Enclosed diode design, about 498 × 319 mm footprint, 385 × 300 mm working area | Still needs ventilation and a stable work surface |
| Lowest practical laser budget | Ortur Laser Master 3 10W | Large approximately 400 × 400 mm work area and broad LightBurn support | Open frame requires more workspace and safety control |
| Frequent plywood signs and batches | SCULPFUN S30 Pro 10W | Approximately 410 × 400 mm area and air-assist compatibility | More assembly and adjustment than an enclosed machine |
| Raised lettering, grooves, and relief carving | Genmitsu 3018-PROVer V2 | Cuts wood mechanically and accepts small router bits | Slower setup, more noise, dust, and software learning |
| Simple guided projects with minimal software setup | Glowforge Aura | Enclosed 6W diode laser with a browser-based workflow | Smaller cutting power and dependence on the manufacturer’s software workflow |
Laser or CNC router: the decision that matters most
Diode laser engraving
A diode laser burns or darkens the surface without touching it. It is well suited to names, photographs, line art, ornaments, coasters, leather patches, and thin plywood. A 10W optical-output diode laser can usually engrave quickly on common plywood and solid woods, but it does not remove a deep channel in one pass.
Laser results vary sharply with wood species. Light, even-grained maple and birch plywood usually produce crisp contrast. Pine can show uneven darkness because its resin and soft growth rings absorb energy differently. Plywood may also contain voids, glue lines, or dark inner layers. Test pieces are not optional if the appearance matters.
CNC routing
A CNC router uses a rotating bit to remove material. It produces tactile lettering, pockets, chamfers, and shallow reliefs that can be painted or filled. The trade-off is dust, noise, bit wear, workholding, and a longer learning curve. A 3018-class machine is excellent for small plaques and signs, but its typical working area of roughly 300 × 180 × 45 mm limits large projects.
Choose a CNC machine if “engraved” means a groove you can feel with a fingertip. Choose a laser if it means a precise image or dark surface mark.
Head-to-head comparison for common wood projects
| Machine | Technology | Working area | Typical material fit | Assembly and focus | Software |
|---|---|---|---|---|---|
| xTool S1 10W | 10W diode laser | 385 × 300 mm | Plywood, hardwood, coated wood | Moderate assembly; height adjustment is assisted by the machine’s positioning system | xTool Creative Space; LightBurn support |
| Ortur Laser Master 3 10W | 10W diode laser | 400 × 400 mm | Large plywood panels, signs, hardwood blanks | More frame assembly; manual focus lever or spacer depending on setup | LightBurn and LaserGRBL |
| SCULPFUN S30 Pro 10W | 10W diode laser | 410 × 400 mm | Plywood batches and solid-wood artwork | Moderate assembly; fixed-height focus procedure and optional air assist | LightBurn and LaserGRBL |
| Glowforge Aura | 6W diode laser | 305 × 210 mm | Thin plywood, veneer, small decorations | Low assembly; guided camera-based placement and software workflow | Glowforge web application |
| Genmitsu 3018-PROVer V2 | CNC router | 300 × 180 × 45 mm | Softwood, hardwood, plywood, plastic | More assembly; bit installation, zeroing, and workholding are manual | GRBL-compatible sender software; Easel is a common option |
How the machines handle real beginner projects
For 3 mm plywood ornaments
A 10W diode laser is the strongest match. The 385–410 mm-wide machines can place several ornaments in one job, while the Glowforge Aura is better for smaller batches. Keep the artwork at least 5 mm from the edge of a fragile plywood blank, and use a honeycomb or raised support to reduce smoke staining on the underside.
Do not assume that a laser’s engraving ability equals its cutting ability. Engraving a name may take one pass, while cutting a 3 mm plywood outline may require multiple passes and air assist. Glue-filled plywood can cut poorly even when the nominal thickness is correct.
For a 200 × 300 mm solid-wood plaque
Both the xTool S1 and the larger open-frame lasers have enough area. A diode laser will create a dark graphic but only a shallow heat mark. On pale maple, start with a low-power test grid; on walnut, the natural dark color may reduce contrast and require a filled or lighter design.
A CNC router is preferable when the plaque needs recessed letters. Use a V-bit for outlined lettering or a flat end mill for a pocket. Secure the plaque across a broad area: vibration is a common cause of ragged edges and inconsistent depth.
For a large 400 × 400 mm sign
The SCULPFUN S30 Pro and Ortur Laser Master 3 fit the design more naturally than the 300 mm-class enclosed machines. Measure the complete frame, not just the advertised work area. You need additional room for cables, ventilation, an enclosure, and access to the emergency stop or power switch.
Assembly, software, and focus: where beginners lose time
Open-frame diode lasers generally cost less, but the savings are exchanged for alignment work and safety preparation. The gantry must be square, belts must be tensioned without binding, and the laser head must travel smoothly across the full area. A slightly skewed frame can turn a square sign into a subtly distorted one.
Enclosed machines reduce those setup decisions. Their camera or positioning features can make it easier to place artwork on an existing board, although camera alignment is not infallible. A board with a raised knot, warped edge, or uneven surface can still be positioned incorrectly.
Software choice matters:
- xTool Creative Space is approachable for basic text, shapes, and image engraving on xTool machines. LightBurn offers deeper control when you outgrow presets.
- LightBurn is a strong cross-brand option for supported diode lasers. It provides layers, speed and power control, image dithering, and material test grids, but its interface takes time to learn.
- LaserGRBL is a lower-cost option for many GRBL diode lasers, although it is less polished for complex layouts.
- Carbide or Easel-style CNC software is designed around toolpaths, feeds, plunge rates, and cutting depths rather than simple image placement.
For laser focus, place the supplied spacer or gauge on the material and set the head to the prescribed height. Focus on the actual top surface, not on the honeycomb beneath it. A 2 mm difference can noticeably soften fine lettering. For a CNC router, zero the X, Y, and Z axes after the stock is clamped; setting Z zero on the spoilboard instead of the material can make the first pass dangerously deep.
A simple cost-per-use calculation
Suppose a beginner buys a machine in the general $400–$800 market range, spends $60 on a honeycomb bed and basic ventilation parts, and makes 100 projects over two years. Ignoring electricity and the value of time, an $550 initial setup works out to approximately $5.50 per project. Add a $15–$30 replacement laser lens or protective window when needed, and the cost remains modest if the machine is used regularly.
For a CNC router, include consumables more carefully. If a $20 router bit produces 30 small plywood plaques before becoming dull, the bit cost is about $0.67 per plaque. Hardwoods, aggressive cutting depths, and poor chip evacuation can reduce that life considerably.
Ownership realities and maintenance
- Laser lenses and protective windows collect smoke residue first. Inspect them regularly and clean only according to the manufacturer’s procedure. A dirty optical surface reduces engraving power and can create uneven marks.
- Air assist is valuable for cutting plywood. It reduces flare-ups and clears smoke, but it does not make unsuitable or glue-heavy plywood predictable.
- Open-frame lasers need a proper enclosure. Use suitable laser-rated shielding, extraction to an appropriate location, and never leave an active job unattended. Burning wood produces smoke and fine particulates.
- CNC bits wear at the cutting edge. Tear-out, increasing noise, and a suddenly poor surface finish are signs to inspect the bit, feeds, and workholding.
- Dust management is part of the CNC budget. Vacuum the machine after use, keep dust away from electronics, and do not allow chips to accumulate around the spindle.
- Warped wood causes inconsistent results. Flatten or firmly hold the stock before engraving. Laser focus follows the surface height, while a CNC bit follows the programmed plane.
Final recommendation
Buy the xTool S1 10W for the most balanced beginner experience across plywood and solid wood, particularly when limited space and simple setup matter. Choose the Ortur Laser Master 3 10W or SCULPFUN S30 Pro 10W when a larger work area and lower entry cost outweigh the need for extra assembly and enclosure planning. Choose the Genmitsu 3018-PROVer V2 only if you specifically want physical grooves, pockets, and relief carving. For small, guided projects with minimal machine setup, the Glowforge Aura is convenient, but its lower laser power and smaller area make it less versatile for thick stock and large signs.