
What's inside
- Quick picks for diode laser acrylic work
- Diode laser acrylic: what the technology can and cannot do
- Head-to-head comparison
- Choosing by your actual situation
- How much cutting power do you need?
- What diode lasers do well on acrylic
- Setup details that make the difference
- Ownership realities and common mistakes
- When a CO₂ laser is the better buy
- Bottom line
As an Amazon Associate I earn from qualifying purchases. This post may contain affiliate links at no extra cost to you.
For most acrylic projects, a 10W or 20W blue-diode laser is the best-value choice for opaque acrylic, while clear acrylic is usually a job for a CO₂ laser. Blue diode lasers can engrave and cut black, colored, and other light-blocking acrylic, but their visible blue light passes through transparent acrylic instead of depositing useful heat in its surface.
As an Amazon Associate we earn from qualifying purchases at no extra cost to you.

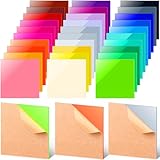


Quick picks for diode laser acrylic work
- Best budget starting point: Longer Ray5 10W, if you mainly engrave signs, tags, and small panels in opaque acrylic.
- Best open-frame work area: xTool D1 Pro 20W, with a 430 × 400 mm working area and enough power for practical cuts in thin opaque acrylic.
- Best enclosed diode option: xTool S1 20W, especially for a workshop where an enclosed design, ventilation connection, and repeatable positioning matter.
- Best lower-cost 20W alternative: Ortur Laser Master 3 20W or Longer Ray5 20W, provided you add proper enclosure, extraction, and fire protection.
- Best choice for frequent clear-acrylic production: a CO₂ laser, typically in the 40W to 60W class.
These recommendations assume you will use a genuine machine with an enclosed or guarded beam path, an air-assist system, suitable extraction, and never leave a cutting job unattended.
Diode laser acrylic: what the technology can and cannot do
Most hobby diode lasers use a blue-violet beam around 450–455 nm. Opaque acrylic absorbs enough of this wavelength to heat, char, vaporize, or melt depending on the color and settings. Black acrylic is usually the easiest material. Dark red, green, blue, and opaque white sheets may also work, but each color needs its own test settings.
Clear acrylic transmits much of the blue light. As a result, a blue diode may appear to run normally while producing only a faint mark or no useful cut at all. Painting the surface with a dark, removable coating can allow surface marking, but that is a workaround rather than true clear-acrylic processing. It will not turn a blue diode into a reliable transparent-sheet cutter.
A CO₂ laser emits at approximately 10.6 micrometres, a wavelength acrylic absorbs well. It can therefore engrave and cut clear, translucent, fluorescent, and opaque acrylic more consistently. For transparent lettering, edge-lit signs, layered displays, and repeated sheet cutting, the CO₂ machine is usually the better buy even when its initial cost is higher.
Head-to-head comparison
| Model or class | Optical power | Work area | Acrylic fit | Best use |
|---|---|---|---|---|
| Longer Ray5 10W | 10W | 400 × 400 mm | Opaque acrylic; limited clear-surface marking with coating | Budget engraving and occasional thin cuts |
| xTool D1 Pro 10W | 10W | 430 × 400 mm | Opaque acrylic, especially dark colors | General-purpose hobby work |
| Ortur Laser Master 3 20W | 20W | 400 × 400 mm | Opaque acrylic with better cutting potential than 10W | Larger signs and more frequent cutting |
| Longer Ray5 20W | 20W | 400 × 400 mm | Opaque acrylic; clear acrylic remains unsuitable for direct blue-diode cutting | Value-focused cutting and engraving |
| xTool D1 Pro 20W | 20W | 430 × 400 mm | Opaque acrylic and coated-surface marking | Versatile open-frame production |
| xTool S1 20W | 20W | 498 × 330 mm | Opaque acrylic; enclosed workflow is the main advantage | Safer repeatable work in a shared workshop |
| CO₂ laser, typical entry class | 40–60W tube | 300 × 200 to 600 × 400 mm | Clear, translucent, and opaque acrylic | Regular cutting, polished edges, and production signs |
Advertised diode power should be compared as optical output power, not electrical input power. A machine marketed as consuming 60W electrically is not necessarily a 60W cutting laser. Also check whether the quoted work area is available after installing a rotary accessory, enclosure, or material-holding frame.
Choosing by your actual situation
| Your situation | Most sensible choice | Why |
|---|---|---|
| Under roughly $500, occasional opaque signs | 10W diode | Lower purchase cost and adequate engraving capability |
| $500–$1,000, regular opaque-acrylic cutting | 20W diode | More usable cutting speed and fewer repeated passes |
| Shared room, children nearby, or limited operator access | Enclosed 20W diode | Better beam shielding and more controlled smoke management |
| Clear acrylic is a core product material | 40–60W CO₂ laser | Correct wavelength for transparent acrylic |
| Large sheets or weekly production | CO₂ laser with extraction | Higher throughput, more consistent cuts, and better edge quality |
| Very limited bench space | Compact enclosed diode or outsourced cutting | Open-frame machines need safety clearance and extraction space |
How much cutting power do you need?
A 10W diode is a sensible engraving tool and can cut thin opaque acrylic when the sheet, focus, air assist, and speed are favorable. A 20W model provides more headroom: it can use a higher feed rate, make fewer passes, or work with somewhat thicker material. It does not solve the clear-acrylic problem, however. Doubling blue-diode power does not make transparent acrylic absorb the beam efficiently.
As a planning example, suppose a 400 × 400 mm sheet is divided into 40 mm square pieces. The maximum geometric count is 100 pieces, before allowing for kerf, margins, and spacing. With a 3 mm gap between pieces, the usable pitch becomes 43 mm, giving nine pieces across each direction, or 81 pieces total. This is why a nominally large work area can produce fewer parts than expected: safe spacing and material margins consume approximately 19% of the available square count in this example.
For cutting, use the manufacturer’s recommended starting settings as a baseline, then test a small grid on the exact brand, color, and thickness of acrylic. Cast and extruded acrylic can behave differently. A setting that cuts black 3 mm cast acrylic may only melt or fail on a light-colored extruded sheet.
What diode lasers do well on acrylic
- Engraving logos, serial numbers, artwork, and shallow decorative textures on opaque sheets.
- Cutting thin black or dark opaque acrylic for labels, ornaments, templates, and small sign components.
- Marking painted, anodized, or coated acrylic when the coating absorbs blue light.
- Creating layered designs from contrasting opaque colors.
They are less suitable for clean transparent windows, clear award blanks, thick production panels, and work requiring a consistently polished flame-like edge. Diode cuts often leave a more visibly heat-affected edge than a well-tuned CO₂ laser.
Setup details that make the difference
- Confirm the material. Use acrylic or PMMA from a known supplier. Do not laser unknown plastics, PVC, vinyl, or materials that may release corrosive or hazardous fumes.
- Install air assist. A steady air stream helps clear smoke, reduces flare-ups, and improves the edge. It does not make clear acrylic absorb a blue beam.
- Focus precisely. Set the focal height for the actual sheet surface. If cutting thicker stock, test whether a slight focus adjustment improves the lower edge.
- Run a power-speed grid. Change one variable at a time. Look for complete separation, minimal melting, and an edge that is not excessively frosted or burned.
- Ventilate outdoors where possible. An enclosure and filtration system are useful, but filtration is not a reason to process unidentified plastics.
- Stay present. Acrylic can soften, flare, and re-ignite. Keep a suitable extinguisher nearby and stop the machine if the material catches fire.
Ownership realities and common mistakes
The first parts to wear are usually the air-assist nozzle, protective lens or window, belts, rollers, and the laser module’s cooling fan. Smoke residue on the lens reduces power and can cause localized heating, so inspect and clean it according to the manufacturer’s procedure. Keep the bed free of melted acrylic, which can change the sheet height and create an uneven focus.
Common mistakes include confusing electrical watts with optical watts, assuming a higher-power diode cuts clear acrylic, skipping air assist, placing flammable material beneath an open-frame machine, and copying settings from a different acrylic color. Protective eyewear should match the laser’s wavelength, but eyewear is not a substitute for an enclosure or beam-stop design.
When a CO₂ laser is the better buy
Choose CO₂ when clear acrylic is more than an occasional experiment, when you need clean through-cuts, or when the machine will run frequently enough that repeated diode passes become a labor cost. A 40W to 60W CO₂ machine generally requires more space, water cooling, exhaust ducting, and maintenance than a diode system. Its tube and mirrors also introduce consumable and alignment considerations.
For a hobbyist making a few opaque pieces each month, a 10W or 20W diode offers a lower-cost, simpler entry. For a sign maker producing transparent lettering every week, buying a diode first and upgrading later can cost more than selecting a suitably sized CO₂ laser from the beginning.
Bottom line
Buy a 10W diode for affordable engraving and occasional thin opaque-acrylic cuts; choose a 20W model when cutting speed and work volume matter. Pick an enclosed model if safety management and repeatability are priorities. If your material list prominently says clear acrylic, skip the blue-diode compromise and budget for a CO₂ laser instead.