
What's inside
- Best fish finders by fishing situation
- What makes a fish finder produce clearer sonar?
- Sonar frequencies: which one should you buy?
- GPS mapping is more than a way to find your way home
- Kayak, boat, or ice: portability changes the right answer
- Ownership details that listings often leave out
- A simple runtime calculation for portable setups
- Final buying advice
As an Amazon Associate I earn from qualifying purchases. This post may contain affiliate links at no extra cost to you.
The best fish finders for clearer sonar are the ones matched to your watercraft and fishing style: choose a 7-inch GPS unit for most boats, a compact castable or 4-inch unit for kayaks, and a dedicated flasher or ice kit for hard-water fishing.
As an Amazon Associate we earn from qualifying purchases at no extra cost to you.



Our Top Picks
 Humminbird Helix 5 G3 GPS Fish Finder with5-Inch Display15.75 x 4.75 x 9.63 inches2.12 PoundsCheck on Amazon
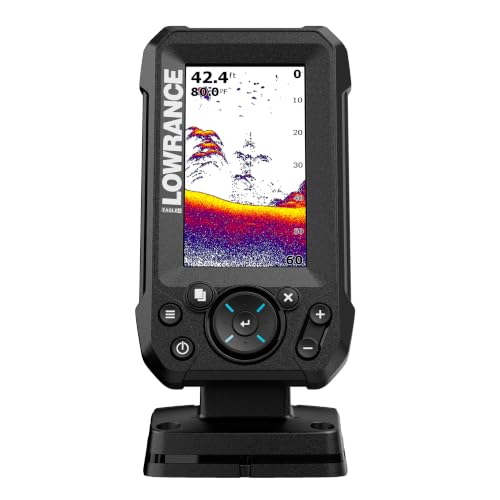 Lowrance Eagle 4X Fish Finder with Bullet Transducer4 Inch7 x 4 x 3.84 inches2.8 PoundsCheck on Amazon
 Humminbird PiranhaMAX 4 Fish Finder with TransducerOne Size3.6 x 3.9 x 6.8 inches2 PoundsCheck on Amazon

Best fish finders by fishing situation
| Situation | Best choice | What to prioritize | Typical market range |
|---|---|---|---|
| Small boat, occasional use | 4-5 inch GPS fish finder | CHIRP, basic GPS, simple keypad, 12V power | $150-$350 |
| Bass or walleye boat | 7-9 inch combo unit | Down imaging, side imaging, chartplotting, networking | $400-$1,000 |
| Kayak | Compact 4-7 inch unit or castable sonar | Low weight, low power draw, sealed connectors, easy mounting | $130-$600 |
| Ice fishing | Dedicated flasher or ice bundle | Portable battery, winter-rated display, ice transducer, carrying case | $200-$1,500 |
| Mapping unfamiliar lakes | GPS/chartplotter combo | Lake maps, waypoint storage, chart updates, sonar recording | $350-$1,200 |
What makes a fish finder produce clearer sonar?
Clarity depends on more than screen resolution. Transducer placement, water depth, boat speed, interference, frequency, and sensitivity settings can matter just as much. A premium display cannot correct a transducer mounted behind a turbulent hull or aimed at the wrong angle.
Screen size and resolution
A 4-inch display is adequate when you need depth, bottom hardness, and a basic fish arch without taking much space. It becomes difficult to read split-screen sonar and mapping at the same time. A 7-inch screen is the practical sweet spot for many boats because it can show traditional sonar beside GPS, DownScan, or side imaging without making every detail microscopic.
Use a 9-inch or larger screen when the console has room and you regularly run multiple panels. Larger displays cost more, draw more power, and may require a stronger mounting arm. Resolution also matters: a 7-inch display around 800 by 480 pixels gives mapping and sonar a noticeably cleaner appearance than a low-resolution panel of the same physical size.
Transducer types
- Transom-mount: The easiest choice for many small boats. It sits outside the hull and can provide traditional CHIRP, Down Imaging, or side imaging. Keep it below the hull’s disturbed water but protected from impacts.
- In-hull: Mounted inside a fiberglass hull, it reads through the hull without adding drag. It generally will not work through aluminum, cored hulls, or heavily layered construction.
- Through-hull: Installed through the hull for a permanent, clean installation. It is effective at speed but requires accurate drilling and careful sealing.
- Trolling-motor transducer: Useful for anglers who want the sonar beam to point where the electric motor points. The cable needs protection from steering and stowage damage.
- Ice transducer: Designed to hang vertically in the hole and display a live water column. It is usually paired with a flasher-style view or a portable ice bundle.
- Castable sonar: A small wireless transducer is cast from shore or a kayak and sends data to a phone or tablet. It is convenient, but phone brightness, battery life, and wireless range become part of the system.
Sonar frequencies: which one should you buy?
Lower frequencies travel farther and generally reach deeper water, while higher frequencies show finer detail in shallower water. A dual-frequency or CHIRP unit gives you more flexibility than a single-frequency model.
| Frequency range | Best use | Trade-off |
|---|---|---|
| 50-83 kHz | Deep water and broad coverage | Less fine detail; often requires a larger transducer |
| 120-200 kHz | General freshwater fishing | Good balance of depth and target separation |
| 350-800 kHz | Down imaging and detailed structure | Shorter effective range and greater sensitivity to speed |
| 1.2 MHz and above | Very detailed imaging in relatively shallow water | Limited depth and usually higher system cost |
CHIRP does not mean one magic frequency. The transducer sweeps across a frequency band and the unit processes the return. That can improve target separation, especially when fish are close to the bottom, but the actual performance still depends on the transducer’s frequency range and installation.
GPS mapping is more than a way to find your way home
Built-in GPS lets you mark brush piles, drop-offs, productive turns, and safe routes. Mapping quality varies widely. Some units include basic worldwide or inland maps, while others support detailed lake charts, depth shading, custom contours, and chart updates.
For a fishing boat, look for waypoint storage, a track function, route planning, and the ability to save sonar logs or create custom depth maps. A unit such as the Garmin STRIKER Vivid 7sv combines a 7-inch display with GPS and Garmin CHIRP traditional, ClearVü, and SideVü sonar when paired with the appropriate transducer. The Humminbird HELIX 7 CHIRP GPS G4N adds GPS chartplotting and supports AutoChart Live on compatible configurations. The Lowrance HOOK Reveal 7 TripleShot is another 7-inch option combining GPS, traditional CHIRP, DownScan, and SideScan-style imaging through its TripleShot transducer.
Check the included transducer before comparing prices. A display-only package may look inexpensive but require several hundred dollars more for the imaging transducer you actually want.
Kayak, boat, or ice: portability changes the right answer
Kayaks
Weight and power consumption matter more than maximum screen size. A 4-7 inch unit can run from a small 12V lithium battery, but protect that battery in a waterproof box and add a fuse close to the positive terminal. Mount the display where it remains visible while paddling, yet does not interfere with a paddle stroke or self-rescue.
Castable products such as the Garmin STRIKER Cast avoid a permanent display and transducer installation. They can be useful from shore or in a small kayak, but a phone screen is harder to read in direct sunlight and the system depends on the phone’s battery and wireless connection.
Boats
Boat owners should prioritize transducer position and mounting strength. A transom transducer must be parallel to the water surface and positioned away from strakes, rivets, and propeller turbulence. Side imaging needs a clear view to both sides; a blocked or poorly aligned installation can create a large blind area.
Ice fishing
For ice, portability and cold-weather operation are more important than side imaging. Dedicated units from brands such as Vexilar, Humminbird, Garmin, and Lowrance are available in ice configurations, but confirm that the package includes an ice transducer, battery, charger, and protective shuttle or case. A flasher view makes it easy to see your lure and fish movement in real time, while a traditional chart-style display is more familiar to anglers who also use the unit in open water.
Ownership details that listings often leave out
The first parts to suffer are usually cables, connectors, mounting hardware, and transducer faces—not the display itself. Rinse salt residue with fresh water, dry connectors before covering the unit, and never scrape algae or ice from the transducer with a knife. Use dielectric grease only where the manufacturer permits it; excess grease can prevent a connector from seating fully.
Common mistakes include running high sensitivity in every depth, leaving the unit on while the boat battery is unattended, and routing the transducer cable beside high-current trolling-motor wires. Electrical interference often appears as repeating lines or noise on the sonar screen. Separate the cables, use a clean power connection, and test the unit with the trolling motor switched off before changing advanced settings.
A simple runtime calculation for portable setups
Suppose a fish finder draws 0.8 amps and your portable battery is rated at 10 amp-hours. The theoretical runtime is:
10 amp-hours ÷ 0.8 amps = 12.5 hours.
In practice, allow a safety margin for cold temperatures, battery age, startup loads, and the fact that many batteries should not be completely discharged. Planning around 8-10 hours is more realistic. A brighter screen, networking, live sonar, and a phone charging from the same battery can reduce that figure substantially.
Final buying advice
Choose a 7-inch CHIRP/GPS combo if you want one versatile unit for regular boat fishing. Choose a compact unit or castable sonar when kayak space and battery weight dominate the decision. Choose a dedicated ice bundle when you fish through winter, because its transducer, case, battery, and cold-weather controls are designed to work together. Whatever the size, spend time on correct installation: a well-mounted midrange transducer will usually produce clearer sonar than an expensive unit installed in turbulent water.