
What's inside
As an Amazon Associate I earn from qualifying purchases. This post may contain affiliate links at no extra cost to you.
The best mortiser for beginners is usually a benchtop model with a rigid cast-iron table, a 1/2-inch chisel capacity, and a rack-and-pinion head; choose a floor-standing machine instead when you regularly build furniture, work with large stock, or need maximum table stability.
As an Amazon Associate we earn from qualifying purchases at no extra cost to you.

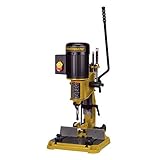


Quick picks by woodworking situation
| Situation | Best choice | Why it fits | Typical market range |
|---|---|---|---|
| First mortiser, limited shop space | Benchtop mortiser, 1/2-inch capacity | Compact, affordable, and easier to understand without sacrificing useful joinery capacity | $250–$500 |
| Occasional furniture projects | Heavier benchtop model with a cast-iron table | More stable than lightweight hobby machines while still movable | $400–$700 |
| Frequent chair, door, or cabinet construction | Floor-standing mortiser | Less setup adjustment, greater table support, and better control over long or heavy workpieces | $800–$1,800 |
| Very large mortises or production use | Floor-standing machine with 3/4-inch or larger capacity | Handles larger chisels and repeated cuts with less strain | $1,500–$3,000+ |
Benchtop versus floor-standing mortisers
A benchtop mortiser is easier for a beginner to justify. It typically weighs about 60–100 pounds, fits on a sturdy workbench, and uses a 1/4- to 1/2-inch hollow chisel set. Its smaller footprint is useful in a one-car garage or shared shop, and two people can usually move it when necessary.
The compromise is that the bench becomes part of the machine. A weak, narrow, or uneven bench allows vibration, which can make the chisel wander and leave a mortise with ragged walls. A benchtop machine also needs to be clamped or bolted down before accurate work begins.
A floor-standing mortiser places the table and column on a dedicated base. Machines in this class commonly weigh 250–500 pounds, accept chisels from 1/4 inch to 3/4 inch or more, and provide a larger working area. The extra mass makes it easier to keep a long leg, rail, or door stile steady while plunging.
Floor-standing models are not automatically easier for a first-time user. They take longer to assemble, occupy permanent floor space, and often expose more adjustment points. Their advantage appears after setup: the table is already at a comfortable height, the machine stays put, and repeated mortises can be laid out consistently.
Head-to-head comparison
| Criterion | Benchtop mortiser | Floor-standing mortiser | Beginner impact |
|---|---|---|---|
| Initial setup | About 30–60 minutes, plus bench clamping | About 1–3 hours, including base assembly and positioning | Benchtop wins for getting started quickly |
| Common chisel capacity | 1/4–1/2 inch | 1/4–3/4 inch or larger | 1/2 inch covers most small furniture joints |
| Typical table size | About 7 × 7 to 10 × 10 inches | About 12 × 12 to 18 × 18 inches | Larger tables simplify long workpieces |
| Approximate machine weight | 60–100 pounds | 250–500 pounds | More mass generally means less vibration |
| Best workpiece size | Small and medium rails, legs, and panels | Long legs, door parts, heavy frames, and repeated batches | Choose based on your largest regular project |
| Storage | Can be moved or stored below a bench | Requires a permanent floor location | Benchtop is more practical for a compact shop |
Beginner-friendly models and machine types
WEN 43012 benchtop mortising machine
The WEN 43012 is a sensible entry-level format for someone learning the process. It is a 1/2-inch-class benchtop machine with a compact footprint and a basic hollow-chisel setup. Its appeal is not advanced refinement; it is the combination of accessible controls, modest space requirements, and a capacity that suits common table, stool, and cabinet joinery.
Expect to spend time aligning the chisel and bit, tightening the table, and securing the machine to the bench. Those steps are normal for this class. The machine is best suited to intermittent use rather than a production workload.
JET JBM-5 benchtop mortiser
The JET JBM-5 is another 1/2-inch-class benchtop option. Its heavier construction and larger, more substantial work surface make it attractive when a lightweight hobby machine feels too tentative but a floor-standing machine would be excessive. It remains a practical choice for a beginner who expects to progress from simple loose-tenon-style work to conventional mortise-and-tenon joints.
Its best results depend on a rigid stand or bench. Adding a dedicated plywood or steel mounting plate can reduce movement and make the machine easier to reposition accurately.
Powermatic PM719T floor-standing mortiser
The Powermatic PM719T is aimed at the serious furniture shop rather than the occasional user. Its floor-standing format, substantial table, and larger-capacity design provide a more stable platform for long stock and repeated operations. It costs and weighs considerably more than a benchtop machine, so it makes sense when mortising is a regular part of your work.
For a complete beginner, the PM719T is easiest to justify when buying once for a long-term shop. If you only expect to cut a few dozen mortises each year, the additional floor space and purchase cost may not improve your results enough to matter.
What capacity do you actually need?
Do not select a mortiser by the largest chisel it can technically accept. Select it by the width of the mortises you are likely to cut. A 1/4-inch mortise works well for narrow cabinet frames and small boxes. A 3/8-inch or 1/2-inch mortise is more versatile for tables, stools, workbenches, and medium-sized doors.
A useful sizing rule is to keep the mortise width near one-third of the tenon thickness or rail thickness, depending on the joint design. For example, suppose a table rail is 3/4 inch thick and you want a centered mortise. A 1/4-inch chisel leaves roughly 1/4 inch of wood on each side:
3/4 inch rail thickness − 1/4 inch mortise width = 1/2 inch remaining; 1/2 inch ÷ 2 = 1/4 inch per side.
That is a reasonable starting proportion for a small table joint. A 1/2-inch mortise in the same rail would leave only 1/8 inch per side, which may be unnecessarily weak and difficult to position accurately.
How a first-time user gets clean mortises
- Mount the machine securely. Bolt a benchtop model to a rigid surface or clamp it where the clamps cannot interfere with the workpiece. A moving machine is a major source of oversized mortises.
- Sharpen the chisel and bit. The hollow chisel should be sharp at its outside corners, and the auger bit should have clean cutting edges. Dull tools increase force and heat.
- Set the chisel clearance. Leave a small gap—often around 1/16 inch—between the auger bit and the inside of the hollow chisel. Too little clearance creates heat; too much can leave an uneven mortise.
- Set depth before touching the work. Use the depth stop and make a test cut in scrap from the same species and thickness as the project.
- Clamp the workpiece against the fence. Mark the mortise ends clearly. Start near one end, overlap each plunge slightly, and finish by cleaning the end walls.
- Use controlled plunges. Do not force the lever. If chips stop evacuating, raise the tool, clear the opening, and continue with lighter cuts.
- Check the first joint immediately. A mortise should accept the tenon with firm hand pressure. If it requires pounding, correct the fit before cutting the rest.
Ownership realities: what wears first
The cutting tools usually need attention before the motor does. Hollow chisels lose their edge at the corners, while auger bits can become dull or bent if they strike embedded nails or are forced through wet, knotty stock. Keep a compatible replacement set available; an inexpensive machine can become unusable for a project if one damaged chisel is not replaced.
Clean wood dust from the column, rack, table, and depth-stop threads after each session. Lightly lubricate sliding metal surfaces according to the manual, but keep oil away from the workpiece-contacting table when glue-up is planned. Check table bolts and fence fasteners regularly because vibration can gradually loosen them.
The most common beginner mistake is cutting full depth in one aggressive plunge. Multiple shallow passes reduce heat, clear chips more effectively, and produce straighter walls. The second is relying on the machine fence without marking a reference face. Always register the same face of every matching part against the fence.
Final verdict
For most first-time woodworkers, a well-secured 1/2-inch benchtop mortiser is the best mortiser for beginners. It offers enough capacity for common furniture joints, reaches working accuracy quickly, and avoids committing valuable floor space. Choose a heavier benchtop model if table stability is your main concern.
Move to a floor-standing machine when you routinely cut large or deep mortises, work with long stock, or need repeatable production. The extra mass and larger table are valuable, but they are most valuable to someone who will use them frequently—not to a beginner buying capacity that will remain unused.