
What's inside
- Table of contents
- Why moisture content matters
- The main types of moisture meters
- How to choose the right meter
- Accuracy, species correction and calibration
- How to take a reading properly
- Use cases: lumber, furniture, flooring and firewood
- Safety and care
- Common mistakes
- Who should choose what
- Buying and setup checklist
- Frequently asked questions
- Conclusion
As an Amazon Associate I earn from qualifying purchases. This post may contain affiliate links at no extra cost to you.
Short answer: the best wood moisture meter is the type that matches your work. A pin meter is the better all-round choice for solid lumber, because it reads at a known depth and tells you something real about the inside of a board. A pinless meter suits people who handle finished or expensive stock and cannot accept pin holes. For firewood and occasional construction lumber, a basic pin meter with a species correction chart is plenty. Whatever you buy, it only helps if you understand what it measures, check it against a reference, and take several readings per board.
Our Top Picks
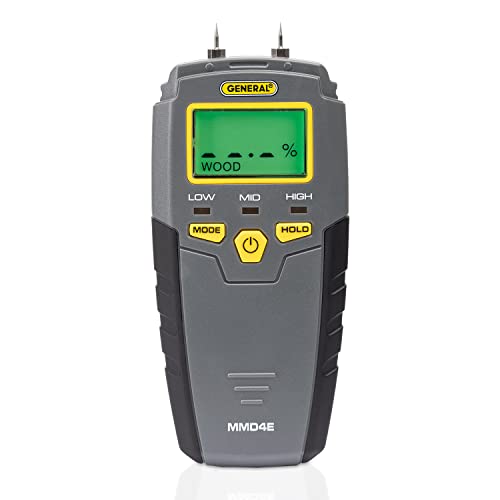

Table of contents
- Why moisture content matters
- The main types of moisture meters
- How to choose the right meter
- Accuracy, species correction and calibration
- How to take a reading properly
- Use cases: lumber, furniture, flooring and firewood
- Safety and care
- Common mistakes
- Who should choose what
- Buying and setup checklist
- Frequently asked questions
- Conclusion
Why moisture content matters
Wood trades water with the air around it for as long as it exists. A freshly cut tree is full of water, and after cutting the wood dries until it settles at an equilibrium moisture content set by the temperature and humidity of its surroundings. A board kept in a damp garage settles higher than the same board in a heated living room. As the water content changes, the wood swells or shrinks, mostly across its width and thickness and very little along its length.
That movement causes a long list of familiar failures. A tabletop glued from wet lumber can cup, split or open at the joints once it dries in a centrally heated house. Drawer fronts fitted tightly in a humid month rattle in the dry one. Finish cracks along glue lines, and mortise and tenon joints loosen. Wood that is far too dry for its destination has the opposite problem: it swells after assembly and pushes joints apart.
A moisture meter turns a guess into a number. Instead of trusting a seller who says the lumber is dry, you can check. The target depends on where the piece will live: furniture for conditioned rooms needs fairly low readings, while outdoor projects tolerate higher ones. Rather than memorize one figure, match the wood to its final environment and use the meter to confirm the wood has stopped changing. Note too that the reading is a percentage of the oven-dry weight, not the total weight, which is why freshly cut wood can read above one hundred percent.
The main types of moisture meters
Pin-type (resistance) meters
These push two or more metal pins into the wood and pass a tiny current between them. Water makes the path more conductive, so lower resistance means higher moisture content. The meter converts the resistance into a percentage, usually after a species correction. The reading reflects the moisture at the depth of the pin tips, and insulated pins that conduct only at the tip let you probe the core of thick stock.
Pinless (capacitance or radio-frequency) meters
A flat sensor plate pressed on the surface creates a small field that penetrates the wood to a limited depth. There are no holes, and you can scan a board quickly. The reading is an average over the zone under the sensor, and it is influenced by density and by the thickness of the piece.
Combination meters
Some meters offer both a sensor plate and pin jacks. You scan with the pinless mode, then confirm a suspicious spot with pins in a hidden area. They cost more, and the flexibility only pays off if you will really use both modes.
| Type | How it reads | Strengths | Limitations | Best suited to |
|---|---|---|---|---|
| Pin-type | Resistance between pins at set depth | Reads inside the board; tolerates rough surfaces | Leaves holes; slow for scanning | Rough lumber, firewood |
| Pinless | Field through the surface | No marks; fast scanning | Averages a zone; sensitive to thickness and density | Dressed boards, finished parts |
| Combination | Either method | Cross-checking | More expensive, more to learn | Mixed workloads |
| Oven-dry reference | Weigh, dry, weigh again | The standard meters are judged against | Destroys the sample; slow | Checking a meter |
How to choose the right meter
Start with the material. Rough lumber from a mill has uneven surfaces and often a big gap between the outside and the core of thick boards, so a pin meter that reads below the surface suits it. If you buy surfaced boards and want to sort a stack for the driest pieces, a pinless meter lets you sweep each board in seconds without marking it.
Consider the value of the stock. Figured hardwoods, veneered panels and pieces where a pinhole would show favor pinless. Construction lumber, fence boards and firewood do not care about small holes, and the simplicity of a pin meter suits them.
Think about range. Furniture lumber lives in the single-digit and low double-digit region, while firewood and green wood need a meter that stays meaningful much higher. Read the manual for the range the maker considers reliable, and treat readings outside it as rough indications.
Look at the details that affect daily use: whether species correction is easy to apply, whether the display is readable in poor shop light, whether pins are replaceable, and whether temperature compensation is automatic or done from a chart. A meter whose controls bury the species setting tends to get used without correction, which makes every number less trustworthy.
Accuracy, species correction and calibration
Think of a meter reading as a well-informed estimate, not an exact figure. Several things stand between the real moisture content and the screen.
The first is the gradient inside the board. Wood dries from the outside in, so a thick board often has a drier shell and a wetter core. A pinless meter with limited depth may read the dry outer layer and give a comforting number while the core is still wet. A pin meter pushed to different depths reveals the gradient.
The second is species. Meters assume a typical relationship between electrical response and moisture, and dense, oily or mineral-rich woods can depart from it. Applying the correction in the manual helps, but it remains an approximation.
The third is the surface. Rain, condensation, sap and a damp shop floor push readings up. Glue, finish and certain preservative treatments can also distort them, and chemically treated lumber may read higher than its true moisture content.
The fourth is the meter itself. Batteries run down, pins corrode and a dropped body may drift.
A simple, honest calibration check
Start with the maker’s own check procedure if the meter has one. Then compare against a trusted reference. The most reliable is the oven-dry method: cut a small, clean sample, weigh it on an accurate scale, dry it at the temperature given by a recognized standard, weigh again once the weight stops falling, and calculate moisture from the weight loss. Take the sample from the board you measured so both figures describe the same wood. Because it destroys the sample, this is a periodic check.
A cheaper habit is to keep a few reference boards that have lived in the shop for a long time and log their readings in a notebook. If the numbers jump with no change in weather, suspect the meter. For a small, steady offset you may note it and allow for it; for a large or erratic one, replace pins and battery, then service or replace the meter. Never open or adjust a meter unless the instructions say to.
How to take a reading properly
Let the meter and wood sit in the same room so they reach the same temperature, and make sure the test spot is clean of dust, sap and glue. Avoid the first several inches of each end, which dry faster and read low, and avoid knots, bark and resin pockets. Sample several points along the length, and on a board that matters, both faces.
With a pin meter, follow the manual on grain orientation, push the pins to the depth you want (often about a quarter to a third of the thickness), and press steadily without wiggling, since bending a pin changes contact and damages it. For thick stock read at more than one depth. Pull the pins straight out.
With a pinless meter, hold the plate flat and press evenly. Air gaps, a tilted body or a rough surface lower the reading. Keep the sensor away from fasteners and your other hand. On thin material, remember that the field may reach whatever lies behind the board.
Record species, dimensions, location and date. A spread of a couple of percentage points across a board is normal; a much larger spread suggests a wet core or local problem. The goal is a confident decision: this stack is ready, that one needs more time.
Use cases: lumber, furniture, flooring and firewood
| Situation | What you want to know | Typical approach | Watch out for |
|---|---|---|---|
| Buying rough lumber | Is it dry enough to mill? | Pin readings mid-board on several pieces | Dry shell, wet core |
| Stickered stock | Has drying stopped? | Repeat readings over weeks and log them | A plateau above the target |
| Furniture parts | Have they matched the room? | Pinless scan, pins in hidden spots | Pinholes in show faces |
| Flooring and trim | Has it acclimated? | Compare material, subfloor and room | Mixing meter types |
| Firewood | Is it dry enough to burn cleanly? | Split a piece and read the fresh face | Reading only the dry outer surface |
For furniture, let the lumber acclimate in the room or a similar space until readings stop moving, and keep boards with similar readings together in the same glued panel, since wetter pieces will move more after assembly. For flooring, follow the manufacturer or installer guidance on acceptable differences, and do not lay a floor over a subfloor that reads damp. For firewood, wood that is too wet burns poorly and deposits more creosote in a chimney, so a few seconds with a pin meter is cheap insurance, provided your meter’s range covers that part of the scale.
Safety and care
- Wear eye protection and gloves with rough lumber, which can hide splinters, nails and grit. Check reclaimed wood for metal before it goes near a blade.
- When cutting a test sample, clamp the work, keep hands clear of the blade and wear hearing and dust protection. Fine wood dust irritates the lungs, and some species cause allergic reactions.
- Brace the board on a bench before pushing in pins. Never press pins into wood held against your body or hand.
- Keep the meter dry and away from live wiring, and cover the sharp pin tips in storage.
Store the meter in its case away from damp, heat and impact. Remove the battery for long storage, since leaks ruin the contacts. Wipe pins and sensor after use, replace bent or rusty pins, and replace weak batteries immediately because low voltage distorts readings.
Common mistakes
- Trusting one reading from one spot.
- Measuring near the ends of boards.
- Leaving the species setting on its default.
- Reading wet surfaces, dew or sap.
- Comparing readings from two different meters as if they were interchangeable.
- Assuming dry in the shop means stable in a humid room.
- Never checking the meter after a drop or battery change.
Who should choose what
| Woodworker profile | Suggested type | Reason |
|---|---|---|
| Hobbyist buying a few boards for furniture | Pin-type with species correction | Simple, with depth information |
| Cabinetmaker with surfaced, high-value stock | Pinless, pin meter as backup | Fast, unmarked scanning |
| Turner working green blanks | Wide-range pin-type | Tolerates high moisture and odd shapes |
| Rough-lumber buyer | Pin-type with insulated pins | Checks the core of thick boards |
| Floor installer | Pinless or combination | Many quick surface checks |
| Firewood buyer | Basic pin-type | Rugged and wide in range |
If you are comparing options, browse a selection of wood moisture meters and compare the stated measuring ranges, species correction and pin or sensor design against your own needs.
Buying and setup checklist
- Decide whether you mostly handle rough or surfaced lumber.
- Confirm the stated range covers firewood or green wood if you need it.
- Check for species selection or a correction chart.
- Choose replaceable pins if you buy a pin meter.
- Read the manual and note pin depth and grain guidance.
- Fit fresh batteries and run any self-test.
- Log readings of a few reference boards.
- Compare the meter against one oven-dry sample.
- Take several readings per board, away from ends and defects.
- Store the meter in its case with pin covers on.
Frequently asked questions
What moisture content should wood be for furniture?
It should match the equilibrium level of the room where the piece will live, usually a fairly low figure for heated rooms. Read the wood over time and wait until it stops changing.
Are pinless meters more accurate than pin meters?
Neither is automatically more accurate. Pin meters read at pin depth, while pinless meters average a zone. Accuracy depends on matching the meter to the wood and using it carefully.
Can I use a moisture meter on finished wood?
A pinless meter can often read through a thin finish, though coatings and glue lines may affect it. A pin meter will mark the surface, so use it only where it will not show.
Why do readings vary from spot to spot?
Ends, edges, knots and cores hold different amounts of water. Several readings give a more honest picture than one.
How often should I check my meter?
Check after replacing the battery or pins, after a drop, and once or twice a year if you rely on it, using an oven-dry sample or long-stored reference boards.
Does a moisture meter work on treated lumber?
It works, but some preservative treatments change the wood’s electrical behavior, so readings may be high. Treat the number as a rough guide.
How long does wood take to dry or acclimate?
It depends on species, thickness, starting moisture and conditions. Thick boards and dense hardwoods take much longer, so track progress with readings instead of rules of thumb.
Is a meter worth it for a small hobby shop?
If you buy rough lumber, glue up wide panels or build furniture, yes, since moisture failures cost time and material. For rough projects from construction lumber it is less essential.
Conclusion
A moisture meter will not make a bad board good, but it will keep you from building with the wrong one. Choose pin for rough, thick or rugged stock and firewood, pinless for surfaced or finished pieces, and a combination meter if you need both. Apply species correction, test the meter against a reference now and then, and take several readings before deciding. To narrow things down, look through the pin-type moisture meters and the pinless moisture meters on offer.
Disclosure: As an Amazon Associate, jd-woodworks.com earns from qualifying purchases made through links on this page, at no extra cost to you.