What's inside
As an Amazon Associate I earn from qualifying purchases. This post may contain affiliate links at no extra cost to you.
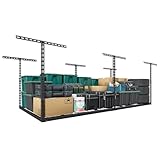
Ceiling storage racks are useful for workshop items that are bulky but light: empty totes, seasonal supplies, folding sawhorses, insulation, trim offcuts, and rarely used jigs. They are a poor choice for dense loads such as sheet goods, boxes of fasteners, batteries, or cast-iron tools. Those materials can overload the rack or create a dangerous falling load.
The best rack is not necessarily the one with the highest advertised capacity. It is the one that fits between your ceiling obstacles, attaches to real framing, leaves enough headroom, and can be loaded without standing on an unstable ladder.
As an Amazon Associate we earn from qualifying purchases at no extra cost to you.



What belongs in overhead storage
Use ceiling racks for materials with a low weight-to-volume ratio. Empty plastic bins, camping gear, foam insulation, cardboard boxes, lightweight lumber cutoffs, and rarely used paint-spraying accessories are sensible examples. Keep the heaviest items near waist height in a cabinet or on a workbench shelf.
As a practical limit, try to keep each overhead tote below 25 to 30 pounds, even if the rack is rated for much more. A 600-pound rack rating does not make a 50-pound box convenient or safe to lower from a ladder. It also may not account for the strength of your ceiling framing or the fasteners you use.
Closed containers are preferable to loose piles. They keep sawdust off stored materials and prevent small items from falling through the rack. Do not store open containers of flammable liquids overhead, and do not place anything where it blocks a light, garage-door mechanism, sprinkler head, electrical panel, or required access path.
Main ceiling rack types
| Rack type | Best use | Advantages | Limitations |
|---|---|---|---|
| Fixed wire rack | Light totes and seasonal supplies | Low cost, good visibility, simple installation | Height is fixed; wire can flex under concentrated loads |
| Adjustable drop-down rack | High ceilings or frequent access | Can be lowered toward you; flexible height | More expensive, more moving parts, requires careful locking |
| Overhead lumber rack | Short, light boards and trim | Uses narrow ceiling space efficiently | Long material can slide or protrude; poor for heavy boards |
| DIY plywood platform | Custom-size storage in a framed bay | Inexpensive and easy to size around obstacles | Easy to underbuild; blocks inspection and collects dust |
For most home workshops, a fixed wire rack is the sensible starting point. Search for garage ceiling storage racks with adjustable hanging depth rather than choosing solely by price. A rack with several height positions can fit above a vehicle, workbench, or garage door more easily.
Capacity, framing, and fasteners
Check the manufacturer’s rated load and the number of attachment points. Treat the rating as a maximum distributed load, not a target. If the rack is rated for 400 pounds, do not put 400 pounds of boxes on it. A conservative working load of 50 to 60 percent of the stated capacity leaves margin for uneven loading, aging hardware, and installation imperfections.
The rack must attach to ceiling joists or properly installed structural blocking. Drywall anchors alone are not suitable for an overhead rack. A stud finder can locate joists, but confirm their position with a small pilot hole or by measuring from an exposed framing member. Joists are commonly 16 or 24 inches on center, but do not assume that spacing.
Use the supplied hardware only when it is intended for your ceiling construction. Lag screws need adequate thread engagement in solid wood; a short screw that barely enters the joist is not adequate. For engineered I-joists, trusses, steel framing, or a finished room ceiling, follow the framing manufacturer’s guidance or consult a qualified installer. Do not cut or drill structural members casually.
Spread the load across multiple joists when possible. If all four corners land between joists, install properly secured blocking first. Washers help prevent brackets from pulling through soft wood, but a washer cannot compensate for a fastener installed in drywall or a hollow void.
Measure before buying
Measure the usable ceiling area, not just the room. Mark garage-door tracks, openers, lights, ductwork, dust-collection pipe, attic access panels, and the swing path of the door. Leave clearance around moving equipment. A rack that works with the garage door closed may interfere when the door is open.
Keep the bottom of the rack high enough for normal movement, but not so high that every load requires climbing. In a typical garage workshop, 7 feet from the floor is a reasonable starting point, but vehicle clearance may require more. Measure the tallest person and the tallest stored container, then leave room to lift the container into place without scraping the ceiling.
Depth matters too. A deep rack above a workbench can make the space feel cramped and may create a head-strike hazard. Shallow racks are easier to reach and generally safer for lightweight supplies. If you need a large platform, consider dividing it into two smaller racks so every item remains accessible.
Installation and safety checks
Assemble the rack on the floor and tighten every bolt before raising it. Use a second person for installation; holding a rack overhead while starting lag screws is a common way to misalign holes or drop hardware. After mounting, push and pull on each corner. Any movement at the ceiling connection needs correction before loading.
Load the rack gradually. Put the heaviest approved items near the joists and center of the platform, then add lighter containers around them. Do not stack so high that boxes can slide off during vibration from a garage door or nearby power tool. A small retaining lip is useful, but it is not a substitute for sealed bins.
Inspect the rack after the first week and again every few months. Look for bent wire, elongated mounting holes, cracked brackets, loose screws, and ceiling drywall that is pulling away. Stop using it if the rack sags, twists, or develops rust. Never modify a rack by cutting out braces to make room for a duct or light.
Access, dust, and lighting
Store items by frequency of use. Seasonal materials can go in the least accessible bay; anything used monthly should be reachable from a stable step ladder. Do not use a rolling shop stool or the top step of a stepladder as a substitute for proper access. If you routinely need a stored item, it probably belongs on a wall or lower shelf.
Ceiling storage gathers dust, especially near a sander, router table, or poorly sealed dust-collection connection. Use lidded totes and leave space around light fixtures for heat dissipation. If a rack sits near a dust collector’s exhaust or filter-cleaning area, expect more frequent cleaning. A lightweight platform loaded with dusty cardboard can also become a fire concern, so keep it away from heat sources and maintain access to electrical shutoffs.
For a high ceiling, a locking adjustable ceiling storage rack may justify its price because it reduces ladder work. For a normal-height garage and infrequent access, a fixed rack is usually the better value. Add lidded plastic storage totes rather than paying extra for a rack with features you will not use.
If your material is too heavy to lift comfortably, too long to contain, or likely to be needed during an emergency, keep it off the ceiling. Overhead storage should reclaim dead space, not turn routine workshop access into a lifting and falling-object problem.