What's inside
As an Amazon Associate I earn from qualifying purchases. This post may contain affiliate links at no extra cost to you.
Sandpaper is easy to store badly. Loose sheets curl, hook-and-loop discs collect dust and stop gripping, and mixed grits turn a quick change into a rummaging session. The right setup depends on what you use: a few hand-sanding sheets need little more than a labeled folder, while a busy shop with discs, belts, and sanding sponges benefits from separate, dust-resistant storage.
As an Amazon Associate we earn from qualifying purchases at no extra cost to you.



Choose storage by abrasive type
Start by separating abrasives by format. Full sheets and half sheets lie flat in drawers or document sleeves. Random-orbit discs need compartments sized to keep their edges from bending. Belts should hang or lie flat without sharp folds; creasing can damage the backing. Keep sanding sponges and shaped abrasives in bins where they will not be crushed under heavier stock.
Group each format by grit, then by material or task if you use abrasives for different jobs. For example, keep wood and metal sanding supplies apart if cross-contamination matters in your work. Label compartments with the grit range and size—not just “coarse” or “fine.” A 5-inch, 120-grit disc should be identifiable without opening a stack.
Storage options at a glance
| Storage option | Best for | Advantages | Trade-offs |
|---|---|---|---|
| Labeled folders or envelopes | Sheets and occasional hand sanding | Low cost, compact, easy to sort | Limited capacity; paper can curl if packed tightly |
| Compartment organizer | Discs, small belts, sanding pads | Fast access; separates sizes and grits | Small compartments may not fit every disc diameter |
| Shallow parts drawers | Frequently used shop stock | Easy to label and expand; keeps abrasives off benches | Open drawers admit dust unless fitted with covers or placed in a cabinet |
| Wall-mounted rack or cabinet | High-use supplies near a sanding station | Visible stock and convenient access | Uses wall space; exposed storage needs regular dust control |
Simple setups for a small shop
If you use a handful of sheet abrasives, start with a flat file box, expanding folder, or labeled envelopes. Store sheets flat, and avoid overfilling a folder until the paper buckles. This is the cheapest workable option for occasional sanding. It is less suitable for a large collection because piles become hard to audit and the sheets at the bottom are easy to overlook.
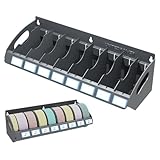
For discs, a divided organizer is often more useful than a general-purpose bin. Check the compartment dimensions before buying: a box advertised as a parts organizer may have wells too small for 5-inch or 6-inch discs. Leave enough room to lift a disc out without scraping its abrasive face against a sharp plastic edge. A compartment parts organizer can work well if its dividers fit your disc diameter and stay in place when the box is carried.
A better setup for regular sanding
For frequent use, use shallow drawers or a rack beside the sanding bench. Put the grits you use most often at waist-to-chest height and reserve lower drawers for backup stock. Label the front clearly—for example, “5 in. hook-and-loop discs, 80–220 grit.” Separate compartments for each grit reduce the chance of fitting an overly aggressive disc by mistake.
Wall storage keeps abrasives visible, but visibility is not the same as protection. A rack near a sander or open dust port may collect fine particles that clog abrasive surfaces or contaminate hook-and-loop backing. Put exposed stock away from the direct path of dust, or choose a cabinet with a door. A wall-mounted drawer cabinet is a practical choice when bench space is tight; confirm that it can be anchored securely and that the drawers are deep enough for your supplies.
Protect abrasives from dust and damage
Keep abrasives dry, flat, and away from heat. Moisture can weaken paper backing and cause sheets to curl; heat and poor storage can also shorten the useful life of some products. Do not store discs loose in a drawer with screws, blades, or other sharp hardware. Scratches and bent edges make them less useful even if the grit is still serviceable.
Dust is a common failure mode in open storage. Fine shop dust can settle on hook-and-loop faces and interfere with attachment, while grit from one abrasive may transfer to another. If your storage is near a sanding machine, use lidded boxes or closed drawers and clean the area before restocking. Avoid sealing damp abrasives in an airtight container; let them dry first.
Make the system easy to maintain
Use labels that include format, diameter or belt size, and grit. A simple format such as “6 in. disc / 150 grit” is more useful than a color code that only you remember. If you keep spare stock, mark a minimum quantity on the drawer label or use a small reorder card. That prevents discovering an empty 120-grit compartment halfway through a job.
Do a quick check when you put abrasives away. Discard sheets with torn edges, belts with damaged seams, and discs that no longer attach securely. Do not keep questionable stock in the main compartment just because it still looks unused. If you need a place for odd sizes, a separate labeled “check fit” envelope is safer than mixing them with ready-to-use supplies.
What to buy first
For a small collection, buy labels and a flat folder before investing in a cabinet. For a growing disc supply, choose compartments sized to your actual discs and keep the organizer near—but not directly in—the dust stream. A sanding-disc storage organizer is worth considering when it keeps common sizes separated and is easy to refill. Skip elaborate storage if you use only a few sheets each month; the important gains are keeping abrasives flat, clean, and easy to identify.