What's inside
As an Amazon Associate I earn from qualifying purchases. This post may contain affiliate links at no extra cost to you.
A workbench that sways when you plane, chisel, or clamp a board can be frustrating—and sometimes unsafe. Two common fixes are adding an apron beneath the top or reinforcing the base with steel. They resist movement in different ways, so the right choice depends on the bench’s construction, the direction it racks, and how much weight and force it must handle.
As an Amazon Associate we earn from qualifying purchases at no extra cost to you.
What bench racking is
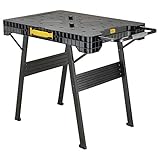
Racking is sideways deformation: the bench’s legs shift out of square, often making the frame lean into a parallelogram. It is different from a top that flexes or a bench that slides across the floor. A quick check: push firmly on a front corner while watching the leg joints. If the frame changes shape, it is racking. If the legs stay square but the top bends, the problem is inadequate top support.
Racking is most noticeable during hand-planing, sawing, or heavy clamping. A bench may feel solid under a stationary load but move when a force acts sideways. Check both the long and short directions; reinforcement on one face may leave the other direction weak.
How aprons and steel reinforcement work
A wooden apron is a deep rail attached beneath the top, usually along the front and sometimes the back. A well-connected apron increases the frame’s stiffness and helps tie legs together. Its effectiveness depends on the joints: a deep board attached only with a few short screws may pull loose when the bench is pushed hard. Bolts, substantial screws into sound material, or fitted joinery provide a more dependable connection.
Steel reinforcement can mean steel angle or flat bar bolted between legs, steel plates at joints, or a complete welded frame. Steel can be very stiff for its size, but the result still depends on geometry and attachment. A thin strip screwed to a flexible rail is not automatically stronger than a properly built wooden apron. A cross-brace or rigid frame that triangulates the legs can do more to prevent racking than simply making a rail heavier.
Apron or steel frame: practical comparison
| Factor | Wooden apron | Steel reinforcement |
|---|---|---|
| Best fit | Wood benches with a solid top and room for deep rails | Metal benches, open bases, or retrofits where timber rails are awkward |
| Typical work | Add a rail roughly 3–6 inches deep, sized to the legs and top | Add braces, angle, plates, or a rigid frame matched to the bench |
| Installation | Cutting and fitting; straightforward with woodworking tools | Drilling and bolting; welding may be needed for a custom frame |
| Common failure | Loose fasteners, split rail ends, or weak leg joints | Bolts loosening, thin material bending, or poor welds |
| Trade-off | Uses space under the top and can obstruct clamps | Can obstruct storage, add cost, and create sharp edges or rust-prone surfaces |
When an apron is the better buy
Choose a wooden apron when the bench is mostly wood, the top is sound, and you can attach rails securely to the legs or existing frame. For a typical 24–30-inch-deep bench, a front apron around 3–6 inches deep is a reasonable starting point, not a guarantee: a long bench, light legs, or forceful hand-tool work may need more support or bracing at the ends. A hardwood board for a bench apron is often a simpler, less expensive fix than replacing the base.
Keep the apron high enough to preserve access for clamps and vises. Before adding it, check for existing rails, bolts, or a vice mount that it could block. If the apron will be attached with screws, avoid driving them close to the end of a narrow rail, where the wood can split. Use pilot holes and fasteners long enough to get solid purchase without breaking through the visible face.
A wooden apron is not a cure for loose mortise-and-tenon joints, undersized legs, or a top that is separating from its base. Tighten or repair those connections first. If you only work with light assembly and the bench has modest movement, tightening bolts and adding a simple wooden stretcher may be enough.
When steel reinforcement makes sense
Steel is a practical choice when a bench has an open metal base, when thick wooden rails would interfere with storage, or when you need a compact retrofit. A bolted steel angle or frame-bracing hardware can connect legs across the direction where the bench moves. Match the fasteners to the material: bolts with washers are generally more reliable in thin-wall tubing than wood screws, which have nothing solid to grip.
Do not assume any piece of metal will stiffen the bench. A flat bar mounted in a way that lets it bend may do little. Steel also adds weight without necessarily improving stability if the feet slide or the frame joints remain loose. Check that bolts cannot interfere with drawers, wiring, or foot space, and deburr cut edges. For a shop with damp conditions, protect bare steel from rust.
Diagnose first, then test the fix
Look for loose bolts, cracked wood, failed glue joints, uneven feet, and a bench that rocks on the floor. A rocking bench may need leveling feet or shims rather than an apron or steel. If the bench is top-heavy or sits on a slick floor, anchoring it to a wall or adding mass low in the base may address the real problem—but anchoring is not appropriate if the bench must remain movable.
After reinforcing the frame, repeat the corner push in both directions. Then test with the operation that used to cause movement, using normal working force rather than a sudden body-weight shove. Watch joints and fasteners for movement. If the bench still racks, the weak point may be at the opposite face, the leg-to-top connection, or the floor. Add a brace in the direction of movement or repair the loose joint instead of stacking on more material blindly.
Make the reinforcement fit the bench
For a sound wooden bench, a properly attached apron is usually the economical first choice. Steel is useful where space, metal construction, or a compact retrofit favors it, but it is not a shortcut around weak joints. Identify which way the frame moves, reinforce that load path, and check that the fix does not compromise clamps, storage, or access. A modest repair that stops the actual movement is better than a heavier frame that leaves the failure point untouched.