What's inside
As an Amazon Associate I earn from qualifying purchases. This post may contain affiliate links at no extra cost to you.
What a heavy vise demands from a bench
A vise loads a workbench in more ways than its weight suggests. Tightening the screw pulls the jaws together; hammering or bending stock adds sudden force; clamping near a corner tries to twist the top and rack the base. A bench that feels solid under ordinary handwork can still bounce or loosen around the vise.
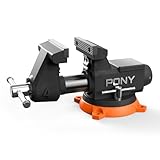
Plan around the work you actually do. A 4- to 6-inch bench vise suits many home shops, while larger vises and pipe or leg vises can transmit much greater loads. The vise’s own weight is only part of the problem. If you regularly pound on work held in it, prioritize a stiff base, a thick top, and a direct load path from the mounting bolts to the legs or frame.
As an Amazon Associate we earn from qualifying purchases at no extra cost to you.



Choose a construction method with a clear load path
The reliable principle is simple: vise force should travel through solid material into the bench base, not through a thin overhang, a hollow cabinet side, or a handful of screws. Put the vise near a front leg or other stout support. If the vise must sit between legs, reinforce the area below it with a crossmember or a full-depth block.
A thick hardwood top is a traditional choice, but thickness alone does not guarantee stiffness. A wide, unsupported top can flex, and a poorly joined base can sway. A torsion-box top can be very stiff for its weight, but the vise needs solid blocking wherever its bolts pass through. A steel frame can also work well if it resists racking and the top is securely fastened.
Compare common bench builds
| Method | Best fit | Advantages | Watch for |
|---|---|---|---|
| Thick solid-wood top on a timber base | General-purpose shop and frequent vise work | Easy to repair, drill, and modify; mass helps resist movement | Can be expensive and heavy; joints and leg bracing matter as much as top thickness |
| Laminated plywood top with solid blocking | Lower-cost build using common sheet goods | Stable, accessible materials, and straightforward construction | Exposed edges can be damaged; bolts must pass through reinforced areas, not unsupported skins |
| Torsion-box top on a braced base | When a flat, stiff top matters and weight is a concern | High stiffness for its weight; uses sheet goods efficiently | Vise mounting needs dense internal blocking; repairs and later modifications take planning |
| Steel frame with a wood top | Metalworking or mixed-use shops | Strong frame and replaceable work surface | Thin-wall tubing or weak joints can rack; provide a solid wood mounting pad under the vise |
For many home shops, laminated plywood is the economical middle ground. Two or three layers of 18 mm (about 3/4-inch) plywood, glued and screwed together, make a substantial top; add solid hardwood or doubled plywood beneath the vise footprint. The exact build depends on the vise and supports. Do not treat a nominally thick top as sufficient if the bolts land near an unsupported edge.
Mount the vise into reinforced material
Use the vise’s mounting holes as a layout template, then check the underside before drilling. Keep the mounting bolts as far from the top’s edge as the vise design allows, and make sure the jaws clear the apron and legs through their full travel. A shallow recess or spacer may be needed to align the fixed jaw with the bench edge.
Through-bolts with large washers or a backing plate are generally more dependable than wood screws for a heavy vise. Use bolts that suit the mounting holes and provide enough thread engagement for the nuts without bottoming out. Tighten evenly, then recheck after the first few sessions: wood compresses, and hardware can loosen. If the top is laminated, clamp it flat during glue-up and let the adhesive cure fully before loading it.
Leave enough bench edge around the vise to support long stock, but do not leave a thin strip of wood between the bolt line and the edge. That strip can split or crush under repeated clamping. If you need extra reach, a purpose-built mounting plate or a reinforced overhang is safer than simply moving the vise outward.
Stiffen the base and control movement
Preventing side-to-side sway is as important as making the top thick. Fit front-to-back and side-to-side stretchers close to the floor or use a rigid cabinet base. Add diagonal bracing or well-fitted corner gussets if the frame racks under a push. A bench that rocks on an uneven floor will feel worse under vise work, so level the feet or shim the base before judging its stiffness.
Mass helps absorb hammering, but extra weight is not a substitute for sound joints. A lighter bench can work if it is anchored to a wall or floor and properly braced. If anchoring is impractical, a lower shelf loaded with lumber or other dense material can reduce movement; keep the load secured and leave room for cleaning.
Choose materials and hardware for the job
Hard maple and beech are durable top materials, but sound construction-grade plywood is often adequate and cheaper. Avoid particleboard as the main vise-mounting structure: its fastener-holding ability can deteriorate under repeated shock, especially near an edge. MDF can make a flat replaceable skin, but it is not the material to rely on for holding vise bolts.
For a plywood build, use exterior- or cabinet-grade panels with intact plies rather than warped sheets with voids around the mounting area. A replaceable hardboard or plywood skin can protect the top from glue and cuts, but keep it separate from the structural vise mount. If buying rather than building, inspect the bench’s frame, top thickness, and underside reinforcement; a large advertised load rating does not tell you how well the vise area is supported.
For a bench-built project, a bench-vise mounting hardware search can help you compare suitable bolt and plate options. Match hardware to the vise’s hole size and the bench thickness rather than buying by appearance.
Avoid predictable failures
Crushed plywood, split edges, loose bolts, and a swaying base are common signs that the vise is poorly supported. A vise mounted only to a thin apron may pull the apron away from the top. Bolts placed too close to an edge can split solid wood or break through a plywood ply. A heavy vise on an unbraced frame can make the whole bench walk across the floor.
Before using the vise hard, clamp a piece of scrap and apply pressure while watching the mount and base. Look for movement at the bolts, flex in the top, and opening joints. Stop if anything shifts; unload the vise, inspect the underside, and add blocking, a backing plate, or bracing as needed. Do not try to cure a weak mount just by tightening bolts harder.
Buy or build to your use
Building makes sense when you need a specific bench height, vise location, or repairable surface. A basic plywood top with solid blocking can be a sound budget option if the base is braced and the vise is through-bolted. A hardwood top costs more and is easier to refresh after years of use, but it is not essential for occasional household repairs.
For a ready-made bench, favor a sturdy frame and a reinforced mounting zone over cosmetic features. A heavy-duty workbench search is a starting point, not proof of suitability: check dimensions, construction details, and whether the top can be drilled or reinforced. Whichever route you choose, put the vise over support, brace against racking, and inspect the mount after the first heavy jobs.