What's inside
As an Amazon Associate I earn from qualifying purchases. This post may contain affiliate links at no extra cost to you.
The right workbench height depends on the job done on it. A bench set up for general assembly is usually too tall for heavy handwork, while a low woodworking bench can leave you bent over during sharpening, wiring, or hardware installation. If one bench must handle both, choose a compromise height and use removable platforms or mats to change the working level.
As an Amazon Associate we earn from qualifying purchases at no extra cost to you.
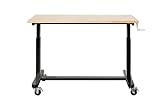
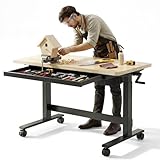


General assembly workbench height
For general assembly, start with a bench height between 34 and 38 inches. This suits tasks such as assembling cabinets, fitting hardware, sanding small parts, repairing tools, and working with benchtop power tools. A useful starting point is the height of your wrist crease when standing naturally with your arms hanging at your sides, then subtract roughly 2 to 4 inches.
A 36-inch bench is a practical middle ground for many people. It keeps small parts close to eye level without forcing you to hunch, and it leaves enough room underneath for drawers, a shop vacuum, or storage bins. Taller users may prefer 38 to 40 inches for light assembly. Shorter users may find 32 to 34 inches more comfortable.
Do not confuse assembly height with the height of a kitchen counter. Assembly involves reaching, holding parts, driving screws, and repeatedly changing position. A bench that is too high makes your shoulders rise and puts your wrists into awkward angles. A bench that is too low causes constant forward bending, especially when inspecting joints or marking parts.
For a general-purpose surface, a 36-inch bench paired with an adjustable-height adjustable shop stool gives more flexibility than building the entire bench around one seated task.
The best height for sharpening tools
Sharpening usually works better at a lower surface height than general assembly. For chisels, plane irons, and carving tools, aim for approximately 28 to 32 inches. This gives you room to use your shoulders and upper body without lifting your elbows high. It also makes it easier to keep both hands low and stable as you hold a tool against a stone, honing guide, or strop.
A sharpening surface around 30 inches high is a strong starting point for a standing user. The exact number depends on the sharpening method. Waterstones and oilstones require controlled, horizontal pressure. A high bench encourages you to press downward with raised shoulders, which quickly creates fatigue and makes it harder to keep the tool flat. A lower bench lets you lean slightly into the work while keeping your wrists more neutral.
Power sharpening changes the calculation. A bench grinder or slow-speed sharpening system needs enough clearance for the wheel, tool rest, and your hands, but the contact point should still fall below elbow height. If the wheel is too high, you tend to work with elevated elbows and reduced control. If it is too low, you may bend toward the wheel and bring your face closer to sparks and debris. Position the center of the sharpening wheel roughly 6 to 12 inches below your elbow when standing, then adjust based on comfortable control.
Use eye protection with any powered sharpening setup. Keep flammable dust and finishes away from the wheel, and provide a dedicated spark-safe area rather than placing a grinder beside a dust collector’s open intake. A grinder can ignite fine dust or shavings that have collected around the bench.
Bench heights by task
| Task | Typical height | Why it works | Main drawback |
|---|---|---|---|
| Heavy planing and chopping | 28–32 inches | Allows downward force from the shoulders and body | Too low for detailed, close-up work |
| Chisel and plane sharpening | 28–32 inches | Keeps elbows low and improves hand control | May require bending for extended sessions |
| General assembly | 34–38 inches | Comfortable for fitting, fastening, and inspection | Too high for forceful handwork |
| Fine electronics or small parts | 36–42 inches | Reduces stooping and brings work closer to eye level | Less leverage for pressing or chopping |
| Seated assembly | 26–30 inches | Works with a standard chair or adjustable stool | Needs leg clearance and careful tool placement |
If you need one bench for both jobs
Do not make the entire bench unusually low just to improve sharpening. A 30-inch bench is excellent for hand-tool work but can feel cramped for assembly, especially when installing drawer slides or working on parts that must be viewed from above. A better compromise is a fixed 34- to 36-inch bench with a lower sharpening station.
One inexpensive solution is a rigid, non-slip platform placed on the bench. A 3- to 4-inch-thick platform lowers the working position enough for stones and honing guides. It should be wider than the sharpening setup, stable under pressure, and easy to remove when assembling parts. A platform made from plywood with a replaceable rubber mat is usually sufficient; it does not need to be an expensive specialty product.
Another option is a dedicated sharpening cabinet or side bench at about 30 inches. This is worthwhile if you sharpen frequently or maintain several planes and chisels. A small bench can hold stones, water, honing oil, rags, and a sharpening stone holder without taking over the main assembly surface.
Bench height is only useful if the surface does not move. Sharpening exposes weak construction immediately: a lightweight bench rocks, a thin top flexes, and a loose vise shifts when you apply pressure. Aim for a top at least 1-1/2 inches thick for a general bench, add a lower shelf or stretchers to reduce racking, and anchor the bench if the floor is uneven.
Surface design, storage, and lighting
Keep the sharpening area separate from dusty operations when possible. Fine abrasive grit contaminates assembly surfaces, while sawdust and finish residue clog sharpening stones. Store stones in closed containers and use a shallow tray so water or oil cannot run into drawers.
Lighting matters more than another few inches of bench height. Put a bright, adjustable task light beside—not directly behind—the work. Side lighting reveals a wire edge on a blade and makes scratches visible. For a general bench, overhead LED lighting around 4,000 to 5,000 lumens for a small workstation is a reasonable target, supplemented by a movable lamp.
For cleanup, a broom and a basic shop vacuum with a fine-dust filter are enough for many assembly areas. Do not rely on a vacuum to remove metal sparks or wet sharpening slurry; collect those separately and dispose of oily rags in a fire-safe container.
Test the height before building
Mock up the proposed bench with sawhorses, scrap lumber, or stacked plywood. Test sharpening for 10 minutes, then assemble a box or drive fasteners for another 10 minutes. Watch for raised shoulders, bent wrists, lower-back strain, and the urge to stand on tiptoe. Adjust in 1-inch increments before committing to a permanent base.
If you regularly switch between tasks, prioritize stability and use interchangeable platforms rather than chasing a perfect universal height. The cheapest workable setup is often a solid 36-inch bench, a removable 3-inch sharpening platform, good task lighting, and storage that keeps abrasives away from dusty assembly work.