What's inside
As an Amazon Associate I earn from qualifying purchases. This post may contain affiliate links at no extra cost to you.
The best workbench surface for glue-ups is not necessarily the best surface for finishing. Glue needs a flat, nonstick reference; finishing prep needs a surface that will not telegraph dents, hold dust, or damage freshly sanded parts. If one bench has to handle both jobs, choose a flat, replaceable top and protect it with disposable layers rather than trying to find one perfect material.
As an Amazon Associate we earn from qualifying purchases at no extra cost to you.



What the surface must do
A glue-up surface should be flat enough that clamps do not pull panels into a twist. It should also resist common woodworking adhesives. Dried PVA glue, epoxy squeeze-out, and contact cement are much easier to remove from a slick surface than from raw plywood or soft wood.
For finishing preparation, the requirements change slightly. The top should not shed fibers, transfer oil, or have deep scratches that catch sandpaper. It should be large enough to support the work without letting long boards sag. A practical minimum is about 24 by 48 inches, but 30 by 72 inches is far more comfortable for cabinet doors, shelves, and tabletop parts.
Flatness matters more than appearance. A top that varies by 1/8 inch across its length can distort a panel during clamping. Check it with a reliable straightedge in several directions, including diagonally. If you can slide a sheet of paper under the straightedge in multiple locations, the surface needs correction or a replaceable overlay.
Workbench surface comparison
| Surface | Glue resistance | Finishing prep | Best use |
|---|---|---|---|
| Melamine-coated particleboard | Very good | Good, but can be slippery | Budget glue-ups and general assembly |
| High-pressure laminate | Excellent | Very good | Permanent, low-maintenance bench tops |
| Solid beech or maple | Fair unless protected | Excellent feel and durability | Heavy assembly and hand-tool work |
| MDF with replaceable paper or plastic | Good with a cover | Good with a clean overlay | Low-cost, flat work surfaces |
| Plastic folding table | Good | Fair; may flex or dent | Occasional work and finishing support |
Laminate and melamine
For most shops, a smooth laminate or melamine top is the sensible choice. Both release dried PVA glue well, wipe clean easily, and do not need regular oiling. Melamine-coated particleboard is usually cheaper and flat when new. The weak points are chipped edges, swelling if water reaches the core, and limited screw-holding strength.
High-pressure laminate over plywood or MDF costs more, but its surface layer is tougher and its edges can be sealed. It is a good permanent choice if the bench will also support sanding, assembly, and finishing prep. Do not assume every laminate is perfectly flat after installation; the substrate underneath determines that.
Use melamine workbench panels when price matters and you can replace the top later. A sacrificial hardboard sheet on top is often cheaper than repairing a damaged permanent surface.
Wood, MDF, and plywood
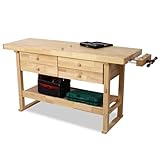
Solid hardwood tops feel excellent and tolerate clamping, planing, and dropped tools. They are also repairable: shallow dents can be sanded, and a damaged area can be flattened. The problem is glue. PVA bonds readily to unfinished wood, so a careless glue-up can turn a workpiece into part of the bench.
If you prefer a wood top, cover the active area with builder’s paper, thin plastic sheet, or a replaceable hardboard panel. Avoid relying on wax as the only release treatment. Wax can contaminate wood before staining or clear coating, creating fisheyes and uneven absorption.
MDF is inexpensive and naturally flat, making it a strong base for a bench. Seal its edges, because spilled water or finish can make them swell. A sheet of 1/4-inch hardboard makes a useful replaceable skin. It is flat enough for most glue-ups, cheap to replace, and smoother than raw MDF.
Protective overlays for glue and finishing
Paper is the cheapest glue-up protection. Builder’s paper or rosin paper prevents most squeeze-out from reaching the bench, but wet glue can soak through seams and folded edges. Replace it after a messy project rather than trying to preserve a contaminated sheet.
Thin polyethylene plastic is nonporous and releases glue well. It is useful under cabinet parts and on large panel glue-ups, but it can slide around and create a small amount of surface unevenness. Tape the edges outside the glue area, or use spring clamps to hold the plastic flat.
Silicone glue mats are convenient for smaller work. They resist many adhesives and can be rolled away, but they are not a substitute for a flat bench. A thick mat can allow narrow parts to rock, and silicone contamination is undesirable near some finishing operations. Keep one mat for glue work and another clean area for finish preparation.
For sanding and inspection, a clean sheet of hardboard or laminate is better than a soft foam pad. Foam supports can hide low spots and let edges curl under sanding pressure. Use a separate padded fixture only when protecting a delicate finished face is more important than checking flatness.
Finishing prep and dust control
A good finishing-prep surface is only useful if it stays clean. Sanding dust settles back onto horizontal benches, especially when the dust collector is undersized or the hose leaks. Use a shop vacuum or dust extractor with a fine filter, and connect it directly to sanders whenever possible. A nearby fine-dust shop vacuum is more valuable than a polished bench top.
Keep the bench at a height that lets you inspect surfaces without hunching. Around 34 to 36 inches works for many standing tasks; a lower 30- to 32-inch surface is better for hand planing and heavy clamping. Add bright, high-CRI lighting from the side. Raking light exposes sanding scratches, glue residue, and dents that overhead light can hide.
Buying and maintenance decisions
Choose a permanent laminate top if the bench will see daily use and you want easy cleanup. Choose melamine or MDF with a hardboard overlay if you want the lowest sensible cost. Solid hardwood is worth paying for when the bench will also serve as a hand-tool workbench and you value repairability.
Leave at least 3 inches of clear space around the main work area for clamps. Round or ease sharp front edges so they do not bruise workpieces or your wrists. Replace overlays when they become deeply scratched, finish-contaminated, or visibly crowned. A disposable surface is not wasted material; it prevents a damaged bench from causing a warped panel or a failed finish.