
What's inside
- Surface Planer Uses: What This Machine Can and Cannot Do
- What a Surface Planer Does
- What It Cannot Do Reliably
- Surface Planer vs. Jointer vs. Thickness Planer
- How to Use a Surface Planer for Accurate Stock
- Choosing a Surface Planer by Situation
- Glue-Up Preparation: A Worked Example
- Ownership Realities and Maintenance
- Bottom Line
As an Amazon Associate I earn from qualifying purchases. This post may contain affiliate links at no extra cost to you.
Surface Planer Uses: What This Machine Can and Cannot Do
Surface planer uses center on bringing rough-sawn boards to a consistent thickness, sizing parts accurately, and preparing matching stock for glue-ups—but a surface planer cannot reliably flatten a twisted first face on its own.
What a Surface Planer Does
In many woodworking markets, “surface planer” means the same thing as a thickness planer: a machine with a rotating cutterhead above a feed bed. You place a board on the bed, and powered rollers pull it beneath the knives. The cutterhead removes material from the upper face while the bed supports the lower face.
As an Amazon Associate we earn from qualifying purchases at no extra cost to you.


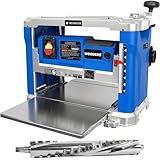
This produces a top face parallel to the face resting on the bed. If the underside is already flat, the machine can make the board flat on both sides and bring it to a repeatable dimension. If the underside is bowed, twisted, or badly cupped, the planer usually follows that shape rather than correcting it.
Common surface planer uses
- Sizing rough boards: Reduce oversized lumber to a target thickness, such as 19 mm, 25 mm, or 32 mm.
- Making boards consistent: Produce a batch of parts that share the same thickness for cabinet doors, shelves, boxes, or furniture components.
- Preparing glue-up stock: Match the thickness of adjacent boards before edge-jointing and clamping them into a panel.
- Removing saw marks: Clean up rough-sawn faces and establish a usable reference surface.
- Calibrating parts: Bring rails, stiles, drawer components, and table parts to a common dimension after cutting them slightly oversize.
- Reclaiming uneven stock: Remove old finish, minor surface damage, or inconsistent thickness, provided the material is free of metal and suitable for machining.
What It Cannot Do Reliably
A thickness-style surface planer does not replace a jointer. It cannot guarantee that a badly twisted board will leave the machine with a flat, straight face. It also does not normally straighten a board’s edge, create a square edge, cut a taper, or flatten a tabletop wider than its capacity.
Running a warped board through repeatedly can make the top and bottom faces parallel while preserving a curve or twist in the board. A thin board may also flex upward under the cutterhead and spring back after leaving the machine, so it can appear flat during the cut but remain bowed afterward.
It is also not a finishing sander. Planer knives leave a cutter pattern, and tear-out can occur around knots or when feeding against the grain. Final sanding is still needed for many visible surfaces.
Surface Planer vs. Jointer vs. Thickness Planer
| Machine | Primary job | Reference surface | Typical capacity | Best use |
|---|---|---|---|---|
| Surface planer / thickness planer | Make a board a consistent thickness | Bottom face on the bed | 305–330 mm width; 3–160 mm thickness | Repeatable sizing and matching stock |
| Jointer | Flatten one face and straighten one edge | Flat tables and fence | 150–300 mm cutting width; 1,200–2,100 mm tables | Creating a flat reference face and square edge |
| Planer-thicknesser combination machine | Joint and thickness in one machine | Jointer tables or planer bed | 260–410 mm width, depending on model | Small shops needing both operations in limited space |
The names vary by region. In North American tool catalogs, “thickness planer” is usually the clearer term for the benchtop machine described here. In the United Kingdom and some other markets, “surface planer” can refer to a jointer, while “planer-thicknesser” describes a combination machine. Check the cutterhead position, table arrangement, and stated function rather than relying on the name alone.
How to Use a Surface Planer for Accurate Stock
1. Inspect and prepare the board
Remove nails, screws, staples, grit, and loose bark. Metal can damage knives and become a dangerous projectile. Mark the board’s grain direction and identify the face that will sit on the bed. For badly cupped or twisted material, flatten one face first with a jointer, router sled, or suitable sled method.
2. Set the machine for a light cut
For the first pass, remove approximately 0.5–1 mm. A deeper cut may be possible in softwood, but light passes reduce motor strain, snipe, vibration, and tear-out. A 2 mm cut across a 300 mm board removes about twice as much material as a 1 mm cut, increasing the load without necessarily improving the result.
3. Feed the board correctly
Keep the board flat on the bed and support long stock at the infeed and outfeed sides. Do not push or pull the board once the feed rollers have engaged it. Keep hands away from the opening and use a push aid only where the machine’s instructions permit one. Never plane stock shorter than the manufacturer’s minimum length.
4. Measure after the machine releases the board
Measure at several points with calipers or a reliable thickness gauge. Do not set the final thickness from the machine scale alone. When producing several parts, keep the same reference face down and take each board to the same final setting rather than adjusting one board independently.
5. Take a finishing pass
A final light cut with a slower feed, if the machine provides that option, can improve the surface. Examine the grain direction and rotate boards when appropriate. If tear-out persists, use sharper knives, reduce the cut depth, support the work properly, or finish with a sander.
Choosing a Surface Planer by Situation
| Your situation | Useful specification | Practical choice |
|---|---|---|
| Occasional DIY projects and limited budget | 260–305 mm width, 1.5–2 hp motor, 50–70 kg | Portable benchtop planer with replaceable knives |
| Regular furniture work | 305–330 mm width, 2–3 hp motor, 70–110 kg | Heavier benchtop or wheeled workshop model with good dust extraction |
| Small shop needing jointing and thicknessing | 260–410 mm combined capacity | Planer-thicknesser combination machine |
| Large panels and frequent production | 400 mm or more width, stronger feed system, longer tables | Floor-standing industrial or professional planer |
| Mostly reclaimed or figured wood | Easy knife changes, reversible carbide inserts, robust chip removal | Model selected for maintenance access and tear-out control |
Width is often more important than maximum thickness. A 305 mm planer can process boards up to about 12 inches wide, but it cannot make a wider tabletop blank pass through in one operation. Maximum thickness matters when preparing thick beams or legs; for ordinary furniture stock, the lower limit and minimum board length may be more relevant.
Glue-Up Preparation: A Worked Example
Suppose a tabletop requires six boards finished at 22 mm thick. You begin with boards ranging from 27 to 30 mm. Plane the thickest board first until its cleanest face is available, then use it to establish a machine setting. Remove material from every board in small, consistent passes until each measures approximately 22.0–22.3 mm.
The planer creates matched thickness, but it does not make the long edges suitable for a seamless glue joint. Joint or otherwise straighten one edge of each board, then rip the opposite edge parallel if required. Arrange the boards to balance color and grain, dry-clamp the panel, and check for gaps before applying glue.
Ownership Realities and Maintenance
Knives are usually the first consumable to wear. Dull knives increase noise, tear-out, motor load, and the temptation to take overly deep cuts. Depending on the model, knives may be sharpenable, disposable double-sided blades, or carbide insert cutters. Keep a spare set available if the planer is used regularly.
- Vacuum chips from the bed, cutterhead area, and vents after use.
- Wax or use the manufacturer-approved lubricant on the bed so boards feed smoothly.
- Inspect drive belts, rollers, and anti-kickback components periodically.
- Clean resin from rollers when it causes slipping or inconsistent feeding.
- Use dust extraction sized for the machine; packed chips can cause poor cuts and overheating.
- Check knives or inserts after any suspected metal contact.
Snipe—an unwanted deeper cut at the beginning or end of a board—often results from unsupported stock or incorrect table setup. Supporting the board level with the bed, using an appropriate feed technique, and making sure the tables and rollers are correctly adjusted can reduce it. For valuable parts, plane boards longer than the final dimension and cut away the affected ends afterward.
Bottom Line
The most valuable surface planer uses are repeatable thickness sizing, batch consistency, and efficient preparation of stock for later joinery. Choose one when you already have—or can create—a reasonably flat reference face. Choose a jointer when the board needs its first true flat face or a straight edge. If space and budget allow only one machine, a planer-thicknesser combination offers broader capability, while a portable thickness planer is usually the simpler and more economical choice for producing accurately matched boards.