What's inside
As an Amazon Associate I earn from qualifying purchases. This post may contain affiliate links at no extra cost to you.
Consumables are easy to underestimate. A box of sanding discs, drill bits, screws, glue, blades, rags, and finishing supplies does not take much room individually, but it quickly becomes a disorganized shelf or a drawer full of duplicates. The storage choice usually comes down to two practical options: fixed storage on the wall or a rolling cabinet that can move around the shop.
As an Amazon Associate we earn from qualifying purchases at no extra cost to you.


The Basic Trade-Off
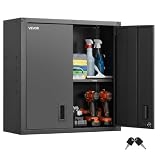
Wall-mounted storage uses otherwise wasted vertical space and keeps frequently used items visible. Rolling cabinets provide more enclosed capacity, better protection from dust, and the ability to bring supplies directly to the workbench or assembly area.
Neither option is automatically better. Wall storage works best when the shop layout is stable and consumables are used near one main bench. A rolling cabinet makes more sense when the same supplies serve several work areas, or when floor space is available for a mobile unit.
| Factor | Wall-mounted storage | Rolling cabinet |
|---|---|---|
| Access | Fast visual access; ideal for high-use items | Good access, but drawers must be opened |
| Capacity | Limited by wall area and bracket strength | High capacity in a compact footprint |
| Dust protection | Open bins collect dust quickly | Drawers and doors offer much better protection |
| Mobility | Fixed in place | Can follow the job around the shop |
| Installation | Requires secure anchoring and layout planning | Usually ready to use after assembly |
| Cost | Can be inexpensive when built from bins and plywood | Usually costs more, especially with quality slides and casters |
When Wall-Mounted Storage Wins
Wall storage is the efficient choice for small, frequently used consumables. A row of bins above a workbench can hold screws, driver bits, sanding discs, utility knife blades, pencils, tape, and small hardware without consuming valuable floor area. Clear-front bins or labeled open containers also make inventory problems obvious. If the last box of 80-grit discs is visible, you are less likely to discover the shortage halfway through a project.
For a typical bench, place the most-used bins between 12 and 20 inches above the work surface. Anything much higher becomes inconvenient and encourages unsafe reaching. Keep heavy containers below shoulder height. A full bin of screws or nails can weigh 10 pounds or more, and a poorly anchored rail can pull out of drywall under surprisingly little abuse.
Use a French cleat, a screwed plywood backer, or a steel storage rail fastened into studs. Do not rely on drywall anchors alone for a loaded system. A useful rule is to design for at least twice the expected load. If the bins and contents may weigh 60 pounds, build the mounting system for 120 pounds or more, with fasteners placed into studs where possible.
Wall-mounted parts bins and storage rails are inexpensive compared with cabinets, and the cheaper option is perfectly adequate for light hardware. The main failure mode is not the bin itself; it is overloading the rail, using inconsistent labels, or allowing open containers to fill with abrasive dust.
When a Rolling Cabinet Wins
A rolling cabinet is better for a broad consumables inventory or a shop with multiple work zones. One cabinet can carry adhesives, fasteners, abrasives, blades, drill bits, layout supplies, and personal protective equipment from the saw area to the bench. That reduces repeated trips and keeps supplies close to the job.
Drawers are particularly useful for flat or boxed items. Sanding discs, jigsaw blades, router bits, and replacement utility blades are easier to organize in shallow drawers than in deep bins. Deep drawers work for caulk, glue bottles, spray cans, and boxes, but avoid piling mixed items more than two layers deep. If you cannot see the back of a drawer, it will become a storage graveyard.
Casters matter more than the paint or overall drawer count. Choose at least two locking casters, preferably four, and check that the cabinet rolls smoothly over the shop floor. A fully loaded cabinet can weigh several hundred pounds. Small casters snag on dust-collection hoses, floor joints, and offcuts. A 4-inch caster is a reasonable minimum for most workshops; larger wheels roll more easily but add height and cost.
Before buying, measure the cabinet’s loaded working clearance, not just its empty footprint. Leave roughly 30 inches of clear space in front of drawers and at least 36 inches in a main walkway. A cabinet that technically fits beside a bench may still block the bench vise, dust hose, or access to a circuit breaker.
For a general-purpose unit, compare rolling tool cabinets with drawers by drawer load rating and slide quality. Thin slides that flex under a box of fasteners are frustrating and can fail early. Locking drawers are useful if children visit the shop, but a cabinet lock is not a substitute for safe chemical storage.
Dust, Moisture, and Chemical Storage
Open wall bins are a poor choice near a table saw, planer, or sanding station unless the shop has effective dust collection. Fine dust settles inside screw threads, adhesive caps, and abrasive packaging. Keep sensitive supplies in lidded containers or closed drawers, and clean storage surfaces with a vacuum rather than blowing dust around with compressed air.
Moisture-sensitive items need special attention. Sandpaper, joint compound, wood glue, and some tapes degrade in damp conditions. Store them off a concrete floor and away from exterior walls. A rolling cabinet with drawers improves protection but does not make a humid shop dry. A small hygrometer is useful; persistent humidity above about 60 percent can shorten the life of paper abrasives and encourage rust on blades and bits.
Do not store flammable finishes, solvents, or oily rags casually in either system. Use a suitable flammable-storage cabinet where required, and keep oily rags in a listed self-closing container. Aerosol cans should stay away from heaters, sparks, and direct sunlight. A lockable cabinet may control access, but it does not remove the fire risk.
The Practical Hybrid Layout
Most workshops benefit from combining both approaches. Put the daily-use items on the wall: driver bits, common screws, measuring supplies, sanding discs, and hearing or eye protection. Keep backup stock, specialty sizes, adhesives, blades, and less-used hardware in a rolling cabinet.
A simple two-bin rule helps prevent clutter: one labeled container for active stock and one for backup stock. When the active bin is empty, refill it from the cabinet and add the item to the shopping list. This is more reliable than buying a large wall system and filling every bin with supplies that may not be used for years.
If the budget is tight, start with a securely mounted plywood backer and inexpensive labeled bins. Add a used rolling cabinet later for heavy or sensitive supplies. If mobility, dust control, and a large inventory are more important than initial cost, buy the cabinet first and add a small wall rack only for the items used at nearly every work session.
Making the Buying Decision
Choose wall-mounted storage when floor space is scarce, the bench location is permanent, and most consumables are small and used daily. Choose a rolling cabinet when several stations share supplies, you need enclosed storage, or your inventory includes heavy boxes and liquids.
Before purchasing, list the actual categories you own, estimate their combined weight, and measure the wall or floor area available. Storage fails when it is selected by empty capacity rather than by the shape, weight, and frequency of use of the items it must hold.