What's inside
As an Amazon Associate I earn from qualifying purchases. This post may contain affiliate links at no extra cost to you.
Clamps are easy to store badly. A pile of bar clamps on the floor wastes space, damages handles, and turns a quick glue-up into a search exercise. In a small workshop, the best wall rack keeps clamps visible, supports their weight without twisting, and leaves enough clearance to remove one without knocking down the rest.
The right choice depends mainly on clamp type, wall construction, and how often you use them. A rack for six light spring clamps has very different requirements from one holding a dozen 48-inch parallel clamps.
As an Amazon Associate we earn from qualifying purchases at no extra cost to you.


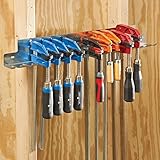
What to Look For in a Clamp Wall Rack
Start with capacity, but do not judge capacity by the number of hooks alone. A rack rated for 10 clamps may only work comfortably with short F-style clamps. Long bar clamps need vertical or angled clearance, and parallel clamps need much stronger mounting than most small utility racks provide.
Look for a rack with at least 1 inch of clearance between neighboring storage points. That prevents handles from interlocking and makes it possible to grab one clamp without moving the others. For bar clamps, measure the length from the rack to the end of the rail. A 48-inch clamp stored horizontally may need more than 52 inches of uninterrupted wall space once the handle and end stop are included.
Steel racks are usually the safest choice for heavy clamps. A welded rack resists splitting and does not depend on small screws threading into thin material. Plywood racks are cheaper and easy to customize, but use 3/4-inch plywood and reinforce the mounting strip if the rack will carry more than about 40 pounds.
Rounded hooks or vinyl-coated contact points are useful. Sharp steel edges can scratch clamp rails and eventually wear through plastic handles. A rack that touches the floor or has a bottom shelf should also allow sawdust to fall through rather than collect in a closed pocket.
The Main Rack Types
| Rack type | Best for | Advantages | Limitations |
|---|---|---|---|
| Horizontal bar rack | F-style and pipe clamps | Simple, compact, inexpensive | Needs long clear wall space; clamps can overlap |
| Vertical slot rack | Parallel clamps and long bar clamps | Uses narrow wall width; easy to expand | Requires adequate height and strong mounting |
| Hook or peg rack | Spring clamps, quick-grip clamps, small tools | Fast access and flexible layout | Hooks can bend under heavy clamps |
| Freestanding clamp cart | Large collections and shared work areas | High capacity; can move near the bench | Uses floor space and adds another obstacle |
For most small workshops, a vertical rack is the best use of wall space. It stores long clamps along the wall instead of projecting into a walkway. A horizontal rack makes more sense when you have unused space above a workbench or when most of your clamps are under 24 inches long.
Best Buying Options for a Small Workshop
A basic wall-mounted clamp rack is fine for a starter collection. Choose one with a steel backplate, two or more mounting holes per side, and a stated load rating of at least 50 pounds. Avoid racks that rely on one small keyhole slot unless you are storing only light spring clamps.
For a mixed collection, an adjustable vertical woodworking clamp rack gives better separation. Slots or pegs can be spaced to suit your clamps, and the rack can usually handle long F-style clamps without consuming a full horizontal wall. The trade-off is height: allow at least 6 inches above the longest clamp handle so removal is not awkward.
If most of your clamps are small, the cheaper option is often enough. A pegboard hook storage setup costs less and can hold spring clamps, corner clamps, and quick-grip clamps. It is not a substitute for a heavy-duty rack. Pegboard hooks can pull forward, and thin hardboard pegboard can tear around the holes when loaded with long clamps.
For a large collection of parallel clamps, consider a heavy-duty parallel clamp rack. These clamps are wide and heavy, so a rack with narrow slots may allow them to lean into one another. A dedicated rack costs more, but it prevents bent rails and saves time during glue-ups.
Mounting the Rack Safely
Mount the rack into studs whenever possible. A loaded clamp rack can weigh 50 to 100 pounds, and the weight is often offset from the wall by several inches. That creates leverage that is harder on fasteners than a shelf sitting directly against the wall.
Use two or more structural mounting points for a small rack and four or more for a long rack. Drive 1/4-inch lag screws or suitable structural screws into studs, with washers under the heads. If studs do not line up, attach a 3/4-inch plywood backer to two studs first, then fasten the rack to that backer with bolts or screws.
Do not rely on drywall anchors for a heavy clamp collection. They may hold the empty rack securely but pull out when the rack is loaded or when a clamp is removed sideways. If you must mount to masonry, use fasteners rated for the block or concrete and keep the rack close to the wall.
Layout, Access, and Shop Safety
Place clamps within one step of the workbench, but not directly above the main assembly surface. A falling 48-inch clamp can damage a project or cause an injury. Keep the lowest clamp at least 12 inches above the floor, and avoid mounting the rack where clamps can block a dust-collection hose, electrical panel, or emergency exit.
Leave roughly 3 inches of free space at the sides of a rack. This gives your hand room to lift a clamp clear. Store the heaviest clamps in the lowest positions and lighter clamps higher up. That lowers the center of gravity and reduces the force on the wall fasteners.
Before drilling, lay your clamps on the floor in the proposed arrangement. Check that handles do not collide, rails do not overlap, and the longest clamp can be removed without hitting a light, shelf, or ceiling. This five-minute test prevents most storage mistakes.
When a DIY Rack Makes Sense
A simple homemade rack can be the best value when your clamp collection is unusual. Cut a 3/4-inch plywood mounting strip, add hardwood or plywood dividers spaced 2 to 3 inches apart, and screw the assembly into studs. Round the divider ends and seal the wood with paint or polyurethane so glue drips do not soak in.
DIY storage is especially useful when you need separate sections for pipe clamps, bar clamps, and spring clamps. The limitation is consistency: poorly aligned dividers can let heavy clamps slide together, and undersized screws can loosen over time. Test the rack with twice the expected load before trusting it over a workbench.
For most buyers, a steel vertical rack is the cleanest solution for long clamps, while inexpensive hooks handle the small ones. Spend money on mounting strength and usable spacing, not on a rack with more positions than your wall and collection can actually support.