What's inside
As an Amazon Associate I earn from qualifying purchases. This post may contain affiliate links at no extra cost to you.
Temporary hazard zones are useful when a workshop is being cleaned, rearranged, or used for a job that creates an unusual risk. A barrier can keep people away from a wet floor, open trench, running test setup, freshly painted workbench, or an active cutting area. It is not a substitute for guarding, lockout, dust control, or supervision, but it can make a temporary boundary obvious and harder to ignore.
The best choice depends on whether you need a visual reminder, a physical delay, or a barrier that can survive daily handling. A lightweight plastic tape stand may be enough for a short cleanup. A wall-mounted retractable belt or chain barrier is better for a doorway or aisle that must be opened and closed repeatedly.
As an Amazon Associate we earn from qualifying purchases at no extra cost to you.



What to Look For in a Workshop Barrier
Start with the hazard, not the product. A barrier around a stopped machine only needs to discourage casual entry. A barrier around a running saw, suspended load, exposed electrical work, or floor opening needs a proper guard or barricade with enough strength and distance to prevent contact. Retractable belt systems are generally warning and access-control devices, not fall protection.
For most shop use, choose a barrier with a high-visibility belt at least 2 inches wide. Red-and-white or yellow-and-black patterns are easier to notice than a plain black belt, especially under workbench lighting. Belt lengths commonly range from about 6 to 15 feet. Measure the opening before buying; a claimed belt length is usually the maximum span, and the belt needs a little slack to connect cleanly.
The receiver post or wall clip matters as much as the reel. A barrier that clips into a weak plastic receiver can release when someone brushes against it. Look for a receiver that accepts the belt securely and can be mounted to a stud, masonry anchor, or solid part of a workbench. Freestanding posts need a broad, heavy base. Narrow bases tip when the belt is pulled at an angle.
The Main Types
| Type | Best use | Strengths | Limitations |
|---|---|---|---|
| Wall-mounted retractable belt | Doorways, shop aisles, and fixed work areas | Compact, quick to deploy, no floor base to trip over | Requires solid mounting; limited to one or a few directions |
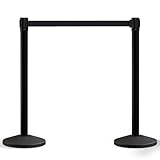
| Freestanding belt posts | Temporary zones in open floor space | Flexible layout; can block several sides | Posts can tip, slide, or become a trip hazard |
| Retractable chain posts | Rougher environments and outdoor or dusty work | Chain tolerates dirt and abuse better than some fabric belts | Heavier, noisier, and less visible at a distance |
| Warning-tape stands | Short cleanup jobs and low-risk areas | Cheapest and fastest option | Easy to step through, tear, or knock over |
For a fixed doorway, a wall-mounted retractable belt barrier is usually the cleanest solution. Mount the reel on the hinge side or one edge of the opening, then place the receiver at the opposite side. Keep the belt around waist height, typically 34 to 42 inches, so it is visible without becoming a neck- or shoulder-height obstruction.
When Freestanding Posts Make Sense
Freestanding posts are more practical when a hazard moves around the shop. You can surround a workbench being assembled, isolate a floor-sanding area, or create a temporary path around a pallet of sheet goods. Buy posts with bases heavy enough for the belt length and expected traffic. Four posts connected in a rectangle are more stable than two posts stretched across a wide opening.
Do not stretch a belt tightly enough to pull the posts inward. A person leaning on the belt can turn the whole setup into a sliding or tipping line. Leave the belt nearly level and use an extra post at corners. On smooth concrete, rubber feet help, but they do not make a light base stable. If carts, lumber, or a shop vacuum will pass nearby, use a sturdier freestanding retractable belt barrier set rather than inexpensive tape stands.
Warning-tape stands are fine for a five-minute mop-up or a small area where everyone present understands the hazard. They are a poor choice beside an active table saw, an open basement stairwell, or a delivery route. Tape communicates “do not enter,” but it offers almost no resistance when someone forgets, is carrying a load, or cannot see the floor.
Placement Around Common Hazards
Set the boundary far enough from the hazard that a person cannot reach it by leaning through. Around a benchtop tool, allow room for the operator, material, and ejected debris. Around a wet finish or coating job, make the zone large enough that a swinging board or hose will not cross the barrier. A barrier placed directly against the hazard often creates a false sense of protection.
Keep barriers out of normal walking paths whenever possible. If the zone must cross an aisle, add a clear sign and provide an alternate route at least 3 feet wide. Never run a belt across an exit, in front of an electrical disconnect, or across the only path to a fire extinguisher. In a dusty shop, place the reel away from direct exhaust from a dust collector; fine dust can work into the spring and latch.
Installation and Use
For a wall-mounted unit, use fasteners suited to the surface. A wood screw in thin paneling can pull out under a modest tug; find a stud or use an appropriate masonry anchor. Pull the belt out slowly. Letting it snap back can damage the reel and eventually weaken the return spring. Inspect the belt for fraying, stretched stitching, and a bent end clip before each use.
Use a sign that states the actual reason for the boundary, such as “Wet Finish—Do Not Enter” or “Machine Test in Progress.” Generic caution wording is less useful when several temporary zones exist. If the hazard requires personal protective equipment, list it on the sign, but do not assume a barrier makes untrained entry acceptable.
Common Failure Modes
The most common failure is an anchor that releases before the belt does. The next is a freestanding post tipping when someone approaches from the side. Belts also become trip hazards when installed below knee height, while dark belts disappear in a poorly lit corner. Add temporary LED or work lighting if the barrier is near a dim bench or doorway; visibility is part of the control.
Replace a barrier that will not retract smoothly, has a broken receiver, or has a belt contaminated with finish, oil, or sharp debris. If people repeatedly step over it, upgrade the control rather than buying a brighter belt. In that situation, use a temporary panel, folding barricade, or locked-out work area. A cheaper barrier is perfectly adequate for brief, low-risk housekeeping. For repeated shop use, solid mounting, stable bases, and clear sightlines are worth paying for.