
What's inside
As an Amazon Associate I earn from qualifying purchases. This post may contain affiliate links at no extra cost to you.
For most blue-diode projects, the best starting point is a matte black ceramic marking spray such as CerMark LMM-6000 or LaserBond 100; choose between them by the metal, the darkness you need, and whether you prefer aerosol convenience or a more controlled coating.
As an Amazon Associate we earn from qualifying purchases at no extra cost to you.


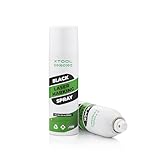

What a diode laser marking spray actually does
A diode laser usually produces blue light around 405–455 nm. Bare stainless steel, aluminum, brass, and coated metal often reflect too much of that light to produce a durable black mark. A marking spray adds a thin, dark coating containing metal-oxide or ceramic-forming material. The laser heats selected areas, bonds the marking compound to the surface, and leaves the unheated coating ready to wash away.
This is different from engraving. The laser is not necessarily cutting deeply into the metal; it is creating a bonded surface mark. The result can be highly resistant to abrasion, but it depends on clean metal, even coating thickness, sufficient power density, and correct focus.
Head-to-head comparison
| Product or type | Diode-laser suitability | Best metal targets | Typical format | Application and cleanup | Practical verdict |
|---|---|---|---|---|---|
| CerMark LMM-6000 | Often workable with powerful blue diodes, but requires a slower, higher-energy test range | Stainless steel, mild steel, coated metals, some aluminum alloys | Commonly sold as a 12 oz aerosol | Spray several thin coats; wash with water after marking | A strong first choice when contrast and established documentation matter |
| LaserBond 100 | Potentially compatible with 10 W and higher blue-diode systems; confirm the maker’s current diode guidance | Stainless steel and other compatible bare metals | Commonly available in aerosol form, including approximately 12 oz sizes | Thin, even coats; water or mild scrubbing removes loose residue | Good candidate for repeatable production if your machine has enough optical power |
| Brush-on or airbrush ceramic marking compound | Can work with a diode when the coating is thin and the beam is well focused | Small stainless parts, test coupons, irregular shapes | Liquid bottles commonly ranging from about 100 to 250 ml | More preparation; easier to control thickness; rinse after marking | Best for minimizing overspray and controlling small areas |
| Generic black high-temperature coating | Uncertain; usually inferior for permanent metal marking | Test pieces only unless the supplier specifies laser marking use | Aerosol cans commonly around 340–400 ml | May require solvent cleanup and can leave a paint-like film | Cheap experimentation, but not a dependable substitute |
The important distinction is that “works with a laser” does not automatically mean “works with a diode laser.” Many marking compounds were developed around fiber or CO2 systems with different wavelengths and power densities. A product can produce a dark result under a fiber laser and fail under a 5 W blue diode.
Which option fits your situation?
| Your situation | Recommended starting point | Why |
|---|---|---|
| 5 W optical-output diode, occasional projects | Small quantity of brush-on compound or a standard aerosol marking spray | Lets you test before committing to a large can; expect slower passes and modest mark area |
| 10–20 W diode, stainless tags and tools | CerMark LMM-6000 or LaserBond 100 | More available energy makes a durable dark mark more realistic |
| Mostly aluminum | A spray explicitly documented for aluminum, tested on your alloy | Aluminum reflectivity, anodizing, and alloy composition vary substantially |
| Small workshop with limited ventilation | Brush-on or airbrush application, used with suitable extraction | Reduces overspray and airborne aerosol, though it does not eliminate fumes |
| Frequent production work | The compound that gives the widest repeatable process window on your machine | A slightly more expensive coating can cost less if it reduces rejects and rework |
Metal-by-metal expectations
Stainless steel
Stainless steel is usually the easiest place to begin. It is relatively consistent, accepts a thin coating, and can produce a sharp black mark with good contrast. Brushed stainless may show directional texture through a thin application, so wipe and spray consistently. Polished stainless reflects more light during setup and makes focus and alignment especially important.
Mild steel
Mild steel can mark well, but mill scale, oil, and surface oxidation create inconsistent results. Degrease it, remove loose scale, and test on the actual finish. A mark that looks excellent on polished steel may look gray or uneven on rough stock.
Aluminum
Aluminum is less predictable. Anodized aluminum may already be suitable for direct diode engraving or color removal, while bare aluminum can reflect the beam and demand a different energy range. Cast and machined alloys also behave differently. Use a sample from the same material batch whenever possible.
Brass and copper
These metals are highly reflective and can be difficult for a diode system. A marking spray may improve absorption, but it does not remove the need for proper eye protection, an enclosed beam path, and conservative testing. Do not assume that a darker coating makes every reflective-metal setup safe.
A practical test grid for finding settings
Do not begin with a large finished part. Cut or obtain a test coupon at least 50 × 50 mm, clean it, and apply the spray using the same method intended for production.
- Prepare the surface. Remove oil and fingerprints with a suitable degreaser. Allow the metal to dry completely.
- Apply a thin coat. Shake an aerosol thoroughly and spray from the distance stated on its label. Two or three light passes are usually easier to control than one wet pass. The coating should look opaque but not textured or dripping.
- Focus at the coated surface. A thick coating changes the effective top surface, so refocus after spraying rather than relying on the bare-metal height.
- Run a speed-and-power matrix. For a diode with adjustable power, test five power levels across five speeds. For example, use 20, 35, 50, 65, and 80 percent power, and speeds of 500, 1,000, 1,500, 2,000, and 2,500 mm/min. These are starting values, not universal settings.
- Keep other variables fixed. Use one pass, the same line interval, the same air-assist setting, and identical artwork. Change only speed and power.
- Wash the coupon. Use warm water and a soft nylon brush or non-abrasive pad. Avoid judging the mark while loose black coating remains on the surface.
- Inspect for durability. Rub a hidden area with a damp cloth, then with a dry cloth. A good setting leaves a uniform bonded mark rather than a dusty or easily scratched film.
If the entire grid remains pale, your diode may not deliver enough energy for that coating and metal combination. Try a thinner coating, a smaller line interval, slower travel, or a compound with explicit blue-diode guidance. If the result is brown, blistered, or surrounded by a wide halo, reduce energy and check focus. Excessive coating thickness can also produce a rough, porous mark.
Application effort, cleanup, and ownership costs
Aerosol is fastest for plates and broad surfaces, but it wastes material through overspray and makes thickness harder to reproduce. A brush or airbrush uses less compound on small parts, yet cleaning the applicator adds labor. Masking the surrounding area with removable paper or low-tack tape can reduce cleanup, but leave a clear margin around the laser path.
As a simple cost calculation, suppose a $35 can produces 30 usable 100 × 50 mm tags after accounting for overspray. The coating cost is about $1.17 per tag. If careful masking increases the yield to 45 tags, the cost falls to about $0.78 per tag. The cheaper can is not necessarily cheaper if inconsistent application causes several rejected parts.
The first consumable to cause trouble is often not the spray itself but a clogged nozzle, contaminated surface, or partially settled compound. Store aerosol cans upright, clean the nozzle according to the label, and rotate liquid containers gently rather than introducing bubbles with aggressive shaking. Keep an opened coating away from heat and follow its shelf-life instructions.
Safety and common mistakes
- Use an enclosed diode-laser system with appropriate wavelength-rated protection and interlocks.
- Provide active fume extraction; a marking spray can release irritating vapors and particulate when heated.
- Do not spray near an operating laser, exposed electronics, flames, or hot surfaces.
- Never judge permanence before washing away the unbonded coating.
- Do not use abrasive polishing immediately after marking; it can remove the bonded layer or soften contrast.
- Do not copy settings from a different diode, lens, focus height, metal alloy, or coating thickness.
Bottom line
For a first purchase, choose a purpose-made ceramic metal marking spray rather than ordinary black paint. CerMark LMM-6000 and LaserBond 100 are sensible candidates for a 10 W-or-higher blue diode, while a brush-on compound can be the more economical route for small parts or a lower-power machine. The winning product is the one that produces a dark, washable, abrasion-resistant mark across a repeatable settings window on your exact metal—not simply the one with the darkest result on an unwashed test piece.