
What's inside
As an Amazon Associate I earn from qualifying purchases. This post may contain affiliate links at no extra cost to you.
The xTool black laser marking spray is a practical way to create dark, high-contrast marks on stainless steel, anodized aluminium, and several other metal surfaces with a compatible laser, but the result depends more on surface preparation, an even coating, and correct focus than on spray alone.
As an Amazon Associate we earn from qualifying purchases at no extra cost to you.
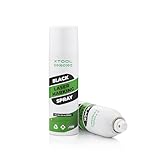

What the xTool black laser marking spray does
This product is a temporary-looking coating that becomes bonded to a suitable metal surface when heated by a laser. The laser removes or changes the coating in the marked areas, leaving a dark mark with a cleaner appearance than ordinary paint engraving. It is especially useful when a diode laser cannot directly colour or engrave bare stainless steel with enough contrast.
The finished mark is normally a dark grey to black image rather than a deep cut. That distinction matters: marking spray improves contrast, but it does not turn a low-power diode machine into a metal-cutting tool. Durability is usually good on rigid, clean metal, while abrasion, solvents, scratching, and outdoor exposure can eventually affect the surface.
Results on common metals
| Material | Expected result | Preparation priority | Useful starting approach |
|---|---|---|---|
| 304 stainless steel | Strong black or charcoal contrast when coating and focus are correct | Remove oil and fingerprints completely | One thin coat; test 2–4 power/speed combinations |
| Brushed stainless steel | Good contrast, with the grain affecting perceived sharpness | Keep the artwork aligned consistently with the grain | Use a small test grid before a large logo |
| Anodized aluminium | Often produces a crisp light or dark contrast, depending on the anodized layer and coating | Do not polish through the anodizing | Begin with lower energy than bare stainless steel |
| Painted steel | Variable; the laser may remove both spray and existing paint | Confirm that the base paint is firmly bonded | Test for flaking around the mark |
| Brass or copper | Possible, but less predictable because reflectivity and heat transfer differ | Use a fresh degreased surface and conservative tests | Use the machine maker’s approved settings and enclosure |
| Powder-coated metal | Usually behaves more like a coating-removal job than a direct metal mark | Check coating thickness and adhesion | Test at low power first to avoid a wide burned edge |
Stainless steel is the safest material from which to judge the product. It is stable, common, and generally gives a clearer indication of whether the problem is coating, focus, speed, or laser power. Reflective metals such as polished aluminium, brass, and copper require extra care because reflected laser energy can damage optics or create a safety hazard.
Preparation controls the final contrast
1. Clean the metal
Wash away dust and machining residue, then degrease the surface with isopropyl alcohol or another cleaner suitable for that metal. Allow it to evaporate completely. Finger oils can create pale spots, pinholes, and uneven edges that look like a laser-setting problem.
2. Mask surrounding areas
Apply low-tack masking tape around the workpiece or place it inside a shallow overspray area. Marking sprays create a fine mist, and overspray can settle on rails, honeycomb beds, and nearby tools. Use ventilation and follow the product label and the laser manufacturer’s safety instructions.
3. Spray a thin, uniform coat
Shake the can or container as directed. Hold it at a consistent distance and make overlapping passes rather than trying to cover the metal in one heavy pass. A suitable coat should look opaque enough to hide the metal without forming runs or a rubbery surface.
Heavy coating is a common mistake. It increases drying time, can soften fine details, and may leave a thick edge around letters. A thin coat that is fully dry generally produces a sharper mark than a thick coat with more pigment.
4. Let the coating dry fully
Drying time varies with humidity, temperature, coat thickness, and the exact formulation. Do not laser a tacky surface. A practical check is to touch an unmarked edge with a clean glove or cotton swab: it should not feel wet, transfer colour, or leave a fingerprint.
A repeatable laser-testing method
Do not begin with the final workpiece. Cut a test area from the same metal stock, or reserve an unused corner. A 30 mm by 30 mm grid is large enough for many small tests. If the laser software supports it, vary speed across one direction and power across the other.
| Test variable | Practical range to explore | What it reveals |
|---|---|---|
| Speed | 100–400 mm/s | Whether extra dwell time improves darkness or causes a wide, dirty edge |
| Power | 20–60% of the machine’s rated output | Whether the coating is under- or over-heated |
| Passes | 1 pass first; 2 passes only for comparison | Whether a second pass adds density or only heat damage |
| Line interval | 0.08–0.15 mm | Balance between filled coverage, detail, and total processing time |
These are starting ranges, not universal recipes. A 10 W diode, a higher-output diode, and a fiber laser deliver energy differently, even when the software displays similar percentages. Confirm the laser’s approved materials and use an enclosure, extraction, and eye protection appropriate to the machine.
Focus at the actual coated surface, not at the workbench or the uncoated underside. Run a small filled square, fine text, and a line drawing in the same test. The best setting should produce an even dark field, clean small lettering, and minimal haloing. If the mark is pale, increase energy gradually. If the edge is brown, fuzzy, or wider than the artwork, reduce power, increase speed, or check that the coating is not too thick.
How durable is the mark?
Once the mark is complete, brush or wipe away loose residue only after the workpiece has cooled. Avoid aggressive scrubbing during cleanup. For a fair durability check, test three areas: wipe with a dry cloth, wipe with a damp cloth and mild detergent, and make several firm passes with a fingernail or plastic tool.
A well-bonded mark on stainless steel can withstand normal handling and light cleaning. It is less resistant to abrasive pads, metal tools, strong solvents, and repeated outdoor weathering. Products used on workshop equipment, labels, or indoor fixtures are better candidates than items that will be sandblasted, polished, or exposed to constant industrial abrasion.
The coating itself is the first consumable to manage. Nozzle clogging, uneven pigment suspension, and dried material around the spray tip can cause inconsistent coverage. Store it as directed, keep the nozzle clean, and record the material, coat method, laser model, speed, power, and number of passes that produced a good result.
Who should buy it?
| User situation | Best choice | Reason |
|---|---|---|
| Occasional metal tags or gifts | Use marking spray with a diode laser | Lower equipment cost and adequate contrast for small batches |
| Frequent production work | Compare spray cost and cleanup with a dedicated metal-marking laser | Spraying, drying, masking, and cleaning add labour to every job |
| Very fine serial numbers | Use the smallest reliable test setting or a purpose-built metal marker | Thick or uneven coating can soften tiny characters |
| Large workpieces with limited ventilation | Prefer a cleaner marking method or improve extraction first | Overspray and fumes become harder to control as area increases |
| Highly reflective metals | Use only a compatible, enclosed laser setup | Reflection and heat behaviour create additional equipment risks |
Verdict
The xTool black laser marking spray is worthwhile when the goal is high-contrast metal identification without buying a dedicated fiber marker. Its strongest use case is clean stainless steel, where careful degreasing, a thin dry coat, accurate focus, and a small speed-power test can produce sharp, durable-looking results. It is less attractive for high-volume production, heavily abrasive applications, or users who cannot provide ventilation and reliable cleanup.
Buy it for the marking capability, not because it eliminates setup work. The spray improves the laser’s interaction with metal, but preparation and testing determine whether the finished piece looks professional.