
What's inside
- What Is Laser Engraving and How Does It Work?
- How Much Does a Laser Engraver Cost? Price Bands by Type
- The Hidden Costs: What the Machine Price Doesn’t Include
- Which Price Band Fits Your Situation?
- How to Use a Laser Engraver: The Basic Workflow
- Ownership Realities: What Wears Out and What Goes Wrong
- FAQ
- Related Guides
As an Amazon Associate I earn from qualifying purchases. This post may contain affiliate links at no extra cost to you.
A laser engraver costs anywhere from about $200 for a basic diode unit to $50,000+ for an industrial fiber machine — but for most woodworkers and hobbyists, the realistic answer is $400–$2,500 for the machine itself, plus another $200–$600 for ventilation, safety, and accessories. This guide breaks down what you actually pay at each level and what the full setup budget looks like before your first burn.
As an Amazon Associate we earn from qualifying purchases at no extra cost to you.


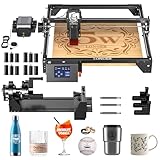
What Is Laser Engraving and How Does It Work?
Laser engraving uses a focused beam of light to vaporize or char the surface of a material, leaving a permanent mark. A small controller moves the laser head across the workpiece on X and Y axes, and software translates your image or text into a path the laser follows. Unlike a CNC router, nothing physically touches the material — which means no clamping force, no tool wear, and extremely fine detail.
There are three main laser types, and the type largely determines the price:
- Diode lasers — semiconductor lasers, typically 5–40W optical output. Great for wood, leather, and coated metals; can’t cut thick stock or mark bare metal well.
- CO2 lasers — glass or RF tubes, 40–150W+. The standard for cutting and engraving wood, acrylic, and glass at speed.
- Fiber lasers — 20–100W pulsed sources. Designed for metals and some plastics; mostly irrelevant for woodworkers.
How Much Does a Laser Engraver Cost? Price Bands by Type
Here’s what the market looks like in 2026, broken into realistic tiers:
| Tier / Type | Typical Power | Work Area | Machine Cost | Best For |
|---|---|---|---|---|
| Budget diode (e.g., Atomstack A6, entry xTool D1 class) | 5–10W optical | ~400 × 400 mm | $200–$450 | Learning, small signs, coasters |
| Mid-range diode (e.g., xTool S1, Ortur Laser Master 3, Sculpfun SF-A9) | 10–40W optical | 400–600 × 400–500 mm | $500–$1,800 | Side-hustle engraving, cutting up to ~10 mm plywood |
| Compact CO2 (e.g., xTool P2/P3, Glowforge-class) | 40–55W | ~500 × 300 mm | $3,000–$5,500 | Production batch work, thick acrylic, larger sheets |
| Open-bed CO2 / galvo hybrids (e.g., xTool F2 Ultra, OMTech 50–80W) | 50–100W | 600+ mm or conveyor-fed | $4,000–$9,000 | Small business, daily production |
| Industrial CO2 / fiber | 100W+ | 900+ × 600 mm | $15,000–$50,000+ | Manufacturing, signage shops |
The jump from a $600 diode to a $4,000 CO2 buys you roughly 4–6× faster cutting, the ability to run clear acrylic and thicker stock, and a fully enclosed chassis with better fume handling.
The Hidden Costs: What the Machine Price Doesn’t Include
The sticker price is typically 60–75% of your real startup budget. Here’s what the rest goes toward:
| Item | Typical Cost | Why You Need It |
|---|---|---|
| Ventilation / inline fan + ducting, or a fume extractor | $50–$400 | Burning wood and MDF produces smoke and VOCs; window-venting works, a filtration unit is needed where it can’t |
| Air assist pump (if not included) | $40–$120 | Blows air at the cut point — reduces charring and prevents flare-ups |
| Honeycomb bed + risers | $30–$100 | Supports material, protects the table, allows focus on thicker stock |
| Rotary attachment | $80–$300 | Essential for tumblers, rolling pins, chair spindles — the most common add-on purchase |
| Material starter stock | $50–$150 | Plywood, basswood, slate, tumblers — expect to ruin some while dialing in settings |
| Software | $0–$99/yr | Most machines ship with free software (xTool Creative Space, LaserGRBL); LightBurn (~$60–$99) is the popular paid upgrade |
| Safety: enclosure, extinguisher, glasses | $50–$200 | Open-frame diodes need OD6+ glasses; an enclosed machine plus a small extinguisher is cheap insurance |
Realistic all-in budgets:
- Hobbyist: $400 machine + ~$250 setup = roughly $650 to start engraving safely.
- Side business: $1,500 enclosed diode + ~$500 setup = around $2,000.
- Production CO2: $4,500 machine + ~$800 setup = $5,000+.
Which Price Band Fits Your Situation?
| Your Situation | Recommended Tier | Why |
|---|---|---|
| Curious beginner, occasional use, garage or spare room | $300–$600 diode | Low risk while learning focus, speeds, and material behavior |
| Selling personalized items (signs, gifts, tumblers) | $900–$1,800 enclosed diode | Faster throughput, enclosure means indoor use, rotary opens product range |
| Daily orders, thick material, acrylic products | $3,000–$5,500 CO2 | Speed pays for itself; 10 mm plywood in one pass vs. several |
| Marking bare metal parts or tools | Fiber, $3,000+ | Diodes and CO2 only mark coated/anodized metal |
A quick cost-per-use check: a $650 hobby setup used on 100 projects over two years costs $6.50 per project before materials — easy to justify. A $5,300 CO2 setup only makes sense if you’re billing for the time it saves.
How to Use a Laser Engraver: The Basic Workflow
Learning how to laser engrave follows the same five steps regardless of machine:
- 1. Prepare your design — create or import artwork in the control software; use vector files for cutting, high-contrast images for engraving.
- 2. Place and focus — set the material on the bed and set the laser’s focal height (usually a fixed gauge or autofocus). Wrong focus is the #1 cause of weak results.
- 3. Set power and speed — start from the manufacturer’s material preset, then run a small test grid. More power or slower speed = deeper mark.
- 4. Frame the job — run a low-power outline preview to confirm the engraving lands where you want it.
- 5. Run it — and stay — never leave a running laser unattended; small flare-ups on wood are common and a fast response prevents damage.
Ownership Realities: What Wears Out and What Goes Wrong
- Lens and mirrors get dirty fast. Smoke residue builds on optics and cuts power noticeably within weeks of regular use. Plan to clean the lens every 10–20 hours of runtime with isopropyl alcohol.
- Consumables are real. CO2 glass tubes are rated roughly 1,000–3,000 hours and cost $100–$400 to replace. Diode modules last longer (often 10,000+ hours claimed) but degrade gradually.
- Belts and rails wear first on cheaper machines — keep them clean and check belt tension monthly.
- MDF is harsh. It chars heavily and gums up optics; birch plywood and basswood are kinder starter materials.
- Budget for scrap. Expect to burn $50+ in test material learning each new substrate.
FAQ
How much does a laser engraver cost for a complete beginner?
Plan on $500–$700 total: a $300–$450 diode machine plus ventilation, glasses, and starter material.
Is a cheap $200 laser engraver worth it?
It’s fine for learning and small personal projects, but expect slow speeds, a smaller work area, and a weaker diode module. If you already know you’ll sell products, starting at the $800–$1,200 enclosed-diode level saves an early upgrade.
What’s cheaper to run — diode or CO2?
Diodes. They use less electricity, have longer-lived light sources, and need no tube replacements or water cooling (though you should budget $60–$150 for a chiller with a CO2 machine).