
What's inside
- What LaserPecker software includes
- LaserPecker software compatibility at a glance
- Supported file formats and their practical limits
- Mobile app versus desktop control
- Setup workflow: from file to finished engraving
- Decision guide: which workflow fits your situation?
- Ownership realities and common software mistakes
- Bottom line
As an Amazon Associate I earn from qualifying purchases. This post may contain affiliate links at no extra cost to you.
LaserPecker software is easiest to choose when you match the app or desktop program to your device, material, and job size: the mobile LaserPecker app is convenient for quick photo engraving and portable work, while desktop software gives you a larger preview, better file handling, and more practical control for repeated or detailed projects.
As an Amazon Associate we earn from qualifying purchases at no extra cost to you.

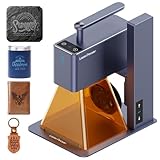


What LaserPecker software includes
LaserPecker’s software workflow generally has three parts: preparing artwork, sending it to the engraver, and controlling the job. Depending on the model, those tasks are handled through the LaserPecker mobile app, LaserPecker’s desktop design software, or a compatible third-party program such as LightBurn.
The mobile app is the normal starting point for compact models such as the LaserPecker 2 and LaserPecker 3. It is designed around a phone or tablet, Bluetooth connectivity, image adjustment, text layout, previewing, and basic machine controls. Newer or more capable models, including the LaserPecker 4 and LaserPecker 5, may support a wider desktop workflow and more advanced connection options, but exact support depends on the machine’s firmware and accessory package.
Software compatibility is therefore not determined by the brand name alone. Check the specific model, operating system, connection method, and firmware version before buying a computer program or rotary accessory.
LaserPecker software compatibility at a glance
| LaserPecker model or class | Typical working area | Common control route | Best suited to |
|---|---|---|---|
| LaserPecker 2 | About 100 × 100 mm | Mobile app; model-dependent desktop options | Small gifts, tags, photos, and portable projects |
| LaserPecker 3 | About 100 × 100 mm | Mobile app; supported desktop workflow on compatible setups | Fine-detail engraving on small workpieces |
| LaserPecker 4 | About 160 × 120 mm without expansion | Mobile app and supported desktop control | More material types and regular workshop use |
| LaserPecker 5 | Up to roughly 400 × 400 mm in expanded configurations | Model- and firmware-dependent app or desktop workflow | Larger signs, panels, batch work, and higher throughput |
These are useful planning figures rather than universal guarantees. Lenses, risers, rotary modules, safety enclosures, and expansion frames can change the usable area. A rotary attachment also changes the way dimensions are entered: the software may ask for object diameter, circumference, or a rotary scale rather than a simple width and height.
Supported file formats and their practical limits
LaserPecker workflows commonly accept raster images such as JPG, JPEG, and PNG, along with vector artwork such as SVG. Some versions and desktop workflows may also accept formats including DXF or other common design files. The exact import list can change between the mobile app and desktop software, so treat the import dialog for your model as the final authority.
Raster files: JPG, JPEG, and PNG
Raster files are made from pixels. They work well for photographs, shaded illustrations, wood grain effects, and grayscale artwork. The software normally converts the image into engraving dots or scan lines using a setting such as threshold, grayscale, dithering, or halftone.
The limitation is that enlarging a small image does not create detail. A 1,000-pixel-wide image placed at 100 mm produces approximately 254 pixels per inch, which is usually more than adequate for a small engraving. A 300-pixel image enlarged to the same width produces only about 76 pixels per inch, so edges may look soft or visibly stepped.
SVG and other vector files
Vectors are preferable for logos, lettering, outlines, and cut paths because lines are defined mathematically rather than by fixed pixels. They can usually be scaled without the same loss of edge definition. However, an SVG can contain unsupported elements such as masks, clipping paths, embedded fonts, transparency effects, or filled shapes that import incorrectly.
For reliable transfer, convert text to outlines, remove hidden layers, use simple fills and strokes, and inspect the imported result before starting the laser. A design that looks correct in a drawing program can still arrive with missing fonts or reversed fills.
Mobile app versus desktop control
| Task | Mobile app | Desktop software |
|---|---|---|
| Quick photo engraving | Fast and convenient | More screen space, better for correction |
| Text and simple layouts | Suitable for one-off items | Better for templates and repeated positioning |
| Complex vector artwork | Less comfortable on a small screen | Usually the better choice |
| Batch production | Acceptable for simple repeated jobs | Preferable for file organization and consistency |
| Machine setup | Convenient for Bluetooth pairing and previews | More practical for USB and long sessions |
The phone app wins when the job is small and visual: select a photo, crop it, adjust contrast, position it, preview the frame, and start. It also suits users who do not want to maintain a dedicated workshop computer.
Desktop control becomes more valuable when you are preparing SVG artwork, aligning several objects, storing production files, changing settings repeatedly, or working for hours. A large display makes it easier to spot gaps, overlapping paths, tiny text, and artwork outside the machine’s working area. If your preferred workflow depends on LightBurn or another third-party controller, confirm that the exact LaserPecker model is supported before purchase; compatibility may require a particular firmware version, cable, driver, or connection mode.
Setup workflow: from file to finished engraving
1. Confirm the machine and connection
Install the current LaserPecker app or the desktop software recommended for your model. Turn on the engraver, enable Bluetooth if using a phone, or connect the appropriate USB cable for desktop operation. Avoid pairing the machine simultaneously with several devices during initial setup, as this can make the wrong machine appear connected.
2. Update firmware before calibrating
Firmware updates can change device communication, accessory recognition, and available settings. Update before you spend time calibrating the work area. Afterward, restart both the machine and software if the new device does not appear immediately.
3. Import and simplify the artwork
Crop photographs tightly, remove unnecessary backgrounds, and convert text to outlines in vector files. For a first job, use a simple design with no fine lines below the material’s practical resolution. This separates software problems from material and focus problems.
4. Set the work area and focus
Enter the actual material dimensions, select the correct lens or attachment, and set the focus height specified for the machine. Use the preview or framing function to check all four corners. Framing is not a substitute for ventilation or an enclosure, but it prevents one of the most common mistakes: sending a correctly designed file to the wrong physical position.
5. Choose image processing and power settings
For photographs, compare grayscale and dithering on a scrap piece. For logos, try a clean vector fill or line treatment. Power, speed, passes, and interval interact: increasing power is not always the best way to darken wood, because excessive heat can widen lines, scorch edges, or create smoke staining.
6. Run a small test
A 20 × 20 mm test grid can reveal more than a full-size failed project. Test several speed and power combinations on the same material and finish. Record the winning settings with the material thickness, surface coating, lens, and software mode.
Decision guide: which workflow fits your situation?
| Your situation | Recommended workflow | Reason |
|---|---|---|
| Under 5 small jobs per month | Mobile LaserPecker app | Lowest setup overhead and sufficient controls |
| Weekly signs, logos, or templates | Desktop workflow | Easier file management and repeatable positioning |
| Mostly phone photos | Mobile app with raster files | Fast cropping, grayscale adjustment, and previewing |
| Mostly logos and lettering | SVG-capable desktop workflow | Cleaner scaling and more dependable alignment |
| Large panels or batch work | Model-specific desktop setup | Better screen space, connection stability, and expansion control |
Ownership realities and common software mistakes
The software itself has few consumables, but the total system does require care. Dust and smoke residue can affect the lens, air path, rails, and cooling openings. Clean according to the manufacturer’s instructions, keep the work surface flat, and do not assume a clear preview means the machine is optically clean.
Common failures include importing text with unavailable fonts, placing artwork beyond the real engraving area, forgetting to reverse artwork for certain transfer methods, using a rotary attachment with flat-bed dimensions, and starting a long job without a material test. Cloud or account features can also be inconvenient in a workshop with unreliable internet, so download the needed app, files, and firmware resources before an important job.
Laser safety remains separate from software safety. Use suitable eye protection where required, provide proper exhaust, and never engrave unknown plastics or materials that may release hazardous fumes. Software cannot identify every dangerous material automatically.
Bottom line
Choose the LaserPecker app if convenience, portability, and small photo or gift projects matter most. Choose a desktop-capable workflow if you need SVG precision, repeatable layouts, larger screens, or regular production. Before buying, verify the exact model’s working area, supported operating systems, file-import list, connection method, and compatibility with any third-party controller. Those details determine whether the software feels like a quick creative tool or a dependable part of a woodworking workflow.