What's inside
As an Amazon Associate I earn from qualifying purchases. This post may contain affiliate links at no extra cost to you.
In a small shop, the workbench location affects nearly everything: how far you carry lumber, where dust collects, how much wall space remains for storage, and whether two people can work safely at the same time. A bench along the wall saves floor space and is usually the better choice for a one-person shop. A freestanding bench gives access on all sides and handles larger assemblies better, but it consumes valuable circulation space.
The right decision depends less on the bench itself than on the work you do around it. Measure the shop, mark the bench footprint with painter’s tape, and leave the intended walkways in place for several days before building or buying anything.
As an Amazon Associate we earn from qualifying purchases at no extra cost to you.
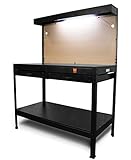


When a bench along the wall works best
A wall-side bench is efficient for hand-tool work, repairs, sharpening, small furniture parts, electronics, and general maintenance. The wall provides a natural place for shelves, pegboard, cabinets, and task lighting. It also prevents tools and materials from spreading into the main aisle.
A practical bench depth is 24 to 30 inches. Going deeper can make the back of the surface difficult to reach, especially if a tool cabinet or backsplash is installed. Leave at least 36 inches of clear space in front of the bench; 42 to 48 inches is more comfortable when you regularly handle long boards or use a vise.
Wall placement is not automatically space-efficient. A deep cabinet, dust hose, or open drawer can reduce the walkway to an unsafe pinch point. Keep drawers and cabinet doors from blocking the shop’s main exit, electrical panel, or machine controls.
The main weakness is limited access. Clamping a cabinet or repairing the back of an assembly may require pulling the work away from the wall. Long stock can also hit the wall, shelves, or nearby machines unless the bench is positioned to align with an open doorway or central aisle.
When a center bench earns its floor space
A freestanding bench is useful when you work on all sides of a project. It is especially valuable for assembling cabinets, trimming large panels, restoring furniture, or using a vise from different positions. You can clamp to any edge, walk around the work, and pass material through without constantly turning it.
The cost is circulation. Plan for at least 36 inches of clearance on every working side, and 42 to 48 inches where you will carry sheet goods, open drawers, or work with another person. A 30-by-72-inch bench can therefore require a usable area close to 10 by 12 feet once access is included.
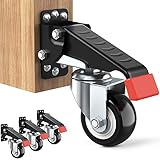
A center bench should be heavy or mechanically anchored. A light bench that slides when you plane or chisel is frustrating and can cause a workpiece to shift. Add a lower shelf or drawers for ballast, use locking casters if mobility matters, and avoid casters that raise the working height enough to make the bench uncomfortable.
| Factor | Along the wall | Freestanding in the center |
|---|---|---|
| Floor-space efficiency | Excellent; one side needs no access | Fair; clearance is needed on multiple sides |
| Access to the work | Limited at the back | Good from every direction |
| Tool storage | Easy to combine with wall cabinets and pegboard | Requires drawers, a shelf, or a nearby cabinet |
| Dust collection | Simple hose routing along the wall | Hoses can cross walkways and become trip hazards |
| Best for | Hand tools, repairs, compact shops | Assembly, large workpieces, two-sided access |
Dust collection, power, and lighting
Dust collection is easier at a wall bench because the hose can run along the wall or under the bench. A 2-1/2-inch hose works for many portable tools and small benchtop machines; larger stationary machines generally need a 4-inch line and a collector matched to that airflow. Do not assume a shop vacuum will adequately collect dust from a planer or table saw simply because an adapter fits.
At a center bench, route hoses and cords overhead, through a floor box, or from a ceiling drop. Never leave them stretched across the walking path. If you cannot route them cleanly, the center location will create a trip hazard every time you use the bench.
Install outlets above a wall bench rather than directly behind it, where plugs can push the bench forward. For a center bench, a ceiling-mounted power drop or a properly protected floor outlet is cleaner than a long extension cord. Use a shop vacuum dust separator if your work produces a lot of chips; it reduces filter loading but does not replace a suitable collector.
Use bright, even light rather than relying on a single ceiling fixture. A wall bench benefits from an adjustable LED task light mounted 18 to 24 inches above the surface, positioned so your head does not cast a shadow over the work. A center bench needs light from at least two directions to avoid shadows from your body and tools.
Storage and shop safety
Wall benches make vertical storage easy, but do not put heavy tools on shallow pegboard hooks above shoulder height. A falling drill or plane can injure someone and damage the tool. Use closed cabinets or a garage wall storage cabinet for heavy items, chemicals, and sharp blades.
Keep frequently used hand tools within one step of the bench. Storage that requires walking across the shop encourages tools to remain on the work surface, reducing usable area and increasing the chance of knocking something onto the floor. Leave at least 3 inches of clear bench edge where clamps can attach.
For either layout, keep a clear path at least 36 inches wide to the exit. Do not position the bench where a dropped workpiece could block the door. Put fire extinguishers where they can be reached without walking past a fire, and store oily rags in a listed metal container with a self-closing lid.
A practical decision rule
Choose the wall location if the shop is under roughly 120 square feet, you normally work alone, or most projects fit within the bench depth. It is cheaper to equip because the wall can carry shelves, lighting, and cabinets, and dust collection needs fewer awkward hose runs. A basic wall bench is also fine for occasional assembly; use folding supports or a separate assembly table when large projects arise.
Choose a freestanding bench if you routinely need to reach the back of projects, clamp on multiple sides, or assemble pieces larger than the bench. Before committing, confirm that you can open every drawer, carry a full sheet through the shop, and reach the dust collector shutoff without squeezing between obstacles.
For many small shops, the best compromise is a wall-side primary bench plus a compact rolling assembly table. The fixed bench handles daily handwork and storage, while the rolling table provides temporary access on all sides when needed. Add heavy-duty locking casters only if the table remains stable under load. This arrangement costs less floor space than a permanent center bench and avoids forcing every task into one layout.