What's inside
As an Amazon Associate I earn from qualifying purchases. This post may contain affiliate links at no extra cost to you.
Hand planes are heavy, sharp, and easy to damage when they are stored in a pile. A No. 4 smoothing plane can weigh 5 to 7 pounds, while a jointer plane may approach 10 pounds and occupy more than 2 feet of bench space. Good storage keeps the soles from hitting metal, protects blades from shop dust and humidity, and puts the planes within reach without sacrificing valuable workbench area.
The best solution depends on how many planes you own, how often you use them, and whether your shop has a permanent bench or a shared work surface. A simple rack is often enough, but the storage should support the plane securely and keep its cutting edge away from anything that can nick it.
As an Amazon Associate we earn from qualifying purchases at no extra cost to you.

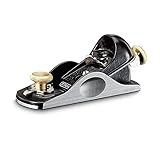
What Good Plane Storage Needs to Do
Store hand planes on their sides or with the sole facing upward. Do not rest them blade-down on a rough shelf. Even a small screw head, chip of grit, or stray nail can dent the sole and affect how the plane cuts. A blade-down position also puts unnecessary pressure on the iron and can make the plane unstable.
Give each plane its own space. Planes stacked together are likely to collide when one is removed, and a heavy plane can damage a smaller block plane. Allow at least 1 inch of clearance between adjacent planes. For long jointer planes, measure the actual tool before building the rack; many require 26 to 30 inches of vertical or horizontal clearance.
The storage should also control moisture. Cast iron will rust quickly in an unheated shop when relative humidity stays above roughly 60 percent. Keep planes away from concrete floors, exterior walls that sweat, and areas directly below a dust collector exhaust. A light coat of paste wax or a purpose-made rust inhibitor on the sole is cheap insurance, but wipe excess wax away before use.
Wall-Mounted Plane Racks
A wall rack is the most efficient choice for a permanent woodworking bench. Mount it above or beside the bench so the plane can be lifted out with one hand. Use a hardwood backer at least 3/4 inch thick and attach it to wall studs or substantial shop framing. Drywall anchors are not adequate for a rack loaded with several cast-iron planes.
The simplest design uses pairs of hardwood pegs or rails. The plane rests on its side, with the cheek against the backer and the sole facing outward. Round over the contact edges so they do not scratch the tool. A 1/4-inch leather, cork, or felt pad on the support rail helps prevent dents and keeps fine dust from acting like abrasive paste.
For safety, keep the lowest plane at least 12 inches above the bench if the rack is over a work surface. This leaves room for stock and reduces the chance of striking a sharp iron with a board. If children or visitors can reach the shop wall, use a rack with a retaining lip or door rather than open pegs.
A wall rack is a good place to use woodworking tool storage wall racks, but check the mounting hardware and load rating rather than assuming a decorative rack will handle cast iron.
Under-Bench and Cabinet Storage
Cabinet storage protects planes better than an open rack, especially in a shop where sanding dust is common. Build shallow vertical dividers inside a cabinet so each plane stands on its side. Line the bottom with 1/8-inch cork or closed-cell foam. Avoid thick soft foam that can hold moisture against bare metal.
Leave roughly 2 inches of clearance above a plane’s highest point. That makes removal easier and prevents a plane from being dragged against the shelf above it. A cabinet depth of 10 to 12 inches is enough for most bench planes, but a jointer plane may require 14 inches or more depending on the handle design.
Use a full-extension drawer only when the drawer is properly built. A loaded drawer can become surprisingly heavy: six planes at 6 pounds each, plus the drawer, may exceed 45 pounds. Use heavy-duty slides rated for at least 100 pounds and attach them to a rigid cabinet. For a small collection, a fixed shelf with dividers is cheaper and more reliable.
| Storage method | Best for | Main advantage | Main drawback |
|---|---|---|---|
| Open wall rack | Frequent use and small shops | Fast access and minimal bench footprint | More exposed to dust and humidity |
| Vertical cabinet | Valuable planes or dusty shops | Strong protection from impact and debris | Uses cabinet space and costs more to build |
| Under-bench shelf | Budget storage and occasional use | Simple, inexpensive, and sturdy | Requires bending and is easier to overlook |
| Dedicated drawer | Organized collections with limited wall space | Clean access and enclosed storage | Heavy-duty hardware is necessary |
Simple Shelf and Bench Storage
The cheapest workable option is a shelf under the bench with individual wood stops. Set the planes on their sides, separate them with 1/2-inch plywood dividers, and screw a front lip to keep them from sliding out. This is fine for a few working planes that already have stable, protected soles.
Do not store planes directly on a concrete floor or on a damp plywood shelf. Raise the shelf at least 4 inches above the floor and seal unfinished plywood with paint, polyurethane, or shellac. If the shop floods occasionally, move the storage higher; a shelf can protect against dust but not standing water.
For planes used only occasionally, add inexpensive cotton or canvas sleeves. The sleeve should be breathable, not airtight plastic, which can trap condensation. A padded case is useful for transport but is unnecessary for daily shop storage and can conceal early rust.
Organizing and Maintaining Stored Planes
Arrange planes by size or task: block planes together, smoothing and jack planes together, and long jointers at one end. Labeling the rack helps prevent returning a plane to the wrong slot. Store replacement irons and cap irons in small drawers or bins, not loose beside the planes where they can scratch the soles.
Before putting a plane away, brush off chips and wipe the sole and sides with a clean cloth. Keep a small woodworking rust preventive wax nearby if the shop is humid. Check the tool monthly during wet seasons. Orange spotting around the mouth, iron, or adjustment hardware is a sign that the storage area needs better ventilation or a dehumidifier.
Do not place hand planes beside a belt sander, grinder, or open dust-collection outlet. Fine abrasive dust settles into adjustment threads and can work under the cap iron. Good shop dehumidifier control is often more effective than repeatedly cleaning surface rust. For most home shops, a rack or cabinet combined with relative humidity between 40 and 55 percent provides dependable protection.
Choosing the Right Setup
Build an open wall rack if you use two to five planes every day and have solid wall framing near the bench. Choose a cabinet when dust, children, or humidity are bigger concerns than instant access. Use an under-bench shelf when cost matters most; it is perfectly adequate if the planes are separated, raised off the floor, and checked regularly.
Whatever design you choose, test it with the heaviest plane before filling it. Pull each tool straight out without scraping neighboring planes, confirm that no sharp iron can catch clothing, and make sure the rack does not flex. A storage system that takes ten seconds longer to use but prevents one dropped jointer plane is doing its job.