What's inside
As an Amazon Associate I earn from qualifying purchases. This post may contain affiliate links at no extra cost to you.
A temporary workshop bench rarely has a convenient light above it. You may be working on folding sawhorses, a sheet of plywood, or a bench that moves between the garage and driveway. In that situation, a clamp-on light is more useful than a permanent ceiling fixture because it can follow the work, pack away quickly, and illuminate the front of a project without rewiring the shop.
The best setup is usually a broad LED work light with a strong clamp, adjustable head, and a cord long enough to reach an outlet without crossing the work area. Small gooseneck lamps have their place, but they are better for inspection, soldering, and detail work than for lighting an entire temporary bench.
As an Amazon Associate we earn from qualifying purchases at no extra cost to you.
![[ETL Listed] Cable Matters Portable LED Clamp Light for Workshop, 6ft](https://m.media-amazon.com/images/I/41c-WwwwSOL._SL160_.jpg)


What to Look For in a Clamp-On Workshop Light
Clamp capacity comes first. A light that claims to open to 2 inches may not grip securely on a rough 2-inch bench edge, especially if the clamp pad is shallow. Look for a clamp with at least a 2-inch opening for ordinary lumber and a padded, fairly deep jaw. A clamp that applies pressure through a metal screw is more dependable than a spring clip on a vibrating bench.
Choose LED lighting. LEDs produce much less heat than old halogen work lights and are less likely to scorch a wood edge or soften a plastic clamp. For general bench work, 1,000 to 2,000 lumens is a practical range. Around 1,000 lumens suits a small 2-by-4-foot bench; 1,500 to 2,000 lumens works better when the light is mounted behind the project or the room has poor ambient lighting.
Color temperature affects detail. A lamp around 4,000K to 5,000K gives a neutral-to-cool white that makes pencil marks, sawdust, and finish defects easier to see. Very cool 6,500K lamps can look harsh and create glare on glossy surfaces. If you paint or inspect finishes, a high color-rendering rating—ideally CRI 80 or higher—is worth considering.
Use a diffuser when possible. Bare LED chips create sharp shadows and glare. A frosted diffuser spreads the light across the bench, although it may reduce peak brightness. An adjustable shade is useful because you can aim light at the work without shining it directly into your eyes.
The Best Clamp-On Light Types
| Light type | Best use | Advantages | Limitations |
|---|---|---|---|
| LED shop-light bar with clamp | General woodworking and assembly | Wide, even coverage; low heat | Bulkier and less convenient to aim |
| Gooseneck LED task light | Small parts and detail work | Precise positioning; compact | Small illuminated area; can droop |
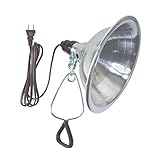
| Reflector work light with LED bulb | Low-cost temporary lighting | Cheap, replaceable bulb, familiar clamp | Harder shadows and more glare |
| Rechargeable clamp work light | Outdoor or unfinished spaces | No cord across the floor | Limited runtime; must be recharged |
For most temporary benches, start with a clamp-on LED shop light. A bar-shaped fixture gives better coverage than a narrow desk lamp and does not need to be positioned exactly over the cutting line. If you mainly repair small hardware, electronics, or tool parts, a gooseneck clamp task light is less expensive and easier to move.
Mounting the Light Without Creating Problems
Clamp the fixture to the rear edge or a side rail, not to the front edge where your body and materials will hit it. Put a scrap of plywood or rubber under the clamp pad if the bench has a soft finish, thin plywood, or a fragile folding table. This spreads the load and prevents dents.
Before switching it on, push and pull the lamp in several directions. A light that shifts 1/2 inch when bumped will eventually swing into the project or shine into your eyes. On a folding bench, check that the clamp is not attached to a section that moves when the legs flex. If the bench has no suitable edge, attach a short 2-by-4 block with two clamps and mount the light to that block.
Keep the power cord behind the bench whenever possible. A cord crossing the front edge is a snag hazard, particularly when handling long boards. Use a cord with enough slack for the lamp’s movement, but do not leave a large loop where it can catch a hand or tool. A simple cable tie or hook on the rear leg keeps the cord controlled.
Brightness, Shadows, and Glare
More lumens do not automatically mean better visibility. A very bright, narrow beam can leave the sides of a cut line in darkness and create glare on metal. For woodworking, aim the light from the opposite side of your dominant hand: a right-handed user will often get fewer hand shadows with the light on the left rear corner.
For close inspection, place the lamp 12 to 24 inches from the work and aim it across the surface rather than straight down. Raking light reveals dents and scratches, but it also exaggerates sawdust. For layout and assembly, raise the fixture and aim it downward at roughly 30 to 45 degrees. If two sides of a project need illumination, two modest lights are usually more useful than one extremely bright lamp.
Corded Versus Rechargeable
A corded light is the better value for a bench that stays near an outlet. It runs indefinitely, costs less per hour of use, and avoids the gradual battery decline common in inexpensive rechargeable lights. The trade-off is a trip hazard and less freedom to move the bench.
Rechargeable lights make sense for driveways, sheds without power, or quick jobs where setting up an extension cord is inconvenient. Check the claimed runtime at full brightness, not the lowest setting. Four hours at reduced output may translate to closer to two hours at maximum brightness. A rechargeable clamp work light is convenient, but keep a charging routine; a dead light is useless when a project is halfway assembled.
Workshop Safety Checks
Do not use a clamp light as a substitute for proper room lighting around a table saw, miter saw, or router. You need enough general illumination to see cords, guards, and the floor. Keep the fixture outside the tool’s moving envelope, and make sure a falling board cannot strike it.
Dust is another failure point. Fine dust can settle on vents and heat sinks, reducing cooling. Unplug the light before brushing or vacuuming it, and avoid blowing compressed air directly into the housing unless the manufacturer allows it. Inspect the cord for cuts whenever you move the bench. If the clamp slips, the housing cracks, or the cord becomes hot, retire the light rather than improvising a repair.
When the Cheap Option Is Fine
A basic reflector clamp light with an LED bulb is perfectly adequate for occasional sanding, glue-ups, and garage repairs. It is inexpensive, the bulb is replaceable, and a failed fixture does not cost much to replace. Spend more on a purpose-built LED bar or rechargeable unit when you need even coverage, frequent repositioning, outdoor portability, or a clamp that will survive daily use.
For a temporary bench, the sensible purchase is usually a dimmable or adjustable LED fixture in the 1,000-to-2,000-lumen range, with a padded screw clamp and a diffuser. That combination handles ordinary assembly and woodworking without adding much bulk, heat, or setup time.