
What's inside
As an Amazon Associate I earn from qualifying purchases. This post may contain affiliate links at no extra cost to you.
For most repeatable workshop jobs in 2026, the best CNC laser etching machine is an enclosed diode model such as the xTool S1 for wood, leather, and occasional coated metal, while a CO₂ machine such as the OMTech Polar or Glowforge Pro is the better choice for frequent acrylic, glass, and larger production work.
“CNC laser etching” usually means a computer-controlled laser engraver that moves over a programmed X-Y area, rather than a conventional router using a cutting bit. The important buying distinctions are not only laser wattage: work area, positioning behavior, material compatibility, enclosure and ventilation, software, assembly time, and how consistently the machine can repeat a job all matter more in a woodworking shop.
As an Amazon Associate we earn from qualifying purchases at no extra cost to you.


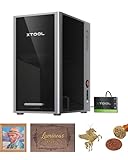
Quick comparison of leading CNC-style laser etchers
| Machine | Laser type | Working area | Rated power | Positioning or detail specification | Typical setup | Best suited to |
|---|---|---|---|---|---|---|
| xTool S1 | Enclosed diode | 498 × 330 mm | 10, 20, or 40 W | Fine engraving capability; camera-assisted positioning on selected configurations | About 30–60 minutes | Wood signs, boxes, leather, coated metal, repeatable small-batch work |
| Atomstack A20 Pro | Open-frame diode | 400 × 400 mm | 20 W optical output | Manufacturer-listed spot size around 0.08 × 0.1 mm | About 45–90 minutes | Budget wood engraving and larger flat panels |
| Ortur Laser Master 3 | Open-frame diode | 400 × 400 mm | Up to 20 W optical output, configuration dependent | Commonly specified around 0.08 × 0.1 mm spot size | About 45–90 minutes | Experienced users wanting a modifiable machine |
| OMTech Polar | Enclosed CO₂ | 500 × 300 mm | 50 W | Manufacturer-listed accuracy commonly around 0.01 mm | About 1–3 hours, including exhaust setup | Frequent acrylic, plywood, glass, rubber, and production work |
| Glowforge Pro | Enclosed CO₂ | 495 × 279 mm | 45 W | Camera-based alignment; fine-detail performance depends on material and settings | About 30–60 minutes, plus ventilation | Users prioritizing guided software and simple workflows |
Specifications vary by regional package and revision, so confirm the exact configuration before purchasing. A quoted spot size is not the same thing as whole-machine accuracy: belts, frame rigidity, lens cleanliness, focus, acceleration, and material movement can all affect the finished part.
Which machine fits your workshop?
| Your situation | Strongest choice | Why | Main compromise |
|---|---|---|---|
| Budget under roughly $700 and mostly wood | Open-frame 10–20 W diode | Low entry cost and a useful 400 × 400 mm class bed | Requires a proper enclosure, extraction, and more manual alignment |
| Beginner with limited floor space | Enclosed diode such as xTool S1 | Compact, cleaner workflow and safer access control than an open frame | Slower or less capable on clear acrylic and thick transparent materials |
| Weekly signs, personalized boxes, or batches | 20–40 W enclosed diode | Good wood throughput, repeatable fixturing, and manageable operating cost | Still not a universal cutting machine; thick stock may need multiple passes |
| Frequent acrylic, glass, or rubber work | 40–50 W enclosed CO₂ | CO₂ wavelength is much better suited to these non-metallic materials | Higher purchase cost, ventilation requirements, and tube maintenance |
| Large production pieces | CO₂ machine with pass-through capability | Allows longer panels than the nominal bed size | Needs careful registration and a dedicated, ventilated location |
Diode versus CO₂: the material decision
A diode CNC laser etching machine is usually the sensible woodworking choice. Blue diode lasers engrave and cut natural wood, plywood, bamboo, leather, slate, and many dark or painted surfaces. They are relatively efficient, inexpensive to replace, and commonly available in powers from 5 W to 40 W optical output.
Diodes are less versatile with clear acrylic and glass because those materials transmit much of the blue laser’s light. A diode can mark some glass when coated or treated, but it is not the same as directly engraving glass with a CO₂ system. Bare aluminum and stainless steel also generally need a marking spray, anodized coating, or a dedicated fiber laser for dependable results.
A CO₂ CNC laser marking machine is the better all-rounder for non-metallic industrial materials. It can engrave and cut wood, acrylic, cardboard, rubber, leather, and glass. However, a CO₂ tube is a consumable component, mirrors and lenses need alignment or cleaning, and the machine must have suitable exhaust. For a hobbyist engraving a few wooden signs each month, those maintenance demands may outweigh its material advantages.
Accuracy, repeatability, and usable work area
Manufacturers often quote resolutions such as 1,000 DPI or spot sizes below 0.1 mm. These figures describe possible detail, not guaranteed dimensional accuracy. For joinery templates, engraved scale markings, or parts that must fit one another, repeatability is more important than the smallest advertised dot.
Before buying, check whether the machine has:
- A rigid frame with square X and Y rails.
- Adjustable belt tension and accessible drive components.
- Fixed-focus or reliable autofocus behavior.
- Material stops or a fixture system for returning stock to exactly the same position.
- Camera alignment that remains calibrated after moving the machine.
- Software support for repeated jobs, arrays, offsets, and saved material presets.
For example, a 300 × 300 mm sign can be repeated efficiently with a corner jig, even on a machine whose camera is only approximate. A larger bed does not automatically produce more accurate work; it can actually expose frame flex and belt errors. If your usual blanks are 12 × 18 inches, a 400 × 400 mm bed may be more practical than a narrow 600 mm axis.
Setup time is more than assembling the frame
Expect an open-frame diode to require frame assembly, squaring, belt tensioning, limit-switch checks, laser-height adjustment, air-assist installation, and enclosure or exhaust planning. The advertised assembly time often excludes those safety steps.
An enclosed diode normally reaches its first test engraving faster, but you still need to install the software, focus the laser, connect air assist, check the emergency stop, and verify that the exhaust hose is not leaking into the room. A CO₂ machine adds water cooling, mirror alignment, exhaust routing, and sometimes a dedicated electrical circuit.
A reliable first-day setup sequence
- Choose the location first. Keep the machine on a rigid, level bench with clearance for the lid, exhaust hose, and maintenance access.
- Square the frame. Measure both diagonals; adjust until they match. A skewed frame produces rectangles that are subtly out of square.
- Install air assist and extraction. Air assist reduces flare-ups and lens contamination, while extraction removes smoke and odor. Never treat a room fan as adequate fume control.
- Set focus on the actual stock. Focus changes with material thickness and is one of the most common causes of weak or blurry engraving.
- Run a small material test grid. Vary speed and power rather than guessing. Save the successful settings with the material name and thickness.
- Create a physical jig. A plywood corner stop or removable fence makes repeatable batches faster than camera alignment alone.
- Measure the result. Check a test square with calipers and inspect the edges before committing to a full sheet.
Ownership costs and what wears first
For diode machines, the first problems are commonly smoke buildup on the protective lens, loose belts, dirty rollers, damaged air-assist tubing, and a diode module that gradually loses cutting performance. Cleaning frequency depends on the wood and exhaust system, but inspecting the lens after every few jobs is a sensible habit.
CO₂ machines add water temperature management, tube aging, mirror cleanliness, and alignment. The laser tube is not an indefinite-life component; replacement cost varies widely by size and quality. A machine that runs at moderate power with good cooling generally places less stress on the tube than one operated continuously at maximum output.
Consumables also include masking tape, exhaust filters where installed, honeycomb beds, lens windows, and sacrificial spoilboards. A realistic general market budget is roughly $300–$900 for an entry diode setup, $900–$2,500 for a more capable enclosed diode package, and $2,000–$5,000 or more for an enclosed CO₂ system with cooling and extraction. Accessories can add several hundred dollars.
As a simple workload calculation, suppose a 20 W diode takes eight minutes to engrave one $6 wooden blank and uses $0.40 of masking, cleaning supplies, and spoilage allowance. At 100 blanks, consumables and blanks total about $640 before labor and machine depreciation. The useful question is therefore not just “what is the cheapest CNC laser etching machine?” but whether its bed size and cycle time reduce handling enough to justify the price difference.
Bottom line
Choose an enclosed 20–40 W diode for most woodworking personalization, signs, boxes, and repeatable small-batch jobs. Choose an open-frame diode only when low cost and modification flexibility matter more than convenience and built-in safety. Choose an enclosed CO₂ CNC laser marking machine when acrylic, glass, rubber, or higher-volume cutting is central to the business. Whatever the laser type, prioritize a rigid frame, dependable focus, air assist, extraction, and a simple jig: those features usually improve real workshop results more than an impressive resolution number.