What's inside
As an Amazon Associate I earn from qualifying purchases. This post may contain affiliate links at no extra cost to you.
A long, narrow garage needs a lighting plan that follows the room’s shape. One bright fixture in the center may make the garage look well lit, but it leaves the walls, benchtop edges, and workpiece faces in shadow. The better approach is layered lighting: bright, evenly spaced ceiling fixtures for general illumination, separate task lights at the bench and machines, and enough side light to reveal defects and dust.
As an Amazon Associate we earn from qualifying purchases at no extra cost to you.


Start With the Right Light Level
For general workshop work, aim for roughly 50 to 75 lumens per square foot. A garage used for fine woodworking, wiring, sharpening, or finishing is better at 75 to 100 lumens per square foot. For example, a 12-by-24-foot garage is 288 square feet. That puts the general-lighting target between 14,400 and 21,600 lumens.
Do not confuse a fixture’s advertised wattage with its useful output. LED shop lights commonly produce between 4,000 and 8,000 lumens each. Four 5,000-lumen fixtures would provide 20,000 lumens before losses from dirt, aging, and poor placement. That is a sensible starting point for a 12-by-24-foot workshop.
Light-colored walls and ceilings improve the result. White or pale gray surfaces reflect light back into the room, while dark rafters, shelves, and cabinets absorb it. If your ceiling is unfinished and dark, plan on adding about 15 to 25 percent more light.
The Best Ceiling Layout
For most long garages, use two continuous rows of LED fixtures running the length of the room. Place the rows about 3 to 4 feet in from the side walls, or directly over the main work zones if cabinets occupy the walls. Keep the fixtures parallel with the long dimension so light is distributed evenly from the garage door to the back wall.
Fixture spacing depends on ceiling height and beam spread. With an 8-foot ceiling, space fixtures about 4 to 6 feet apart along each row. With a 10- or 12-foot ceiling, use wider-beam fixtures or reduce the spacing. A common failure is placing fixtures only above the walking aisle. The center will be bright, but a board held at the bench blocks light from reaching the cut line.
For a 12-by-24-foot garage with an 8-foot ceiling, a practical layout is eight 4-foot LED fixtures: four in the left row and four in the right. Staggering the fixtures between rows can reduce dark bands. Alternatively, use four 8-foot fixtures if they fit the ceiling structure and are easy to service.
| Garage size | Typical general-light target | Practical fixture starting point |
|---|---|---|
| 10 × 20 feet | 10,000–15,000 lumens | Four 4-foot LED fixtures |
| 12 × 24 feet | 14,400–21,600 lumens | Six to eight 4-foot fixtures |
| 14 × 28 feet | 19,600–27,400 lumens | Eight to ten 4-foot fixtures |
These are starting points, not a substitute for checking the actual room. Open shelves, a tall dust collector, and a vehicle parked inside can create shadows that require another fixture or a task light.
Choose Fixtures for Workshop Conditions
Buy LED fixtures rated around 4,000 to 5,000 Kelvin. This neutral-to-cool range makes pencil marks, wiring colors, scratches, and finish defects easier to see without the harsh blue cast of very high color temperatures. A color rendering index of 80 or higher is adequate for general work; 90 or higher is worthwhile near a finishing bench or paint-matching area.
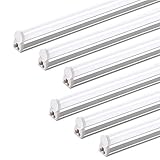
Linkable linear shop lights are inexpensive and easy to install, making them a good choice when the garage is dry and the ceiling is accessible. Hardwired LED strips or surface-mounted commercial fixtures cost more, but they usually have better housings, cleaner wiring, and more reliable switches.
For a dusty shop, look for enclosed or gasketed fixtures rather than exposed LED boards. Dust buildup on a hot driver or circuit can shorten its life. No fixture is truly dustproof unless it has the appropriate rating, so keep the housing clean and avoid placing it directly above a sanding station.
Compare total cost, not just the fixture price. A cheap plug-in light is fine for a temporary setup or a small woodworking bench. For a permanent layout, the cost of extension cords, damaged plugs, and awkward switches can outweigh the savings. Linkable LED shop lights are a reasonable middle ground for many garages.
Add Task Lighting at the Bench
Ceiling lighting should not be expected to handle detailed work. Install a separate task light at each primary station: workbench, drill press, sharpening area, assembly table, and finishing bench. Position the light so your head and arms do not cast a shadow over the work.
For a right-handed user, a lamp on the left side of the bench often keeps the hand from blocking the work. That is not universal; adjust it to your working position. An adjustable arm is more useful than a very bright fixed lamp because it lets you move the light close to a joint, blade, or measurement mark.
Use a high-CRI LED task lamp for finishing, inspection, and electronics. For rough carpentry and assembly, a cheaper 4,000- to 5,000-K lamp is usually enough. A clamp-on high-CRI LED workbench lamp is often the best first purchase because it can move between stations.
Machine tools need special attention. A drill press can hide the bit from a ceiling fixture, and a bandsaw table can shade the blade. Mount a compact task light beside—not directly in front of—the blade or chuck. Protect cords from moving parts and use flexible conduit or a clipped cable route where necessary.
Control Glare and Electrical Problems
Divide the lighting into at least two circuits or switched zones: one for the front half and one for the rear half of the garage. A third switch for task lighting is useful. This lets you light the bench without illuminating an empty storage area, and it provides a backup if one circuit fails.
Avoid aiming bare fixtures at polished metal, glossy finishes, or your normal line of sight. Glare can be as disabling as darkness. Frosted diffusers usually produce a more comfortable shop, though they may reduce measured output slightly. If your eyes feel strained after an hour, the problem may be glare or flicker rather than insufficient brightness.
Use fixtures with low-flicker drivers. Flicker can be distracting and may create a strobing effect around rotating tools, making a blade or chuck appear slower or stopped. Do not rely on that visual effect as a safety system. Shut off and unplug machinery before adjusting it.
Installation and Maintenance
Mount fixtures securely to ceiling joists, strut, or rated anchors. In a garage with an overhead door, keep lights clear of the door tracks, opener, and moving panels. Leave enough access to replace a fixture or driver without dismantling shelving.
Keep lighting separate from dust collection and tool cords where possible. A tripped breaker should not leave the room dark while a saw is running. Put switches near the entry, and consider a second switch by the house door if the garage has one. Clean lenses every few months; a layer of fine dust can reduce useful light substantially.
Finally, test the layout with your largest tools in place. Stand at the bench, hold a board at the saw, and inspect the floor around the dust collector and storage cabinets. If you see a strong shadow where you work, move or add light there rather than simply increasing the brightness everywhere. A well-spaced, switched, low-glare layout is safer and more useful than a few extremely powerful fixtures.