What's inside
As an Amazon Associate I earn from qualifying purchases. This post may contain affiliate links at no extra cost to you.
A modular workbench system earns its floor space when your workshop has to do more than one job. The same bench may support cabinet assembly on Monday, metalwork on Wednesday, and a vehicle repair project on Saturday. A fixed, heavy bench is excellent at staying put, but it can make dust collection, material handling, and access to wall storage awkward.
The best systems let you change the layout without rebuilding the shop. Look for interchangeable tops, locking casters, removable storage, and enough stiffness for the work you actually do. A bench that rolls easily but flexes under a hand plane is not modular in a useful way.
As an Amazon Associate we earn from qualifying purchases at no extra cost to you.
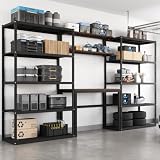


What to Look For in a Modular Workbench
Start with the work surface. A 24-inch-deep top suits many garages and leaves a usable aisle behind you. A 30- to 36-inch depth is better for cabinet assembly, but it consumes floor space quickly. For most home shops, a 60- to 72-inch-wide bench is large enough for common projects without becoming difficult to move.
Stiffness matters more than advertised weight capacity. A bench should not rack when you push sideways or clamp near a corner. Steel frames with diagonal bracing usually resist racking better than inexpensive bolt-together shelving frames. A 1.5-inch-thick hardwood or laminated top is a practical target. MDF is inexpensive and flat, but its edges crumble under repeated clamping unless you protect them with hardwood or metal.
Check the height before buying. Around 34 to 36 inches works for general assembly and power tools. Fine detail work is more comfortable at 38 to 40 inches, while hand-planing benefits from a lower surface, often 30 to 34 inches. Adjustable legs are useful if more than one person uses the shop, but they add joints that can loosen.
For a flexible setup, consider a modular workbench system with common mounting dimensions. Proprietary accessories can be convenient, but they become expensive if a replacement shelf, vise plate, or connector is only available from one supplier.
The Main System Types
| System type | Best use | Strengths | Limitations |
|---|---|---|---|
| Fixed steel-frame bench | Heavy assembly and hand tools | Strong, stable, often affordable | Hard to relocate; storage layout is less flexible |
| Rolling modular bench | Shared garage or changing work zones | Moves for cleaning, vehicles, or long stock | Casters can reduce stability and raise the cost |
| Workbench-and-cabinet system | Organized tool storage and repeatable setups | Drawers, cabinets, matching accessories | Heavier, pricier, and often tied to one ecosystem |
| Folding or portable bench | Small shops and temporary work | Stores compactly and is easy to carry | Limited clamping, lower capacity, more flex |
| DIY modular frame | Custom layouts and tight budgets | Easy to size around tools and walls | Requires accurate construction and finish work |
Casters, Locks, and Stability
Rolling benches are only useful if they roll when you want and behave like fixed benches when you do not. Four swivel casters make a cart maneuverable, but it can drift while you work. Two swivel casters and two fixed casters track better over a longer distance. A retractable caster kit, which lifts the bench onto leveling feet, offers the best compromise for heavy woodworking.
Do not judge a caster by its diameter alone. Six-inch wheels cross thresholds and extension cords more reliably than 3-inch wheels, but they raise the top and may increase tipping risk. Each caster should have a realistic load rating above one-quarter of the fully loaded bench weight. If the bench weighs 300 pounds loaded, four 100-pound casters provide little margin once a heavy vise or a sideways impact is involved.
Locking the wheel is not the same as stabilizing the frame. Wheel locks stop rolling but may still allow rocking. Leveling feet, brakes that lock the swivel, or a design that lifts off the casters will produce a more dependable work surface. Test the bench with a firm sideways push before installing a vise.
Storage, Dust Collection, and Services
Open shelves are cheap and hold bulky tools, but they collect dust and encourage piles. Drawers cost more and take longer to build, yet they keep measuring tools, router bits, and fasteners visible and protected. Leave at least 25 percent of your storage capacity empty at first. A completely full system becomes difficult to reorganize.
Plan dust collection before bolting cabinets together. Keep a central aisle at least 36 inches wide, and aim for 42 to 48 inches where you regularly handle sheet goods. Put dust hoses and electrical cords where a rolling module will not crush them. A 4-inch dust hose needs a generous bend radius; forcing it around a tight cabinet corner restricts airflow and increases clogging.
For a shop with several machines, install 4-inch dust hose and blast gates so each movable station can connect without dragging a long hose across the floor. A modular bench is not successful if its dust connection becomes a trip hazard.
Top Materials and Tool Mounting
A replaceable top is one of the most valuable modular features. Use MDF for a low-cost assembly surface, plywood for better screw holding, or laminated hardwood for durability and hand-tool work. A sacrificial hardboard layer is practical if glue, paint, and metal chips will damage the main top.
Mount tools through a replaceable plate rather than drilling directly into the bench whenever possible. Router tables, small vises, grinders, and sharpening stations can then move between modules. Use through-bolts with washers for a vise. Wood screws driven into the edge of MDF eventually loosen, especially when the vise is used for bending or heavy filing.
For frequent reconfiguration, look for a workbench clamp and mounting plate system. These are convenient for lighter tools, but they are not a substitute for bolting down a metalworking vise or bench grinder.
Lighting and Safety in a Reconfigurable Shop
Moving benches can move shadows. Use ceiling fixtures for general light and add an adjustable task light over the main work zone. Around 500 to 1,000 lumens of task lighting is a useful range for assembly and inspection; brighter is not always better if the fixture creates glare on a polished surface.
Keep at least 3 feet of clearance around rotating tools and leave a clear path to the door. Lock casters before using a table saw, planer, or grinder. Secure tall storage modules to the wall even if they are intended to move; a loaded cabinet can tip when pulled over a cord or floor joint. Keep fire extinguishers, first-aid supplies, and the electrical disconnect accessible after the layout changes.
A cheaper fixed bench is fine when your shop has one purpose, the floor plan is settled, and you need maximum stiffness per dollar. Pay extra for modular construction when you regularly park a vehicle in the space, work on large projects, or need to separate dusty and clean operations. In those cases, mobility and access can save more time than a thicker top.
Before buying, mark the proposed footprint on the floor with tape, including the open doors, vise swing, dust hose, and walking clearance. Load-test the bench, check every lock, and confirm that replacement tops and hardware are available. Those simple checks reveal most modular workbench failures before they become expensive shop rearrangements.