
What's inside
As an Amazon Associate I earn from qualifying purchases. This post may contain affiliate links at no extra cost to you.
The best spindle sander for beginners is the WEN 6524 if you want an affordable, compact machine with useful sleeve sizes; choose the Triton TSPS450 for a stronger all-round benchtop option, or the JET JBOS-5 when table stability and frequent shop use matter more than price.
A spindle sander removes waste from concave curves more safely and evenly than a handheld drum sander. For a new woodworker, the important differences are not simply motor horsepower. Oscillation speed, the range of sanding drums, table flatness, dust collection, and how quickly sleeves can be changed have a much greater effect on day-to-day results.
As an Amazon Associate we earn from qualifying purchases at no extra cost to you.
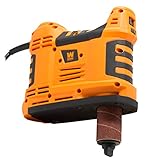
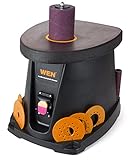
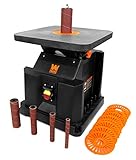

Quick comparison: beginner-friendly spindle sanders
The figures below are commonly published specifications for these models. Regional versions and production updates can differ, so confirm the manual before buying replacement parts or planning a dust-hose connection.
| Model | Motor and oscillation | Spindle or sleeve sizes | Table and dust port | Approximate weight | Best fit |
|---|---|---|---|---|---|
| WEN 6524 | 3.5 amp; about 2,000 RPM; 58 oscillations/min | 1/2, 3/4, 1, 1-1/2 and 2 inches | About 14-1/2 by 17-1/2 inches; 2-1/2-inch port | About 30 lb | Lowest-cost entry and occasional projects |
| Triton TSPS450 | 450 W; about 2,000 RPM; 58 oscillations/min | Commonly supplied with five or six drum sizes, up to roughly 3 inches depending on market | Approximately 14 by 18 inches; dust-extraction outlet | About 27 kg | Beginners wanting a capable general-purpose machine |
| Shop Fox W1831 | 1/2 hp; about 1,725 RPM; 30 oscillations/min | 1/2, 3/4, 1, 1-1/2, 2 and 3 inches | Approximately 14 by 14 inches; 2-1/2-inch port | About 35 lb | Small shops needing a broad drum range |
| JET JBOS-5 | 1/2 hp; about 1,725 RPM; 30 oscillations/min | 1/2, 3/4, 1, 1-1/2, 2 and 3 inches | About 20 by 20 inches; 2-1/2-inch port | About 77 lb | Frequent use and maximum table stability |
What the numbers mean for a beginner
Oscillation speed
Oscillation is the up-and-down movement of the spindle. It spreads wear over more of the abrasive sleeve and reduces the chance of cutting a deep groove in one spot. A machine oscillating around 58 times per minute moves more quickly than one at 30 oscillations per minute, which can help produce a more even finish on soft wood. The trade-off is that you still need a light feed rate; pushing too quickly can leave a rough, uneven curve.
Spindle RPM is different from oscillation speed. RPM describes how fast the sleeve rotates, while oscillations per minute describe its vertical travel. Do not compare RPM alone as if it indicated sanding performance. For beginners, a moderate fixed speed is usually simpler than a complicated variable-speed control.
Spindle sizes and sleeve availability
A 1/2-inch spindle is useful for tight inside curves, while 3/4- and 1-inch drums cover many chair parts, templates, handles and small cabinet components. Larger 1-1/2-, 2- and 3-inch drums are better for broad curves because they leave a gentler radius.
More sizes are valuable only if replacement sleeves are easy to obtain. Check whether the machine uses standard-height sleeves and whether the package includes matching rubber drums, washers and throat plates. A spindle sander with five sizes that you can replenish locally is more useful than one with seven unusual sizes that sit unused.
Table flatness and working area
A flat table keeps the workpiece from rocking as you sand. This matters particularly when cleaning up the edge of a thin panel: a small gap or dip under the panel can make the edge taper instead of staying square.
Large, heavy machines such as the JET JBOS-5 resist movement and provide more support around a large workpiece. Compact machines are easier to store but may need to be clamped or bolted down. Before buying, place a straightedge across the table in several directions, if possible, and look for visible gaps. Also check whether the throat plates sit flush rather than above or below the table surface.
Dust collection
Most of the dust is produced below the table, where the spindle exits the workpiece. A 2-1/2-inch port is convenient for a typical workshop dust collector, but a port alone does not guarantee clean operation. The table opening, internal baffles and hose fit all affect capture.
For occasional work, a shop vacuum with a fine-dust filter can be adequate. For repeated sanding, a dust collector with greater airflow is preferable. Keep the hose short and avoid sharp bends. A blocked filter reduces suction and can make the machine appear poorly designed when the real problem is restricted airflow.
Which spindle sander suits your situation?
| Your situation | Best choice | Why | What to accept |
|---|---|---|---|
| Budget-conscious beginner using it a few times a month | WEN 6524 | Compact format, useful basic drum range and relatively low purchase cost | Less mass and potentially more vibration; secure it to the bench |
| Beginner building furniture and using several curve sizes | Triton TSPS450 | Good balance of motor output, oscillation and supplied accessories | Confirm the exact regional accessory package |
| Small shop with limited floor space but broad sanding needs | Shop Fox W1831 | Six commonly useful drum sizes in a relatively compact machine | Slower oscillation and a smaller table than heavy-duty models |
| Frequent use, large panels or a preference for stable equipment | JET JBOS-5 | Heavy body and approximately 20-by-20-inch table reduce movement | Higher cost, greater weight and more storage space |
Changing sleeves without damaging the machine
Changing a sanding sleeve should take only a few minutes. Unplug the sander, remove the table insert and loosen the spindle nut. Slide off the old sleeve and rubber drum, inspect the rubber for cracks or swelling, then fit the new sleeve with the abrasive seam positioned consistently. Install the correct washer and throat plate before tightening the nut firmly, but do not over-tighten it.
Use the smallest throat plate that leaves safe clearance around the drum. A large gap allows small workpieces to drop into the opening and gives less support near the curve. Keep the washers associated with each drum size; using the wrong stack can leave the drum loose or prevent the nut from seating correctly.
Setup and sanding technique that prevents common mistakes
- Support the machine. Bolt it to the bench or use a non-slip mat. A light benchtop sander can shift when a board catches the sleeve.
- Choose a drum close to the curve. A drum that is too small takes longer and creates a tighter-than-intended profile; one that is too large may not reach the bottom of a concave curve.
- Leave a small amount of waste. Rough-cut the curve with a jigsaw or bandsaw, leaving roughly 1/16 inch for the spindle sander to remove. Removing an entire saw-cut allowance wastes sleeves and overheats the abrasive.
- Start the machine before contact. Feed the workpiece gradually and keep both hands clear of the rotating spindle.
- Keep the work moving. Hold the piece flat and travel around the curve rather than pausing in one place. Oscillation helps, but it cannot prevent a stationary board from developing a hollow.
- Check frequently. Stop after a few passes and compare the edge with the template or mating part. The machine removes material quickly enough that correcting an oversanded curve may be impossible.
Ownership costs and what wears first
Sanding sleeves are the main consumable. As a simple example, suppose a sleeve costs $3 and remains effective for four medium-sized projects. Its abrasive cost is about $0.75 per project. If a sleeve clogs after one project because resinous wood is sanded with excessive pressure, the cost rises to $3 per project, before counting lost time.
Use moderate pressure and clean clogged sleeves with a rubber abrasive-cleaning stick while the machine is unplugged. Replace sleeves when the grit is rounded, torn or no longer cuts efficiently. Do not keep using a split sleeve: it can catch an edge and damage the workpiece.
Other wear points include rubber drums, throat plates, spindle bearings and the drive belt. Keep dust from accumulating around the motor vents, empty the collector regularly and inspect the spindle for wobble. A slight vibration may come from an incorrectly installed drum or washer rather than a failed bearing.
Bottom line
For most first-time buyers, the WEN 6524 offers the most approachable path into spindle sanding, provided it is secured to the bench and paired with effective dust extraction. The Triton TSPS450 is the stronger balanced choice when you expect to make furniture or use the tool regularly. Choose the Shop Fox W1831 for its useful selection of drum sizes, and choose the JET JBOS-5 when a large, flat table and heavy construction justify the extra space and expense.
Whichever model you select, prioritize standard sleeve sizes, a genuinely flat table and a dust port that matches your existing equipment. Those details will affect your results far more than a small difference in motor numbers.