What's inside
As an Amazon Associate I earn from qualifying purchases. This post may contain affiliate links at no extra cost to you.
Sandpaper lasts longer when its abrasive face stays clean, flat, and sorted by grit. The right setup depends on what you use: sheets need protection from bent corners, discs need to stay together by diameter and attachment type, and belts need room to lie flat without being kinked. A few labeled drawers or wall pockets can handle a small supply; a busy shop may be better served by separate storage for each format.
As an Amazon Associate we earn from qualifying purchases at no extra cost to you.


Choose storage by abrasive type
Start by separating sheets, discs, and belts. Mixed bins save little space once you have to rummage through them, and hooked discs can snag paper sheets or damage their abrasive faces. Within each group, sort by grit and size. For discs, keep hook-and-loop and pressure-sensitive adhesive (PSA) styles apart; they are not interchangeable, and PSA backings can collect dust if left exposed.
Label grit in a consistent way, such as 80, 120, and 180, rather than relying on package colors that vary by brand. If you buy in bulk, keep unopened stock in its original packaging until needed. It provides useful protection and identifies the abrasive without extra labels.
Store sheets flat and dry
For standard sheets, a shallow drawer, document box, or divided file organizer keeps paper flat and makes grit easy to scan. Choose compartments large enough that corners do not curl against the sides. A basic letter-size organizer is often enough for 9-by-11-inch sheets if it has a little clearance; check the actual inside dimensions before buying.
Use dividers for each grit, and avoid stacking heavy tools or offcuts on top. Creased paper can tear or leave uneven marks, especially when sanding a broad surface by hand. A sanding paper organizer is convenient for frequent use, but a clean, dry drawer with labeled dividers is the cheaper option and works well for a modest assortment.
Moisture is a bigger threat than ordinary shop dust. Damp paper can soften, curl, or lose its backing strength. Keep abrasives away from concrete floors, open exterior doors, and sinks. If the shop is humid, use a lidded plastic container and a small desiccant packet; replace the packet when it is spent rather than treating it as permanent protection.
Keep discs sorted by diameter and backing
Disc storage should prevent faces from rubbing together and keep sizes from getting mixed. Small compartment boxes work for common random-orbit sanding discs, while a drawer with labeled dividers suits larger stacks. Store hook-and-loop discs with their abrasive faces protected, and keep PSA discs on a clean, smooth backing surface or in their original sleeves. Do not press PSA adhesive against dusty cardboard and expect it to stick reliably later.
Sort by diameter first, then grit and attachment type. A 5-inch disc can look close enough to a 6-inch disc in a crowded bin, but it will not cover the pad properly. Keep perforation patterns together when your sander depends on specific dust-extraction holes; mismatched holes can reduce collection and leave more dust on the work.
A sanding disc organizer is useful if you change grits often or carry discs between benches. For occasional sanding, labeled zipper bags inside a dry drawer are usually adequate. Bags cost less and keep dust off, but they are easier to mislabel and can bend discs if packed tightly.
Give belts room to lie flat
Belts are the least forgiving format to store. Do not fold, sharply crease, or hang them from a nail: a kink can create a weak spot that makes the belt track poorly or fail under tension. Store each belt flat in its original sleeve, or lay it in a wide drawer where nothing heavy will press on it. Keep belts sorted by width, length, and grit; a belt that fits the width may still be the wrong length for the sander.
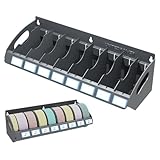
For a small collection, the packaging the belts arrive in is often the best low-cost solution. If packaging is flimsy or regularly discarded, a dedicated sanding belt storage rack can keep sizes visible. Check that the rack supports belts without forcing them into a tight curve, and position it where belts will not collect grinding dust or get bumped by stock.
Storage options at a glance
| Storage option | Best for | Main advantage | Main drawback |
|---|---|---|---|
| Labeled drawer dividers | Sheets and mixed shop stock | Low cost; easy to adapt | Needs a suitable drawer and clear labels |
| Compartment organizer | Discs sorted by size and grit | Quick visual access | Small compartments may limit bulk quantities |
| Original sleeves or boxes | Occasional use and belt storage | Usually free and protects stock | Can be awkward to browse after packages are opened |
| Dedicated wall rack | Frequently used belts or discs | Visible and easy to reach | Exposed stock collects dust and takes wall space |
Place storage where sanding happens
Put the abrasives near the sander, but not in the direct path of dust from sanding or grinding. Fine dust settles on exposed adhesive and hook-and-loop surfaces, reducing their grip. A cabinet or lidded drawer beside the bench is a better spot than an open shelf over a dusty machine. Leave enough room to remove a stack without bending sheets or knocking belts onto the floor.
Use labels on the front of each drawer or divider, and include format, size, grit, and backing where relevant—for example, “5 in / hook-and-loop / 120.” Mark a minimum quantity if you want to reorder before running out. Keep used abrasives separate from new stock; a worn disc can look similar to a fresh one, and mixing them makes it easy to start a job with an abrasive that cuts poorly.
A practical buying checklist
Before buying an organizer, measure the abrasives you actually own and the drawer or wall space available. Confirm that shelves are wide enough for belts and that disc compartments fit your largest diameter. Prefer smooth dividers over rough wire edges that can catch paper. Choose a lidded container if dust or humidity is a problem, but do not seal damp abrasives inside. For a small collection, original packaging and a few labeled dividers are enough; spend on dedicated storage when sorting time, damaged stock, or frequent format changes become a real nuisance.