What's inside
As an Amazon Associate I earn from qualifying purchases. This post may contain affiliate links at no extra cost to you.
Waterstones, honing guides, and sharpening supplies are easiest to use when they stay together but don’t share a damp, gritty pile. Water left on a stone can rust a guide or steel tool; loose abrasive grit can scratch polished edges and bench surfaces. A good setup keeps stones supported, lets wet ones dry, and makes small items easy to find without turning sharpening into a storage project.
As an Amazon Associate we earn from qualifying purchases at no extra cost to you.

Start with the stones
First sort stones by how they’re used. Waterstones that need soaking belong near a sink or a water tray. Splash-and-go stones need less preparation, but still need to dry before going into a closed cabinet. Keep diamond plates and oilstones separate from waterstones so oil, slurry, and abrasive residue don’t migrate between surfaces.
For a small collection, a plastic dish rack or open tray on a shelf is often enough. Choose a tray longer and wider than the largest stone, with a raised lip to catch drips. A rack that holds stones on edge improves airflow, but only use it if the stones are stable and cannot fall onto concrete. For larger or heavy stones, a flat shelf is safer; leave space between them instead of stacking.
Don’t put wet stones straight into a sealed plastic box or drawer. Trapped moisture encourages mildew, leaves stale slurry in corners, and can rust nearby steel. Let stones drain and air-dry first. If a stone’s manufacturer specifies soaking or storage in water, follow that guidance; not every stone should be treated the same way. A dedicated waterstone storage tray with drainage can keep the wet stage contained, but a washable kitchen tray is a reasonable low-cost substitute.
Give honing guides a dry home
Honing guides are small enough to disappear under rags and heavy enough to chip a stone if they slide off a shelf. Store the guide, its roller or clamp parts, and any setup gauge together in a shallow drawer bin or divided parts box. Leave the guide open or loosened if that prevents pressure on a delicate adjustment mechanism. Wipe it dry after use, especially around rollers, screws, and steel jaws.
Magnets are convenient for steel guides, but they are a poor universal solution: some guides contain nonmagnetic parts, and a strong magnet can collect abrasive grit that later transfers to a blade. A plastic compartment box avoids that problem and keeps replacement screws from vanishing. Label the compartment if you own guides for different blade widths.
Compare common storage options
| Storage option | Best for | Trade-off |
|---|---|---|
| Open tray or rack | Wet stones used frequently | Dries well, but collects shop dust |
| Shallow drawer with bins | Dry guides, gauges, and small parts | Protects from dust; must stay dry |
| Wall shelf or cabinet | Several stones and sharpening accessories | Uses vertical space; secure it against tipping |
| Portable lidded case | Sharpening kit used in more than one location | Good for transport, poor for storing damp stones |
Keep abrasive grit under control
Sharpening residue is fine enough to spread across a bench and scratch a polished tool, so make cleanup part of the layout. Put a washable mat or shallow pan under the sharpening area and keep a separate rag for slurry. Don’t use that rag on machine tables or finished work. After the stones are dry, brush loose grit from their storage tray rather than blowing it around the shop with compressed air.
For a dusty workshop, store dry stones and accessories in a cabinet or covered bin. A lidded tote is inexpensive and works well if the contents are dry; add dividers or small tubs so stones don’t knock together. Avoid sealing in a stone that still feels cool and damp. A small parts organizer with adjustable compartments is useful for guide parts, flattening tools, and clips, but is unnecessary if you have only one guide and a few accessories.
Set up a compact sharpening station
Keep the station close to a water source if you use soaking stones, but don’t place wood-handled tools where splashes will sit. A bench corner with a stable, wipeable surface is usually better than a narrow shelf above a sink. Leave a clear working area at least as long as your largest stone and enough room to move a honing guide without bumping stored tools.
Store flattening plates or lapping stones separately from sharpening stones, ideally in a sleeve or compartment. Their coarse abrasive surfaces can damage a fine stone if they rub together. Keep honing oil away from waterstones, and keep bottles upright in a small catch tray. If you use spray bottles or a soaking tub, empty or cover them when they’re not in use so shop dust does not settle in the water.
Buy for the collection you have
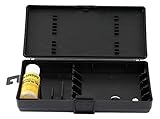
For two or three stones and one guide, a tray, a drawer divider, and a dry cloth are usually all you need. A dedicated waterstone storage rack earns its space when you own several stones and want them to dry upright. For a kit that travels, use a tool storage case with dividers for dry equipment, but carry wet stones separately in a washable tray until they have dried.
Before buying anything, measure the longest stone and check shelf depth, door clearance, and load capacity. A rack that fits the stones but blocks cabinet doors is a nuisance; an overloaded wall shelf can become a safety hazard. The useful setup is not the one with the most compartments. It is the one that keeps wet stones ventilated, keeps grit off clean tools, and puts the guide and small parts back in the same place after every sharpening session.