
What's inside
As an Amazon Associate I earn from qualifying purchases. This post may contain affiliate links at no extra cost to you.
The Craftsman molder planer is a worthwhile buy mainly for a small shop that needs occasional thickness planing and simple stock molding in one machine; it is less appealing for continuous production, wide boards, or anyone expecting modern dust control and readily available factory tooling.
As an Amazon Associate we earn from qualifying purchases at no extra cost to you.
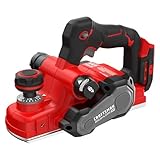


What the Craftsman molder planer actually does
The older Craftsman planer-molder machines combine a thickness planer with a cutterhead or molding setup intended for producing decorative profiles in straight wood stock. In practical terms, the machine can flatten boards to a consistent thickness and, with the correct cutter arrangement, create profiles such as round-overs, bevels, coves, and simple trim shapes.
That flexibility is the reason these machines still attract buyers on the used market. One footprint can cover two jobs, and a secondhand machine may cost considerably less than buying a modern planer and a separate molding machine. The trade-off is that specifications vary by model number, condition, and included accessories. “Craftsman planer molder” is not one single standardized machine, so confirm the model plate before buying replacement parts or relying on a published capacity.
Capacity, cutting depth, and feed performance
Most commonly encountered Craftsman planer-molder machines belong to the portable or benchtop class, with approximately 12 to 12 1/2 inches of planing width and roughly 6 inches of maximum stock height. Those figures are useful for furniture parts, cabinet components, shelving, and trim, but they do not make the machine suitable for wide tabletop slabs.
| Evaluation point | Typical older Craftsman planer-molder range | What it means in use |
|---|---|---|
| Planing width | 12 to 12 1/2 in. | Suitable for most cabinet boards, but narrower than many modern industrial machines |
| Maximum stock height | About 6 in. | Enough for substantial furniture parts; verify the exact manual |
| Practical removal per pass | 1/16 in. on softwood; 1/32 in. on hardwood | Conservative cuts reduce snipe, overload, and tear-out |
| Typical feed speed | Approximately 12 to 20 ft/min, depending on model and condition | Fine for individual boards, slower than production molding equipment |
| Motor class | Commonly around 1 1/2 to 2 hp, 120 V | Usually practical in a home workshop, but the circuit and manual take priority |
| Working weight | Approximately 70 to 110 lb, depending on stand and accessories | Portable enough to move, but heavy enough to need a stable support |
These are buying-guide ranges rather than universal specifications. A machine with a different model number may have a different width, motor, cutterhead, or feed rate. Measure the opening and read the identification plate rather than treating a similar-looking listing as an exact match.
Cutting depth is where expectations matter most. A planer may technically accept a deep cut, but removing that much material in one pass places stress on the motor, feed rollers, knives, and board surface. A better working calculation is to remove 1/32 inch per pass from hardwood and up to 1/16 inch from cooperative softwood, then take a final light pass. If a board needs 1/4 inch removed, that means at least four 1/16-inch passes on softwood or eight 1/32-inch passes on hardwood. The slower method usually produces a better finish and fewer stalled-feed problems.
Molding-profile compatibility
The molding function is useful, but it is also the feature most likely to be misunderstood. A planer-molder does not automatically accept every modern molding cutter. Compatibility depends on cutterhead diameter, arbor or cutterhead design, cutter width, maximum cutter projection, guard arrangement, and the machine’s specific instructions.
Before purchasing one, ask for photographs of the cutterhead, knives, guards, and arbor. A complete machine with its original molding knives is much more valuable than a bare planer body. Profile knives made for another machine may not seat correctly, may project too far, or may create an unsafe imbalance.
Simple profiles are the sensible target: modest round-overs, small coves, beads, chamfers, and trim details. Large or deep profiles can increase cutting load and may exceed the machine’s guard or feed capability. Long, narrow molding also needs infeed and outfeed support; otherwise it can twist, lift, or leave uneven edges as it passes through the cutterhead.
Replacement tooling is a potential weakness. Original Craftsman knives and molding cutters may be discontinued or available only through used-parts channels. A sharpening service may be able to restore straight knives, but custom profile knives require a shop that can match the original dimensions. Budget for sharpening or fabrication before assuming that a cheap machine is a cheap molding solution.
Dust collection and workshop setup
Dust collection is usually adequate only when the machine has its chip hood, blower path, and exhaust adapter in place. A shop vacuum can handle light planing, but a 1 1/2- to 2-hp dust collector with a 4-inch hose is a better match for repeated use. Fine shavings can quickly fill a vacuum filter, reduce airflow, and cause chips to accumulate around the feed mechanism.
Use a short, unobstructed hose and check that the hood does not interfere with board travel. Never operate with a damaged guard or an improvised cover that can contact the cutterhead. Planer chips are bulky, and a nearly full collection bag can reduce suction enough to leave the work area covered even though the machine still appears to be operating normally.
A practical setup sequence
- Identify the exact model. Record the model number, voltage, cutterhead type, and maximum stock dimensions before ordering parts.
- Inspect the table and rollers. Remove resin and pitch, then check that the table is flat and the rollers turn without binding.
- Install sharp, matching knives. Unequal projection causes ridges, vibration, and poor surface quality.
- Align the infeed and outfeed support. Keep long boards level with the table to reduce snipe and prevent the board from dropping at the exit.
- Set a shallow first cut. Feed a scrap board and listen for motor strain, slipping, or rhythmic knocking.
- Connect dust collection before starting. Confirm that chips leave the hood rather than packing around the cutterhead.
- For molding, make a test profile. Use scrap of the same species and thickness, then increase the cut gradually rather than starting with a full-depth profile.
Durability and ownership realities
Age is a bigger concern than the Craftsman name on the housing. The parts that commonly need attention first are feed rollers, drive belts, cutter knives, bearings, height-adjustment threads, switches, and plastic dust-hood components. Hardened rollers can slip on smooth stock; worn belts can produce inconsistent feed; and dirty height screws can make depth adjustments feel rough or uneven.
Clean the table after each session, brush chips from the cutterhead area, and lubricate only the points specified by the manual. Excess oil near the feed rollers can attract dust and reduce traction. Keep spare straight knives or a sharpening plan available, because dull knives increase the load on every other component.
A useful ownership estimate illustrates the economics. Suppose a used machine costs $250, a sharpening or knife replacement allowance averages $80 per year, and it is used 20 times annually for three years. The equipment and tooling cost is approximately $330 divided by 60 uses, or $5.50 per use, before electricity and labor. That can be attractive for a hobbyist who would otherwise pay for repeated milling services. It is not attractive if replacement parts are unavailable or if the machine will sit unused after one remodeling project.
Who should buy it?
| Situation | Best decision | Reason |
|---|---|---|
| Limited budget and occasional trim work | Consider a complete used machine | The combined planer and molder function can save space and purchase cost |
| Beginner with no planer experience | Buy only after checking guards and manuals | Setup, knife alignment, and profile selection require more care than a basic planer |
| Small workshop | Choose a machine with a stable folding or compact stand | It needs support space for long boards even if its body is compact |
| Weekly furniture production | Prefer a newer planer or dedicated molding machine | Feed speed, dust handling, parts supply, and repeatability become more important |
| Wide tabletops or thick slabs | Look for a wider or industrial planer | A 12-inch-class opening limits the work before motor power becomes the issue |
Final verdict
The Craftsman molder planer makes the most sense as a capable, space-saving secondhand machine for light-to-moderate hobby use. Its strengths are combined functionality, ordinary household electrical requirements on many models, and the ability to produce useful custom trim without buying two separate machines. Its weaknesses are model-specific tooling, aging feed components, modest production speed, and dust collection that depends heavily on condition and setup.
Buy one when the exact model is known, the cutterhead and guards are complete, replacement knives are obtainable, and the price leaves room for maintenance. Pass when the machine is missing molding hardware, has seized height adjustment, shows feed-roller damage, or is being marketed as suitable for large-scale production. In that context, the best craftsman molder planer is not necessarily the cheapest listing—it is the complete, serviceable example with tooling you can actually replace.