
What's inside
As an Amazon Associate I earn from qualifying purchases. This post may contain affiliate links at no extra cost to you.
Operating a table saw safely comes down to three habits: verify the blade, fence, and riving knife before you switch on; keep your hands out of the blade path with guards and push devices during the cut; and let the blade coast to a complete stop before you touch anything at shutdown. This guide walks through each phase with the actual numbers that separate a safe cut from a kickback incident.
As an Amazon Associate we earn from qualifying purchases at no extra cost to you.
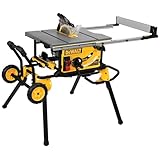
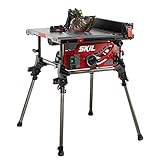


Pre-Start Setup: Blade Height and Alignment
Every check below is done with the saw unplugged — no exceptions. These five minutes of setup prevent most of the accidents table saws are known for.
Set the blade height
The widely taught rule: raise the blade until the carbide tips project roughly 1/8″–1/4″ (3–6 mm) above the top of the workpiece — about one tooth gullet showing. Less exposure means less blade for fingers to find, and the teeth enter the wood at a steeper angle, which reduces tear-out on the face.
Worked example: “3/4 inch” plywood actually measures about 18–19 mm. Set the tooth tips 24–25 mm above the table surface — measure with a combination square laid flat on the table, not by eyeballing it. Going higher than ~1/2″ above the stock adds exposure with no cutting benefit.
Check blade and fence alignment
- Blade to miter slot: Mark one tooth with a pen, rotate it to the front of the insert, and measure to the miter slot with a combination square or dial indicator. Rotate the same tooth to the rear and measure again. Difference should be within 0.002″–0.004″ (0.05–0.1 mm). If it’s off, the rear teeth re-cut the kerf — that’s the burning, binding, and kickback you can’t explain.
- How to fix it: Cabinet and hybrid saws: loosen the trunnion bolts under the table and tap the assembly into line. Most jobsite saws (DeWalt DWE7491-series, Bosch 4100 series) have adjustment screws accessible from the top.
- Fence to blade: Lock the fence and measure to the miter slot at the front and rear. Parallel within 0.002″–0.003″ is ideal; a hair of toe-out (up to ~0.004″, tilting away from the blade) at the rear is acceptable. Toe-in is dangerous — it pinches stock between blade and fence and launches it.
- Riving knife: It must sit in the same plane as the blade, 3–5 mm behind the teeth, with its top edge a few millimeters below the blade’s highest point. The knife should be thinner than the blade’s kerf (standard kerf ≈ 3.0–3.2 mm; thin-kerf ≈ 2.3–2.4 mm) but at least as thick as the blade plate.
Guards, pawls, and push devices
Install the blade guard — splitter, anti-kickback pawls, and cover — for every through cut it can physically clear. For dados and other non-through cuts, drop to the riving knife alone. Keep two push devices within arm’s reach: a notched push stick and a grabbing-style push block (a GRR-Ripper–style block runs roughly $60–$80; shop-made sticks cost nearly nothing). The trigger distance: if your hand would come within 6″ (150 mm) of the blade, a push device goes in it instead.
Choosing the Right Setup for Each Cut
| Cut | Blade height above stock | Guide | Push device | Guard setup |
|---|---|---|---|---|
| Rip, board 2″–6″ wide | 1/8″–1/4″ | Rip fence | Push stick + push block | Full guard |
| Rip, panel over 6″ | 1/8″–1/4″ | Rip fence | Push block for final 12″ | Full guard |
| Narrow rip under 2″ | 1/8″–1/4″ | Fence (thin-rip jig preferred) | Push stick or shoe | Guard or riving knife |
| Crosscut | 1/8″–1/4″ | Miter gauge or sled | Hands on gauge only | Full guard |
| Bevel rip at 45° | ~40% higher (see below) | Fence opposite blade tilt | Push stick | Riving knife (most guards won’t fit tilted) |
| Dado / groove | Groove depth only (e.g., 6 mm) | Fence or miter gauge | Push block | Guard off — dado throat plate installed; reinstall guard after |
The bevel math: at 45°, the blade needs 1/cos(45°) ≈ 1.41 times the vertical travel for the same thickness. For 18 mm stock, that’s ~25.5 mm of cutting depth plus clearance — set tooth tips around 31–32 mm above the table.
Supporting the Workpiece
Unsupported stock is a top-three cause of kickback. The moment a board tips off the back of the table, the kerf closes on the blade.
- Outfeed: The workpiece must stay level through the entire cut. A 4×8 sheet needs 36″–48″ of supported travel behind the blade — an outfeed table, or roller stands set a hair below table height (2–3 mm) so stock slides over rather than catching.
- Infeed and side support: Long boards entering the saw need support too, or you’ll lever them up at the start of the cut.
- Helpers: A second person may only support weight — never pull, steer, or push. Two people applying force from different directions twists the stock into the blade. If you can’t support it alone or with stands, cut it down roughly first with a track saw or circular saw.
- Stance: With the fence on the right of the blade, stand slightly to the blade’s left. If kickback fires the workpiece backward, it misses your torso.
Which Push Device for Which Gap
| Rip width (fence to blade) | Use | Why |
|---|---|---|
| Wider than 12″ (300 mm) | Hands for the feed; push block for the last stretch | Full palm pressure keeps stock flat against fence |
| 4″–12″ (100–300 mm) | Grabbing push block | Straddles or runs beside the blade while controlling both keeper and offcut |
| 1″–4″ (25–100 mm) | Notched push stick | Keeps your hand above and behind the blade line |
| Under 1″ (25 mm) | Thin-rip jig or sacrificial push block | A plain stick can skate up off narrow stock; thin strips can also slip under the fence |
Kickback: Causes and Prevention
Kickback is the blade grabbing the workpiece and throwing it back at you — often faster than you can react. Nearly every cause is preventable in setup:
- Kerf closing on the blade — the riving knife prevents this; never remove it for through cuts.
- Fence toed in toward the blade (see alignment check above).
- Stock lifting or drifting off the fence mid-cut — keep firm, consistent pressure against both fence and table.
- Case-hardened or reaction wood that pinches as it’s cut — feel for increased feed resistance and stop.
- Freehand cutting. Every cut uses the fence or the miter gauge — never both together, never neither.
One trap worth spelling out: the fence plus miter gauge combination. Using the fence as a stop for repeated crosscuts wedges the offcut between blade and fence. If you need repeatable lengths, clamp a standoff block to the fence before the blade so the cut end rides free past the blade.
Safe Shutdown Checklist
- Finish fully: Push the workpiece completely past the blade and off the table before releasing pressure — half-finished cuts left on the blade are a common injury point.
- Switch off and wait: Keep eyes on the blade while it coasts. Depending on blade mass and arbor condition, coast-down runs 10 seconds to over a minute; saws with electronic brakes stop in roughly 2–5 seconds. Even on a SawStop, the flesh-detection brake only fires on contact — normal shutdown still coasts.
- Clear offcuts only after a dead stop. Use a stick for small pieces near the throat plate, never fingers.
- Park the saw: Lower the blade fully below the table and return the tilt to 90°. This protects both the blade teeth and the next user.
- Lock out: Unplug the saw or hit the lockout switch before blade changes, and anytime others share the space.
- Brush down: Clear dust from the table, fence rail, and throat-plate slot before covering the saw.
What Wears First (Ownership Realities)
Beginners blame the saw; the saw is usually fine. In order of what actually degrades:
- The blade: Pitch buildup mimics a dull edge — burn marks and heavy feed pressure often just mean the blade needs cleaning with a blade-and-bit solvent, not sharpening.
- Throat plates: Zero-clearance inserts wear wide and stock phenolic plates chip around the slot. A sloppy slot lets small offcuts jam next to the blade — replace or re-machine them.
- Elevation and tilt screws: Sawdust and pitch pack the threads. Clean and relubricate with paste wax or dry PTFE; wet oil just glues more dust in place.
- Fence faces: Aluminum and HDPE faces wear grooves and pick up residue, especially after pressure-treated lumber — a sticky fence equals dragging stock equals kickback risk.
- Common beginner mistakes: wearing gloves (they snag on teeth), loose sleeves and rings, cutting round stock freehand, and running a dado stack with the standard throat plate.
FAQ
How high should a table saw blade be above the wood?
1/8″–1/4″ (3–6 mm) of tooth above the workpiece — roughly one gullet showing. Less is safer; significantly more adds exposure without cutting better.
Can I crosscut using the rip fence?
Never with the stock trapped between fence and blade — that’s the classic kickback setup. Use the miter gauge or a sled. To repeat lengths, clamp a block to the fence ahead of the blade as an index, so the cutoff exits freely.
Push stick or push block — which is better?
Match it to the rip width: blocks for wider cuts where you need downward control, sticks for narrow rips under about 4″. Most shops keep both hanging on the fence rail.
Why did the saw kick back right at the start of the cut?
Usually the board wasn’t tight to the fence when it met the teeth, or the blade/fence is out of parallel. Re-check the 0.002″–0.004″ alignment before cutting again.
Do I really need to unplug the saw to change blades?
Yes — a bumped switch while your wrench is on the arbor is a life-changing injury. Unplug, then raise the blade fully and block it with a scrap of wood while you break the arbor nut loose.