
What's inside
As an Amazon Associate I earn from qualifying purchases. This post may contain affiliate links at no extra cost to you.
Start With the Saw, Not the Blade
A dado blade set for a 10 table saw is compatible only when its arbor diameter, permitted stack width, guard arrangement, and throat opening all match the saw’s manual. The blade’s 10-inch label describes its diameter; it does not guarantee that the set fits every 10-inch saw. Check the saw’s exact model documentation before buying, and do not install a dado set unless the manufacturer approves that use.
That last check can rule out a set even when its arbor and width appear to fit. Some saws are not designed for dado cutters, or allow only a limited stack width. Others require a specific dado throat plate, arbor hardware, or operating setup. If the manual is silent or unclear, contact the manufacturer rather than inferring approval from a similar saw model.
As an Amazon Associate we earn from qualifying purchases at no extra cost to you.
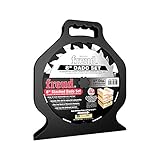


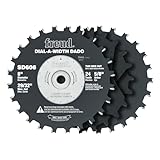
Check These Four Compatibility Points
1. Arbor diameter and usable length
Match the dado set’s center bore to the saw’s arbor. Common bore sizes include 5/8 inch and 1 inch, but neither should be assumed for a particular saw. A set with the wrong bore will not mount correctly; do not use improvised bushings or adapters unless the saw and blade manufacturers explicitly approve them.
Then check the arbor’s usable threaded length. A stack may fit over the arbor but leave too little thread for the flange and nut to engage securely. The blade maker’s instructions and saw manual should specify the allowed arrangement. Never omit a required flange or substitute a different nut to make a stack fit.
2. Maximum stack width
A dado stack’s total cutting width comes from the two outside blades plus the chippers and any specified shims. Compare that assembled width with the saw’s stated maximum—not just the nominal width printed on the set’s case. If the saw permits a narrower stack than the cutter’s maximum, use only a configuration the blade maker supports and that remains within the saw’s limit.
3. Guard, riving knife, and throat opening
A standard blade guard or riving knife may not work with a wide dado stack. A compatible saw may require those parts to be removed for the dado operation and may specify other precautions. Follow the manual’s procedure, use appropriate workholding, and never run the saw with an incompatible guard or insert arrangement.
The stock throat plate is often too narrow for a dado stack. The saw may need a manufacturer-approved dado insert or a properly made zero-clearance insert. Verify the required opening and any restrictions on insert material or construction. The insert must sit flat and secure; it must not contact the cutters through the full height adjustment range.
4. Explicit manufacturer approval
Look for dado instructions in the exact saw model’s manual, including allowed diameter, maximum width, required hardware, and guard or insert guidance. A product page saying “fits 10-inch table saws” is not enough. If the saw is not approved for a dado set, choose another joint-making method, such as a router with a suitable jig, rather than trying to adapt the saw.
Use the Numbers to Screen a Candidate Set
The following figures illustrate common configurations, not a universal compatibility specification. Confirm every value against the manuals for the particular saw and cutter.
| Specification to compare | Example value | What it tells you |
|---|---|---|
| Blade diameter | 8 inches | A frequent dado-set diameter; it can be used on some 10-inch saws, but only if approved. |
| Blade diameter | 10 inches | Not automatically compatible just because the saw is also labeled 10 inches; verify the saw’s permitted dado diameter. |
| Arbor bore | 5/8 inch or 1 inch | Must match the saw arbor exactly unless an explicitly approved arrangement says otherwise. |
| Assembled stack width | 1/4 inch to 13/16 inch | Common ranges vary by set; the saw’s maximum allowed width is the controlling limit. |
| Example width calculation | Two 1/8-inch outside blades + two 1/8-inch chippers = 1/2 inch | Use the cutter maker’s stated cutting-width method; shim only as instructed. |
For the example calculation, add the components’ stated cutting contributions: 1/8 + 1/8 + 1/8 + 1/8 = 1/2 inch. Do not assume every chipper contributes its full physical thickness to the cut, or that a nominal stack width is the finished groove width. Consult the set’s chart, then make a test cut in scrap and measure the groove before cutting a workpiece.
Choose by Your Saw and How You Work
| Your situation | Practical choice | Why |
|---|---|---|
| Manual does not approve dado cutting | Do not buy a dado stack for that saw; use a router or another approved method. | Fit alone does not establish safe, permitted operation. |
| Manual approves dadoes but limits stack width | Choose a set whose supported configurations stay within that limit. | A set’s maximum capacity is not the saw’s capacity. |
| Occasional shelf grooves or cabinet work | A quality general-purpose stack with clear setup instructions may be adequate. | Interchangeable chippers offer useful width options without requiring a specialty set. |
| Frequent joinery with tight fit requirements | Prioritize consistent, well-matched cutters and a precise width chart; keep test material available. | Small setup differences matter when grooves must fit mating parts repeatedly. |
| Limited storage or infrequent use | Compare the full set’s case and included components with a narrower-purpose option. | Extra chippers and shims are useful only if stored cleanly and kept organized. |
Setup and Ownership Details That Matter
Before installation, unplug the saw. Assemble the stack in the order and orientation specified by its maker, making sure the teeth and chippers are correctly aligned. Confirm that the arbor nut engages as required and that no component is pinched or left out. Rotate the stack by hand through a full turn with the saw disconnected, checking clearance against the throat insert and surrounding parts. Follow the saw manual for height, fence, guard, and operating instructions.
Make a test cut in scrap of the same material, then measure the groove with calipers or a suitable gauge. A groove that is too tight or loose may call for a different supported chipper arrangement or a small adjustment with approved shims. Do not force the workpiece into an undersized groove or compensate by exceeding the saw’s maximum stack width.
Chippers and shims are easy to misplace, and resin buildup can affect seating and cut quality. After use, clean cutters with a product and method approved by their manufacturer, dry them thoroughly, and store them so teeth cannot strike one another. Inspect for damaged carbide, cracks, missing components, or distorted shims before each setup. Worn or damaged cutters should be replaced or professionally serviced—not straightened or reshaped by guesswork.
Buying Checklist
- Does the exact saw model’s manual permit dado cutting?
- Does the set’s bore match the arbor, with adequate approved thread engagement?
- Is the assembled stack width within the saw’s stated maximum?
- Are the required insert, arbor hardware, and guard procedure available and approved?
- Does the cutter maker explain how to build the desired width and use shims?
- Can you make and measure a scrap test cut before committing to the workpiece?
When shopping for a 10 inch dado blade for table saw use, treat “10 inch” as a diameter category, not a compatibility guarantee. The right purchase is the set whose specifications and operating instructions agree with the exact saw manual; if any critical limit cannot be confirmed, pause and ask the saw manufacturer before buying or installing it.