What's inside
As an Amazon Associate I earn from qualifying purchases. This post may contain affiliate links at no extra cost to you.
Small parts storage looks simple until a workshop has hundreds of screws, fittings, blades, connectors, and brackets to sort. The right bin system should make parts visible, keep dust under control, and survive being opened with dirty or gloved hands. The two common choices are stackable bins and tilt-out bins. They solve different problems, and neither is automatically better.
As an Amazon Associate we earn from qualifying purchases at no extra cost to you.
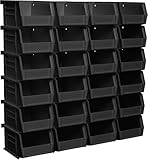


The Basic Difference
Stackable bins are removable containers that sit on shelves, racks, or on top of one another. You pull the bin out, carry it to the bench, and return it when finished. They work best when you need to move parts between storage and a project.
Tilt-out bins stay mounted in a cabinet, wall rack, or modular organizer. The front of each container tips forward so you can reach inside without removing it. They work best when parts stay in one location and you want quick visual access.
For a typical home workshop, a stackable bin system is the more flexible first purchase. Tilt-out storage becomes more attractive when you have a dedicated assembly area and a stable inventory of frequently used parts.
Where Stackable Bins Work Best
The biggest advantage is flexibility. A 4-inch-wide bin can hold electrical terminals, hose clamps, drill bits, or fasteners, and you can move it to the workbench when needed. Reorganizing the shop is also easy: change the shelf spacing, swap bin sizes, or take a group of bins to another room.
Stackable bins are usually the better choice for bulky or irregular items. You can store several dozen fittings in one larger container instead of forcing them into a shallow tilt-out tray. Many are compatible with plastic stackable parts bins, which are available in many widths and depths.
The main failure is poor access. If bins are stacked four or five high, the lower bins become inconvenient to reach. A bin that is 8 inches deep may hold a lot, but parts at the back disappear under a layer of mixed hardware. Stacking also increases the chance of knocking over a container while pulling one from the middle.
Weight matters. A small bin filled with steel screws can weigh 5 pounds or more. If the bin has a thin front lip or a cracked nesting edge, it may collapse when lifted. For heavy parts, use bins with reinforced rims and place them no higher than chest level.
Where Tilt-Out Bins Work Best
Tilt-out bins provide faster one-handed access. You can read a label, pull the tray forward, and grab a few parts without clearing the bench or lifting a container. This is useful for supplies used repeatedly during wiring, assembly, and machine maintenance.
They also make a wall-mounted inventory easy to scan. A panel with 20 to 40 small compartments can keep common screws, washers, fuses, and connectors visible at eye level. Choose wall-mount tilt-out parts bins when floor and shelf space are limited.
The trade-off is fixed location. You cannot conveniently carry a mounted bin to a project across the shop. Tilt-out containers also tend to be shallow, so long screws, pipe fittings, and oddly shaped pieces may not fit. A tilted tray can dump its contents if it is overfilled or opened too aggressively.
Mounting is another failure point. A rack filled with metal hardware can weigh 30 to 50 pounds. Fasten it to studs, masonry, or a properly installed plywood backer rather than relying on drywall anchors alone. Leave enough clearance below the rack for the trays to open fully.
Stackable vs. Tilt-Out Bins
| Factor | Stackable bins | Tilt-out bins |
|---|---|---|
| Best use | Portable storage and mixed project parts | Fast access to frequently used parts |
| Capacity | Small to large, including deep containers | Usually small to medium and shallow |
| Reorganization | Easy; bins can be moved or regrouped | Limited; compartments stay mounted |
| Visibility | Good if bins are clear and not stacked too high | Very good from the front |
| Dust control | Better with lids or closed cabinets | Open fronts collect dust and overspray |
| Heavy parts | Generally better, if the shelf is rated for the load | Can strain the tray and wall mount |
| Typical failure | Hidden parts and unstable stacks | Overfilled trays, broken pivots, weak mounting |
Dust, Oil, and Workshop Conditions
Neither system is dustproof by default. Fine dust from sanding can settle on threads and electrical contacts, while grinding dust can work into hinges and pivots. If your shop regularly produces airborne dust, put small-parts storage behind cabinet doors or use lidded containers. A clear parts storage container with a lid is often a better choice for precision hardware than an open wall organizer.
Do not store oily rags, solvent-soaked parts, or leaking containers in ordinary plastic bins. Some plastics soften or become brittle when exposed to solvents. Keep chemicals in containers rated for the product, and store them separately from fasteners and electrical components.
For dusty shops, locate the organizer away from the dust collector discharge and directly beside the bench only if it will not interfere with work. A parts rack next to a grinder can quickly become coated with abrasive grit.
Sizing and Labeling That Actually Works
Use one bin for one part type whenever possible. Mixing 1/4-20 and 5/16-18 bolts because they “look close enough” guarantees wasted time and incorrect repairs. For common fasteners, separate by diameter, thread type, and length. A label such as “M6 x 20 socket head” is more useful than “metric bolts.”
Leave roughly 20 percent empty space in each bin. Overfilled containers are hard to search, spill when moved, and encourage parts to be returned to the wrong location. For tilt-out trays, keep the fill level below the pivot or front edge so parts cannot roll out when opened.
Use labels that remain readable under shop lighting. White plastic labels or printed tape are easier to read than tiny handwritten marks covered in oil. Put the label on the front and, for stackable bins, on the top as well. If a bin can be stored above eye level, the top label saves time.
A Practical Buying Plan
Start with stackable bins if your inventory is changing, your parts travel to different benches, or you are still deciding how the shop should be arranged. Buy enough sizes for current needs rather than filling a wall with empty compartments. A shelf or cabinet with adjustable spacing gives you more long-term value than a fixed rack.
Choose tilt-out bins for the 20 or so items you use constantly: common washers, wire connectors, fuses, zip ties, and frequently used screws. Mount them between waist and eye level, secure the rack properly, and reserve the lower positions for lighter parts.
The cheapest option is fine when the bin is lightly loaded, kept indoors, and opened only occasionally. Pay more for reinforced rims, smooth pivots, or a metal mounting frame when bins will carry heavy hardware, face daily use, or sit near a hot, dirty process. In most workshops, a mixed system is the sensible answer: stackable bins for capacity and mobility, tilt-out bins for speed.