What's inside
As an Amazon Associate I earn from qualifying purchases. This post may contain affiliate links at no extra cost to you.
In a small shop, an outfeed surface has to do more than catch boards leaving the table saw. It competes for floor space with assembly work, storage, dust collection, and walking room. The choice is usually between extending the workbench behind the saw or building a separate outfeed table that can serve several tools.
An integrated extension is cheaper and takes less space. A separate table is more flexible and often easier to use safely. The right answer depends on whether your table saw stays in one position, how much sheet goods you cut, and whether you need a large flat surface for assembly.
As an Amazon Associate we earn from qualifying purchases at no extra cost to you.
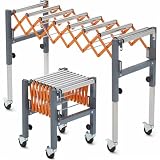


What an Outfeed Extension Does
An outfeed extension supports a workpiece after it passes the saw blade. Without support, a long board can drop, lift the rear of the stock, or twist into the blade. Those movements can cause burning, inaccurate cuts, or kickback. Support should begin close to the blade and remain flat with the saw table.
A typical small-shop extension is a 24- to 36-inch-deep platform attached to the rear of the saw or to a workbench. For cutting full sheets, more depth is useful, but a narrow extension can still handle cabinet parts, shelving, and shorter boards. The surface should be level with the saw table, or no more than about 1/32 inch lower. Higher than the saw table is likely to interfere with the cut.
The cheapest version is a plywood top fixed to a sturdy bench. Add a replaceable hardboard or laminate skin if you expect to slide plywood across it. A sag of even 1/8 inch across the width can steer a large panel and make the saw feel unsafe.
When an Integrated Extension Makes Sense
Choose an integrated extension when the saw has a permanent location and floor space is severely limited. It can use the dead space behind the saw as storage, too. Drawers below the top can hold push sticks, blades, featherboards, and measuring tools, keeping those items within reach without adding another cabinet.
This setup is usually the best value for a shop that primarily cuts dimensional lumber and occasional plywood. A basic plywood top, cleats, and a few screws may cost far less than a dedicated table. It is also stable: because the extension is tied to the saw or a heavy workbench, it will not roll away as a board reaches it.
There are limitations. The extension normally cannot move when you need the bench for assembly. If the saw is on a mobile base, the extension must move with it or be disconnected quickly. A fixed bench can also make it difficult to reach the rear of the saw for blade changes, dust hose connections, or resetting the riving knife.
For a compact build, a plywood and hardboard work surface is generally enough. Use a straightedge to check the joint between the saw and extension, and leave access to the saw’s power switch and circuit breaker.
When a Separate Table Is Better
A separate outfeed table earns its floor space when it also serves as an assembly table, finishing surface, or support for a planer or router setup. A 30-by-60-inch table is a useful minimum for many small shops; 36 by 72 inches gives much better support for cabinet sides and sheet goods but needs a clear operating area around it.
Mobility is the main advantage. Locking casters let you pull the table into position for the saw, then move it against a wall when you need the room. The casters must lock firmly in both swivel and rolling directions. Cheap casters can allow the table to creep under a heavy panel, which is a safety problem rather than a minor annoyance.
A dedicated table can also have a replaceable top, dog holes, clamps, drawers, or a lower shelf for dust-collection fittings. If you use it for assembly, keep the top free of deep tracks and protruding hardware. A flat torsion-box or plywood top is more useful than a complicated top full of accessories.
Separate does not automatically mean better. A lightweight table can rack when a sheet contacts it. Build the base with four legs, corner bracing, and a lower stretcher, or use a torsion-box design. Aim for a table that does not move when you lean hard against one corner.
Extension Versus Separate Table
| Factor | Integrated extension | Separate table |
|---|---|---|
| Typical cost | Low; often plywood and hardware | Moderate to high, especially with casters and storage |
| Floor space | Smallest permanent footprint | Requires room to move and store it |
| Stability | Excellent when attached to a heavy saw or bench | Good only if the base and casters are rigid |
| Other uses | Limited; usually tied to the saw | Assembly, finishing, storage, and tool support |
| Best for | Fixed saws and tight budgets | Mobile shops and multi-purpose work areas |
Build and Safety Details That Matter
Measure from the saw table, not from the floor. Check the height with the saw in its normal working position, including any mobile base. Use a long straightedge across the seam and test with a scrap board before cutting valuable stock. A board that catches at the seam is a warning that the surface is misaligned.
Keep at least 3 feet of clear space behind the outfeed path when possible. For full sheets, 4 feet or more is much easier to control. Do not let the table block an exit or force you to stand directly in the line of a possible kickback. The riving knife, blade guard, and anti-kickback features still matter; an outfeed table is not a substitute for them.
Dust collection needs room, too. A fixed extension can hide a hose and improve the setup, but leave enough slack for blade-angle adjustments and cleaning. A separate table may obstruct the hose or create a pinch point between the saw and table. A 2-1/2-inch hose is common for portable saws, while a 4-inch connection generally moves more air when the saw supports it. Use a dust-collection hose and clamp set that does not sag into the cutting path.
Lighting should cover the seam and the first few feet of outfeed space without placing your body between the light and blade. An adjustable linkable LED shop light mounted above the work zone is usually more useful than a bright fixture directly behind the operator.
The Practical Choice for Most Small Shops
If the saw stays put and the budget is tight, build the integrated extension first. Make it sturdy, level, and removable enough to service the saw. Spend the savings on a better blade, dust collection, and a proper push-stick storage spot.
If the shop already needs an assembly bench, build one robust separate table and design it around the saw’s height. Locking casters, a flat replaceable top, and a rigid base are more important than drawers or elaborate fixtures. A locking workbench caster set can make a heavy table movable, but only if the legs and frame are strong enough to resist racking.
For many shops, the sensible long-term arrangement is both: a narrow fixed extension for everyday cuts and a separate table available for large panels and assembly. Start with the fixed surface if space is the immediate problem, then add the mobile table when its second use justifies the footprint.