What's inside
As an Amazon Associate I earn from qualifying purchases. This post may contain affiliate links at no extra cost to you.
Workshop layout is not just a matter of where the tools look tidy. The position of machines, benches, storage and dust collection determines how often you move material, how much floor space you lose, and whether a mistake turns into an injury. The two common approaches are perimeter machines—tools arranged along the walls—and a central work island with machines or benches accessible from multiple sides. Both can work well. The right choice depends on your room, the material you handle and how often you need to reconfigure the shop.
As an Amazon Associate we earn from qualifying purchases at no extra cost to you.


How a perimeter layout works
In a perimeter layout, stationary tools sit against the walls, usually with storage above or beside them. A table saw, planer, drill press and bandsaw may each have a permanent position, while a workbench occupies one longer wall. The middle stays open for assembly, breaking down sheet goods or moving long stock.
This arrangement is usually the safest starting point for a small garage or basement shop. It preserves a clear central aisle and makes the room easier to share with a vehicle or household storage. It also simplifies dust collection: a collector can sit near an outside wall, with shorter branch runs to nearby machines.
The main limitation is access. A machine pushed hard against the wall may be awkward to service, clean or use from the rear. Long boards can also collide with walls, shelving or another machine. Before fixing a tool in place, mark its footprint and add the full infeed and outfeed path. A table saw handling an 8-foot board may need roughly 16 to 20 feet of clear travel, depending on the cut.
What a central work island adds
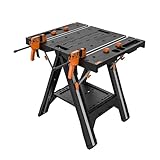
A central island can be a large assembly bench, an outfeed table, or a group of machines arranged back-to-back. It gives access from all sides, which is valuable for clamping, sanding, assembling cabinets and handling awkward workpieces. An island-mounted table saw can also double as an outfeed surface, saving space that a separate bench would consume.
The price is lost floor area. Leave at least 36 inches around a bench for normal passage; 42 to 48 inches is more comfortable when drawers open or two people work at once. Around a table saw, allow enough room for the longest expected stock in both directions, not merely enough room to walk around it. A central island that looks efficient on a floor plan can become a permanent obstacle once lumber, clamps and partially assembled projects accumulate.
Islands also need more careful power and dust planning. Floor outlets prevent cords crossing walkways, but they must be protected from impact and kept away from areas where water or finish spills are likely. Flexible dust hoses crossing the floor are a trip hazard. If the island contains a table saw or router table, plan overhead hose routing or a protected floor connection before the bench is built.
Perimeter machines versus a central island
| Factor | Perimeter machines | Central work island |
|---|---|---|
| Best use | Small shops, shared garages, infrequent setup changes | Frequent assembly, cabinet work and two-sided access |
| Floor space | Leaves the center open | Consumes the most usable floor area |
| Dust collection | Shorter, simpler duct or hose runs | May require floor or overhead routing |
| Material handling | Can be restricted by walls | Better access around large workpieces |
| Storage | Easy to add wall cabinets and shelves | Storage can obstruct movement or reduce clamping space |
| Reconfiguration | Usually harder once machines are fixed in place | Can be flexible if built on locking casters |
Plan around the work, not the machines
Draw the room on graph paper or masking tape the layout directly on the floor. Include doors, windows, heating equipment and the swing of every door. Then trace your normal workflow: bringing in rough lumber, cutting, milling, joining, sanding, finishing and storing the finished piece. Machines used consecutively should be close enough that you are not carrying boards across the entire room.
Keep a clear path from the entrance to the lumber rack. A rack holding 8-foot boards needs more than its own 12-inch depth; you need room to pull stock out without striking a light, vehicle or person. Store heavy sheet goods low, preferably vertically only when they can be restrained against falling. Small offcuts belong in a bin that can be reached without walking through the cutting zone.
A mobile base is useful for a planer, bandsaw or small router table, but wheels are not automatically an advantage. A machine that shifts during a cut is dangerous and produces poor results. Use locking casters rated for the machine’s full weight, and check that the locks prevent both rolling and swiveling. For a table saw, a fixed or positively braced stand is generally preferable to a flimsy rolling base.
Dust collection, power and lighting
Put the dust collector where its noise and exhaust are least disruptive, but do not hide it so completely that filter cleaning becomes a chore. A short, smooth run is better than a long hose loop. Use the largest practical ducting for the collector and tool inlet; a narrow shop-vac hose on a high-volume machine will choke airflow. For a small shop, a shop vacuum dust collection kit is often fine for a router, sander and small saw. It is not a substitute for a properly sized collector on a planer producing heavy chips.
Place general lighting so your body does not cast a shadow over the cut. Bright, evenly distributed LED fixtures are more useful than one intense lamp. Aim for roughly 50 foot-candles in general work areas and brighter task lighting at benches. Avoid glossy floors and bare bulbs in your line of sight; glare hides pencil marks and blade teeth.
Provide more outlets than you think you need, ideally on separate circuits for high-load tools. Do not solve inadequate wiring with daisy-chained extension cords. A workshop-rated power strip is acceptable for chargers and lamps, but stationary saws, compressors and dust collectors should use properly installed receptacles and circuits. Use GFCI protection where required by local code, especially in garages and damp areas.
Bench, storage and safety details
A workbench against the perimeter is the cheaper and more space-efficient option when most projects are small. A 24- to 30-inch-deep bench with drawers underneath is enough for hand-tool work and light assembly. Choose a central island instead when you regularly assemble cabinets, clamp large frames or need to work from both sides. A 30- to 36-inch bench height suits many general tasks, but lower it slightly for heavy hand-planing and raise it for detailed finishing if that is your main work.
Keep frequently used hand tools between shoulder and knee height. Reserve high shelves for light, rarely used items; storing a heavy planer overhead creates a lifting hazard. Mount a tool storage pegboard system near the bench, but do not place loose tools where they can fall into a blade path.
Finally, keep fire extinguishers accessible from the exit, not behind the finishing bench. Separate oily rags in a listed metal container with a self-closing lid. Maintain a clear 36-inch route to the door, sweep chips before they build up around motors, and never let layout convenience justify bypassing blade guards, riving knives or dust protection. The best arrangement is the one that makes the safe action the easy action.