What's inside
As an Amazon Associate I earn from qualifying purchases. This post may contain affiliate links at no extra cost to you.
The Height Problem in a Low-Ceiling Shop
Overhead storage can reclaim valuable wall and floor space, but a low ceiling changes the calculation. In a shop with an 8-foot ceiling, a cabinet or rack hung 12 inches below the joists can leave only about 7 feet of clearance. Add a 6-foot-2-inch user, a sheet of plywood being carried, or a raised workpiece, and the storage becomes a daily hazard.
Wall-mounted storage is usually the safer default below 8 feet. It keeps tools visible, avoids head strikes, and can be installed at a height that leaves the ceiling clear for lighting, dust collection ducts, and electrical work. Overhead storage still has a place, but it should be reserved for shallow, lightweight items that you do not need constantly.
As an Amazon Associate we earn from qualifying purchases at no extra cost to you.


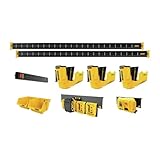
Overhead vs. Wall-Mounted Storage
| Factor | Overhead storage | Wall-mounted storage |
|---|---|---|
| Best use | Seasonal supplies, empty cases, light lumber, rarely used tools | Hand tools, clamps, batteries, fasteners, daily-use equipment |
| Clearance risk | High in an 8-foot or lower ceiling | Low if mounted above the bench or below shoulder height |
| Access | Often requires a step stool | Usually reachable from the floor |
| Installation load | Must resist downward and sideways forces | Mostly downward force, provided it is attached correctly |
| Effect on lighting and dust collection | Can block fixtures and interfere with duct runs | Leaves the ceiling more flexible |
When Overhead Storage Makes Sense
Use overhead storage when the material is light, infrequently handled, and unlikely to fall onto a person. Empty tool cases, camping gear, spare filters, seasonal finishing supplies, and lightweight plastic bins are reasonable candidates. Keep the storage shallow—roughly 12 to 18 inches deep—so it does not become a head-level shelf.
In a low-ceiling shop, avoid overhead racks directly above a table saw, planer, drill press, or assembly bench. Those areas need vertical clearance for boards and sheet goods. A rack above a clear aisle is not automatically safe either: a dropped bin can cause an injury, and reaching overhead while standing on a stool is an unstable operation.
Do not rely on drywall anchors or ordinary ceiling tiles. Fasten overhead racks into joists, blocking, or a properly built structural frame. Check the rack’s rated capacity, then stay well below it. A practical limit is to load it to no more than 50 to 60 percent of the stated rating, especially when the rack is suspended with threaded rod or has a long projection from the ceiling. The load shifts when a bin is pulled out.
For this category, a ceiling-mounted storage rack is best treated as a backup storage area, not a replacement for cabinets at working height.
Why Wall Storage Usually Wins
Wall-mounted storage makes better use of a low shop because it uses the vertical surface without competing with overhead lighting, ductwork, and material handling. A French cleat, slatwall panel, pegboard, or shallow cabinet can hold a surprising amount while keeping the floor open.
Mount frequently used tools between waist and shoulder height. Put heavier items lower, ideally with their center of gravity below chest height. A cordless drill station can sit around 48 to 60 inches above the floor; clamps may need a lower rack because long handles extend outward. Leave at least 6 inches of clearance around tool handles so removing one does not knock neighboring tools loose.
For a simple and inexpensive setup, a plywood French cleat works well. Use 3/4-inch plywood, rip it at a 45-degree angle, and fasten the wall piece to studs with structural screws. Locate the studs rather than trusting drywall anchors. A 4-foot cleat attached to three or four studs can safely carry far more than a cleat attached only to plasterboard, provided the boxes and brackets are also built strongly.
A French cleat wall storage system costs more than loose pegboard but is easier to rearrange and less likely to pull away when a heavy tool is lifted off at an angle. Pegboard is fine for screwdrivers, small pliers, and light accessories; it is a poor choice for a dense row of cast-iron tools unless the mounting frame is reinforced.
Keep Storage Clear of Dust Collection
Storage placement affects dust collection. Bins and cabinets mounted close to a dust collector inlet can restrict airflow or make hose routing awkward. Keep flexible hose runs as short and straight as possible, and avoid forcing a 4-inch hose around sharp corners created by shelving.
Do not store open boxes of sanding discs, router bits, or electrical components beside a chip-producing machine. Fine dust settles on tool motors and switches, while chips can jam drawers. Enclosed wall cabinets are worthwhile for abrasives, replacement filters, and finish materials. A wall-mounted garage storage cabinet is often a better buy than an overhead rack when dust and moisture are concerns.
Plan Lighting and Safe Clearance First
Install lighting before deciding where storage goes. A low ceiling benefits from multiple slim LED fixtures rather than one central fixture hidden behind a rack. Aim for roughly 50 foot-candles at a general workbench and 75 to 100 at detailed work areas. Storage should not cast a shadow across the vise, saw table, or assembly surface.
Mark the maximum height of stored items with tape before drilling. Walk the shop while carrying a 4-by-8-foot sheet, a long board, or a box of tools. If anything catches the rack, fixture, or cabinet, the layout is too crowded. Maintain a clear walking path at least 36 inches wide; 42 to 48 inches is more comfortable around machines.
Secure every door, bin, and hanging hook. A cabinet that is safe when closed can become front-heavy when its drawers are extended. Add latches where vibration from a planer or dust collector could open doors. Label bins at eye level, and keep a step stool out of the main aisle so it does not become a permanent trip hazard.
A Practical Low-Ceiling Layout
Put a shallow wall system above and beside the main bench for daily tools. Place heavier storage in base cabinets or under the bench. Reserve one ceiling rack near the least-used corner for light, bulky items. Keep the center of the ceiling open for LED fixtures and dust collection lines, and leave the area above machines clear for stock movement.
The cheaper option is fine when it matches the load: plywood cleats, reinforced pegboard, and labeled plastic bins can outperform expensive modular systems. Spend more on structural fasteners, enclosed cabinets for dusty materials, and storage that prevents repeated reaching or climbing. In a low-ceiling shop, accessibility and clearance are usually worth more than maximizing every cubic foot.