
What's inside
As an Amazon Associate I earn from qualifying purchases. This post may contain affiliate links at no extra cost to you.
Best Belt and Disc Sanders: Compare Configurations and Shop Fit
For most small woodworking shops, a 4-by-36-inch belt and 6-inch disc sander is the best balance of edge-sanding capacity, footprint, and manageable power; choose a 6-by-48-inch belt with a 9-inch disc when you regularly shape wider stock and have room for a heavier machine.
The right belt disc sander is less about choosing the largest dimensions and more about matching the belt’s working length, disc diameter, adjustment range, and base stability to your projects. A compact combo machine can handle squaring small parts, smoothing curves, and refining miters, but it won’t replace a dedicated large belt sander for broad panels or heavy stock removal.
As an Amazon Associate we earn from qualifying purchases at no extra cost to you.
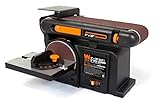
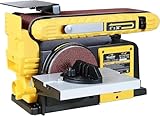
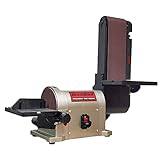
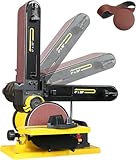
Compare common configurations
The figures below describe representative benchtop machine formats, not guaranteed specifications for every model. Verify a machine’s manual before buying, especially for weight, table angles, and available abrasive sizes.
| Configuration | Typical belt and disc | Typical adjustment | Shop fit and best use |
|---|---|---|---|
| Compact combo | 1 × 30 in belt; 5 in disc | Belt often tilts up to 90°; disc table commonly tilts to 45° | Light, occasional work and small parts; low bench-space demand |
| General-purpose combo | 4 × 36 in belt; 6 in disc | Belt commonly tilts from horizontal to vertical; disc table often reaches 45° | Good all-round choice for furniture parts, shop projects, and routine fitting |
| Larger benchtop combo | 6 × 48 in belt; 9 in disc | Belt may tilt through a broad range, sometimes approaching 90°; disc table often reaches 45° | More belt contact and disc area for frequent shaping; needs a sturdy, spacious bench |
A longer belt provides more usable sanding surface before one small area becomes worn or loaded. A wider belt supports broader edges and makes it easier to keep a workpiece flat, but it does not automatically produce a more accurate result: a poorly aligned belt or flexible table can still spoil a square edge. A larger disc offers more working area, while its outer edge moves faster than the area near the center. Keep parts on the portion of the disc that rotates downward onto the table, and avoid sanding on the unsupported, upward-moving side.
Choose by the work and the available bench
- For occasional small projects: A 1-by-30-inch belt and 5-inch disc can be a space-conscious choice for model parts, small boxes, and light fitting. Its narrower belt limits how comfortably you can sand broad edges, so expect more careful handling of larger pieces.
- For a general-purpose home shop: A 4-by-36-inch belt and 6-inch disc usually covers the widest range of everyday tasks without taking up the space or imposing the weight of a larger unit. Look for a belt arm that locks securely in both horizontal and vertical positions.
- For frequent shaping and wider stock: Consider a 6-by-48-inch belt and 9-inch disc if the work justifies the larger footprint. The longer, wider belt can be more forgiving across broad edges, but the machine needs a rigid mounting surface and a clear area around both sanding surfaces.
- For very long edges or large panels: A combo sander may be the wrong primary tool. Its belt length, table size, and motor capacity can constrain continuous work; a dedicated edge or wide-belt sander may suit repeated large-scale tasks better.
Before buying, measure not just the machine base but also the working envelope. A vertical belt needs clearance above it; a horizontal belt needs room to support the workpiece; and the disc table needs unobstructed space for angled cuts. Allow room to reach the tracking adjustment and belt-release lever, and account for dust-collection fittings at the rear or side. A machine that fits on paper can become awkward once connected to a hose and loaded with a long board.
Stability and adjustment matter as much as size
Combo sanders generate enough vibration to move a light machine, particularly when a belt is worn or a workpiece is pressed too hard. Check whether the base has mounting holes and whether the bench can accept bolts or clamps. For a portable setup, a heavy mounting board clamped to the bench can add stability without permanently fastening the sander.
Inspect the belt arm and tables for positive locks, not just hand knobs that tighten against a moving surface. The disc table should stay square to the disc when set at 0°, and its angle scale should be treated as a guide rather than a substitute for checking with a reliable square. The belt’s tilt range is useful only if the arm locks without shifting under pressure. A table with a gap that varies along the disc can also catch narrow workpieces, so check how close and evenly it sits to the abrasive.
Dust collection is another practical differentiator. A port is helpful, but it does not guarantee clean operation: sanding dust can escape around the disc, belt, and workpiece. Match the port to a suitable extractor or shop vacuum, and clear dust from the machine and surrounding bench regularly. Fine wood dust is a respiratory hazard; use effective dust collection and appropriate respiratory protection for the material and task.
Operating costs and wear to expect
Abrasives are the main recurring cost. As a general market guide, combo sanders range from roughly $100–$200 for basic compact machines, about $150–$350 for many general-purpose benchtop options, and $300–$600 or more for heavier or more capable units. Belt and disc replacement prices vary with size, backing, grit, and pack quantity; specialty abrasives can cost more. Check that replacement belts and discs are readily available before committing to an uncommon size.
The abrasive usually wears or clogs before the machine itself is spent. Resinous woods, paint, and softwoods can load an abrasive quickly; a loaded belt cuts poorly and encourages users to press harder, creating excess heat and uneven results. Replace belts that are torn, badly glazed, or no longer track reliably. Keep spare abrasives flat and dry, and use an abrasive-cleaning stick when suitable for the abrasive type.
Other wear points include the drive belt, belt-tracking components, table-lock hardware, and dust-exposed bearings or switches. Keep dust out of moving parts, unplug the sander before changing abrasives or cleaning near the belt, and follow the manufacturer’s maintenance schedule. Avoid forcing the workpiece: let the abrasive remove material with steady, light pressure, and keep small parts supported with a jig or suitable push aid rather than holding them close to the disc by fingertips.
A practical selection checklist
- Can you buy the correct belt and disc sizes locally or from reliable suppliers?
- Will the belt tilt to the orientation you use, and does its arm lock firmly?
- Does the disc table tilt to the angles you need and return accurately to square?
- Can your bench support the machine without rocking, and is there room for the workpiece?
- Can you connect dust collection without blocking adjustments or table movement?
- Does the machine’s capacity match your usual stock, rather than an occasional maximum-size project?
When two machines appear similar, favor the one with easier-to-source abrasives, dependable table locks, accessible tracking controls, and a base you can secure. For many buyers, that makes a well-supported 4-by-36-inch belt and 6-inch disc combination a more useful long-term purchase than a larger machine that crowds the bench or is difficult to maintain.