
What's inside
- The best budget mortiser depends on your stock and mortise size
- Budget mortisers compared by the work they suit
- Choose by your typical work, not the biggest job you might do
- Four details that separate convenient machines from frustrating ones
- Setup habits that improve accuracy and tool life
- What a budget machine costs beyond the purchase
- Bottom line
As an Amazon Associate I earn from qualifying purchases. This post may contain affiliate links at no extra cost to you.
The best budget mortiser depends on your stock and mortise size
For repeatable furniture joinery on common hardwood stock, a 1/2-inch benchtop mortiser is the best budget mortiser for most home shops; choose a compact 3/8-inch model if your work is smaller or storage is tight, and step up to a floor-standing machine if you routinely cut deep, wide mortises in large parts. Before buying, compare throat capacity, chisel-change convenience, table adjustment, and how securely the machine can be mounted—not just the largest chisel size listed.
Budget mortisers compared by the work they suit
The figures below are representative of common machine classes, not specifications for a particular model. Check the current manual before purchasing: capacities, table travel, and machine weight vary by manufacturer and model.
As an Amazon Associate we earn from qualifying purchases at no extra cost to you.

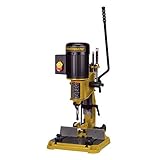


| Machine class | Typical chisel range | Typical throat capacity | Approx. machine weight | Best fit |
|---|---|---|---|---|
| Compact benchtop | 1/4–3/8 in. | About 3–4 in. | About 40–60 lb | Small boxes, light furniture, limited shop space |
| Standard benchtop | 1/4–1/2 in. | About 4–6 in. | About 50–90 lb | Furniture parts and general-purpose joinery |
| Floor-standing | 1/4–3/4 in. or more | About 6–8 in. or more | About 150–300 lb | Large stock, frequent use, longer workpieces |
These ranges are useful for narrowing the field, but throat capacity is not the same as maximum mortise length. Throat capacity describes the distance from the chisel centerline to the column; the table’s usable travel and fence arrangement determine how far you can reposition a workpiece for a long mortise.
Choose by your typical work, not the biggest job you might do
| Your situation | Practical choice | Why |
|---|---|---|
| Occasional small projects; limited storage | Compact benchtop, up to 3/8-in. chisel | Lower cost and easier storage; adequate for small furniture and boxes |
| Regular furniture work; common 3/4-in. stock | Standard benchtop, 1/2-in. capacity | A useful balance of reach, chisel options, and footprint |
| Large frames, thick stock, or frequent production | Floor-standing machine | More mass and working room can make setup and repeated cuts less cumbersome |
| Very occasional mortises and almost no storage space | Consider a drill press mortising attachment | It may cost less if you already own a suitable drill press, but setup and rigidity can be less convenient |
For a typical 3/4-inch-thick furniture rail, a 1/4-inch or 5/16-inch mortise is often a sensible starting point, subject to the design and load. A machine’s advertised 1/2-inch capacity means it can accept that chisel size; it does not mean every cut should be that wide. A large chisel removes more material and places greater demands on the machine, the bit, and the workholding.
Four details that separate convenient machines from frustrating ones
Capacity and reach
Match the largest chisel you expect to use, then check the machine’s actual throat and table travel. If a rail is too wide to fit under the chisel, a larger nominal chisel capacity will not solve the problem. For long mortises, confirm the fence and work stop can reposition the stock without losing alignment.
Chisel changes and alignment
Hollow-chisel mortisers need the bit and chisel aligned with the correct clearance between them. A keyed chuck, accessible locking points, and a setup method that is easy to repeat can save time when changing sizes. A quick-change feature is useful only if it holds alignment securely. After a change, check that the bit turns freely inside the chisel and that the chisel opening faces the direction specified by the manual.
Table and fence adjustment
Look for a table that adjusts smoothly and locks without shifting, plus a fence that stays square under clamping pressure. A scale can speed up rough positioning, but verify critical settings with a rule or square. If the table is small, consider whether your usual parts can be supported without rocking or cantilevering far beyond its edges.
Stability and mounting
A light benchtop machine can cut accurately when it is firmly attached to a rigid bench and the work is clamped close to the chisel. It can feel awkward when perched on a narrow or flexible surface. Check the base’s mounting points and footprint before buying. If you cannot leave the machine mounted, a dedicated plywood or laminated base that can be clamped to a solid bench is a practical alternative to repeatedly balancing it on a crowded worktop.
Setup habits that improve accuracy and tool life
- Mount the machine before dialing it in. Movement in the base can undermine careful fence and depth settings.
- Set depth in stages. Use the depth stop for consistency, and remove material in manageable bites, especially in dense hardwood.
- Keep the chisel sharp and clean. Pitch and resin increase friction; dull edges encourage excessive feed pressure and can leave ragged walls.
- Clamp the workpiece. Do not rely on one hand to resist the cutting force. Use the fence, hold-down, and suitable clamps without obstructing the stroke.
- Make overlapping cuts deliberately. For a longer mortise, advance the stock in controlled increments. Overlap enough to remove the webs between cuts, but avoid forcing the chisel sideways.
- Clear chips often. Packed waste can bind the chisel and overheat the cutting edges. Follow the manual’s guidance for clearing chips and lubricating the chisel exterior.
Chisels and bits are wear items. The cutting edges usually need attention before the machine itself does, particularly if you work abrasive or dirty stock. Inspect the chuck, handle linkages, depth stop, and table locks periodically; loose fasteners or a drifting fence can affect repeatability even when the chisel is sharp. Avoid using a mortiser as a substitute for clearing chips with the motor running or for cutting material the manufacturer excludes.
What a budget machine costs beyond the purchase
As a broad market guide, compact benchtop mortisers often fall around $150–$300, standard benchtop machines around $200–$450, and floor-standing models around $500–$1,000 or more. These are general ranges, not current quotes; included chisels, construction, and market availability affect pricing. Budget for sharpening supplies or replacement chisels, a stable mounting solution, and clamps if you do not already have them.
For example, if a $250 benchtop machine is used for 25 projects, its purchase cost alone works out to $10 per project; at 100 projects, it is $2.50. That simple calculation excludes setup time, sharpening, and accessories, but it shows why a more capable machine may not be worthwhile for occasional work—and why a flimsy or inconvenient setup can be a poor bargain for regular use.
Bottom line
Choose a compact 3/8-inch benchtop mortiser for small work and minimal storage, a standard 1/2-inch benchtop machine for the broadest range of typical furniture joinery, or a floor-standing model when stock size, reach, and frequent use justify its space and cost. Confirm the working envelope, inspect how the table and fence lock, and plan how the machine will be mounted. Those details matter more to accurate, repeatable mortises than buying the largest capacity you may never use.