What's inside
As an Amazon Associate I earn from qualifying purchases. This post may contain affiliate links at no extra cost to you.
A shared garage has to do two jobs: store a vehicle and support accurate, safe woodworking. The best workbench is not necessarily the biggest one. It is the one you can clear, lock, or roll out of the way without dismantling the entire shop. Plan around the garage’s usable footprint, not its total square footage.
As an Amazon Associate we earn from qualifying purchases at no extra cost to you.


Start With the Garage
Park the car inside before measuring. Leave at least 30 inches for walking along the sides, and reserve 36 inches or more in front of the bench for feeding boards and opening drawers. A garage door, side door, water heater, and electrical panel all need clear access. Mark these zones on the floor with tape for a week. If you repeatedly trip over a proposed cabinet or cannot open a door fully, the layout is already wrong.
Most shared garages work best with a bench along one wall and mobile tools parked underneath or on the opposite wall. Keep the center open. A 24-inch-deep bench leaves more driving and parking room than a 30-inch model, while still providing enough depth for joinery, assembly, and hand-tool work. The exception is a planer or table saw setup that needs long infeed and outfeed space; those tools should usually roll into position only when needed.
Choose a Bench Configuration
| Configuration | Best for | Main advantage | Main drawback |
|---|---|---|---|
| Fixed wall bench | Frequent woodworking and hand tools | Stiff, simple, and easy to organize | Consumes permanent parking and storage space |
| Rolling bench | Shared garages with changing layouts | Can move against a wall or outside | Casters can reduce stability and add cost |
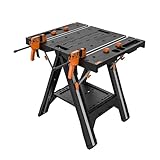
| Folding bench | Occasional projects and small repairs | Maximum floor clearance when stored | Limited mass, depth, and clamping options |
| Hybrid bench | Most serious shared-garage shops | Fixed storage with a mobile work surface | More planning and construction effort |
A fixed bench is the most pleasant to use. Screw it to wall studs, add a lower shelf, and it will resist racking while hand-planing or chiseling. If the car must occupy that wall, build a 24-inch-deep rolling bench with four locking casters. Choose casters rated for the full bench, tools, and workpiece weight; a 600-pound total load divided across four wheels is not a reason to buy 150-pound casters, because impacts and uneven floors reduce the practical capacity.
For a folding setup, spend money on a rigid top and reliable supports rather than decorative features. A 1-1/2-inch laminated top or torsion-box top is far less frustrating than a thin panel that bounces during sawing. Folding legs should lock mechanically, not rely on friction. The cheaper option is fine if you mainly sand, assemble, or repair small parts. It is a poor choice for planing, routing, or heavy chopping.
Get Height and Surface Details Right
Start around 34 to 36 inches high, then adjust for your work. A hand-tool bench may be comfortable at roughly wrist height when standing. A sanding or assembly surface can be 36 to 38 inches. If several people use the garage, adjustable feet or a replaceable top are more useful than chasing a perfect measurement.
Use a flat, replaceable sacrificial surface such as MDF, plywood, or a laminated hardwood top. MDF is inexpensive and flat, but it swells quickly when exposed to water. Seal its edges or use plywood if the garage is damp. Add bench dogs, holdfast holes, or a vise only after deciding how you actually clamp work. A large vise hanging off the front can interfere with parking and become a dangerous snag point.
For a mobile bench, retractable casters or leveling casters are preferable to ordinary swivel wheels left on the floor. Locking wheels stop rolling but may still allow the bench to rock. Test the bench by pushing diagonally; any movement means the frame needs bracing, better feet, or a flatter parking location.
Build Storage Around the Bench
Use shallow wall storage for frequently used hand tools and reserve cabinets or bins for bulky accessories. Pegboard is cheap and easy to rearrange, but hooks can fall out when a tool is removed. French cleats are stronger and let you lift entire holders off the wall when the garage needs to change jobs. Keep heavy items below shoulder height. A planer, compressor, or full hardware bin above head level is a falling-object hazard.
Put the bench near an outlet, but do not overload one circuit with a dust collector, shop vacuum, heater, and saw. Extension cords across a driving path are trip and tire hazards. A ceiling-mounted cord reel can keep power off the floor, provided it is rated for the tools used and does not hang where the garage door or vehicle can strike it. If adding circuits, have the work completed and inspected according to local requirements.
For general organization, French cleat tool storage systems are a good fit for a changing garage. Use labeled bins for screws, sandpaper, and router bits. Labels matter more than matching containers: hidden hardware becomes duplicate hardware.
Control Dust and Improve Visibility
Dust collection should move with the tool when possible. A shop vacuum with a fine dust filter and a cyclone separator handles a router, sander, and track saw well. A larger collector is better for a planer or cabinet saw, but it takes floor space and may need a dedicated 240-volt circuit. A separator protects the vacuum filter and keeps suction more consistent; it does not make an unsafe dust system safe by itself.
Use a short, wide hose when the tool supports it, and keep the hose run smooth. Long narrow hoses, clogged filters, and leaking blast gates are common causes of weak collection. Fine sanding dust can remain airborne after the machine stops, so run filtration for another 15 to 30 minutes and wear a properly fitted respirator when the task creates visible dust. A shop vacuum cyclone separator is often the cheapest meaningful upgrade for a small bench shop.
Use bright, even overhead lighting plus task lighting at the bench. Aim for roughly 500 to 1,000 lumens per square meter at the work surface, with a color temperature around 4,000 to 5,000K. Light from the front or both sides reduces shadows from a blade or hand. Do not depend on a single bulb in the garage-door opener; your body will block it exactly when you need to see a cut line.
Make the Layout Safe to Pack Away
Give every mobile tool a marked parking position. Store blades, router bits, and sharp chisels in closed cases rather than loose drawers. Keep a fire extinguisher rated for ordinary combustibles and electrical equipment near an exit, not behind the bench. Do not store oily rags in an open pile; use a listed metal container with a self-closing lid.
Before leaving, disconnect portable tools, empty the dust collector, sweep with a vacuum rather than compressed air, and return the bench to its parking line. The best shared-garage configuration is the one that takes five minutes—not an entire Saturday—to make safe for the car.