What's inside
As an Amazon Associate I earn from qualifying purchases. This post may contain affiliate links at no extra cost to you.
A vise for a general-purpose bench needs to hold work securely without making ordinary jobs slower or awkward. A quick-release vise opens and closes quickly when you need to change jaw width. A screw vise takes more turns, but gives you predictable control and is often simpler and cheaper. For a bench used for repairs, woodworking, and light metalwork, either can work; the better choice depends on how often you reposition the jaws and what you clamp.
As an Amazon Associate we earn from qualifying purchases at no extra cost to you.

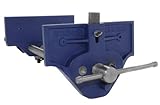


How the two vise types work
A conventional screw vise moves its jaw along a threaded screw. You turn the handle to open or close it, and the screw supplies clamping force. Most models have a few inches of travel, so opening the vise by 2 inches can take several turns.
A quick-release vise adds a mechanism that disengages the screw when the jaw is unloaded. You pull a lever or trigger, slide the jaw close to the work, then turn the handle to clamp. It saves time when the opening changes often, but the final clamping still comes from the screw. It is not a substitute for tightening the handle.
Quick-release vs. screw vise
| Factor | Quick-release vise | Conventional screw vise |
|---|---|---|
| Jaw adjustment | Slide quickly, then tighten | Turn handle through the full travel |
| Best fit | Frequent changes in workpiece size | Occasional clamping and steady setup |
| Cost and upkeep | Usually costs more; release parts need to stay clean | Usually less expensive; fewer moving parts |
| Potential drawback | Can disengage poorly if worn, dirty, or misused | Slow to reposition across a wide jaw opening |
| Clamping control | Fine control comes from the screw after the jaw is positioned | Fine control comes from the screw throughout adjustment |
When quick release is worth paying for
Choose quick release if you regularly move between narrow parts and wide assemblies, or clamp and release many pieces in one session. The time saving is most noticeable when the jaw has to travel several inches. If your work usually fits within a narrow range, the feature may save only a few seconds now and then.
Before buying, check that the release mechanism works smoothly throughout the vise’s travel and re-engages reliably. A common failure mode is trying to use the release while the jaws are under load; many mechanisms are intended to disengage only after pressure is removed. Dirt and chips can also make a release sticky. Keep the mechanism clear, and do not force the jaw if it will not slide.
For frequent general bench work, compare quick-release bench vises by jaw opening, throat depth, mounting pattern, and vise weight—not just by the release feature. Jaw width is not the same as maximum opening: check both dimensions against the pieces you expect to hold.
When a conventional screw vise is enough
A basic screw vise is a sensible choice if you clamp only occasionally, mostly handle similarly sized work, or want to put more of your budget toward a sturdy bench and proper mounting. Turning the handle takes longer, but there is less mechanism to operate and keep clear. For a home workshop where the vise is used for a few jobs each week, that trade-off is often easy to accept.
A screw vise can still be slow when you repeatedly open it from, say, 1 inch to 5 inches. But that does not automatically justify an upgrade: estimate how often you make that change, not how fast the feature sounds in a product description. A plain bench vise with a screw mechanism is often the better value when speed is not a regular bottleneck.
Fit the vise to the bench and the work
Measure the bench thickness, underside clearance, and available mounting area before ordering. A vise that is too large for the bench can flex the top or interfere with drawers and leg structure. Mount it through a solid section of the bench with suitable bolts, washers, and backing plates where needed; screws driven into a thin top alone can loosen under repeated force.
Position the fixed jaw near the front edge so longer stock can hang below the bench without hitting the apron. Leave room for the handle to turn without striking a leg, cabinet, or stored tool. If the vise will be used for both wood and metal, removable jaw pads help prevent steel jaws from marking finished wood. Soft pads do not make it safe to apply unlimited force: small or delicate parts can still crush, bend, or slip.
For woodworking, a vise intended for woodworkers or a vise fitted with wooden jaw faces is usually easier on boards than bare metal jaws. For metalwork, a sturdily mounted vise with a suitable jaw opening matters more than quick release alone. Some general-purpose vises include a small anvil surface, but it should not be treated as a heavy forging surface; hard hammering can damage the vise or workbench.
Avoid the common failure modes
Do not use a pipe or long extension on the handle to multiply force. Over-tightening can bend the screw, crack a casting, pull mounting bolts loose, or damage the workpiece. Clamp near the center of the jaws when possible; gripping at one end can twist the moving jaw and reduce contact. For thin or finished material, spread the load with pads or a scrap block.
After installation, test the vise with moderate pressure and check for movement at the mounting bolts and bench. Retighten hardware if it settles, and periodically clear chips from the screw and release mechanism. A quick-release vise earns its extra cost when rapid repositioning is part of the routine. If it is not, a well-mounted screw vise is the cheaper, straightforward tool—and usually all a general-purpose bench needs.