What's inside
As an Amazon Associate I earn from qualifying purchases. This post may contain affiliate links at no extra cost to you.
Hand planes need storage that protects their soles and edges, keeps them dry, and lets you put them away without a fussy routine. For most shops, a shallow drawer or wall cabinet with individual compartments is a better choice than a rack that leaves planes exposed to dust and accidental knocks. Block planes are small enough to share a compartment with other tools, but keeping them separate makes them easier to find and less likely to get scratched.
As an Amazon Associate we earn from qualifying purchases at no extra cost to you.


What good plane storage needs to do
A plane’s sole and cutting edge are precision surfaces. A tool dropped onto concrete, knocked against a chisel, or left where condensation forms can need more than a quick wipe before it is ready to use. Storage should prevent tools from rolling or touching, avoid trapping damp air, and leave enough space to lift each plane out by its body rather than tugging on the iron or lever cap.
Measure your planes before buying or building storage. A typical bench plane may be around 9 to 14 inches long, while a block plane is often about 6 to 7 inches. Allow roughly 1 inch of clearance around each tool so your fingers fit and the plane does not scrape a divider. If the drawer will hold a plane with its iron installed, make sure the iron cannot contact the drawer bottom when the plane is set down.
Compare the main storage options
| Option | Best for | Trade-off |
|---|---|---|
| Shallow drawer with dividers | Several planes and a clean, protected setup | Uses bench or cabinet space; drawer must be deep and sturdy enough |
| Wall cabinet or enclosed shelf | Keeping tools visible but shielded from dust | Needs secure mounting and enough clearance for safe removal |
| Open wall rack | Frequent access in a dry, clean shop | Exposes planes to dust, bumps, and changes in shop humidity |
| Tool roll or padded case | Transport or occasional storage | Can hold moisture and is inconvenient for daily use |
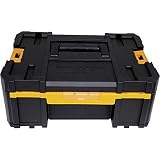
A drawer is usually the practical choice if you have a tool chest or cabinet already. Look for a shallow tool-chest drawer with dividers if you need a ready-made starting point. Check the interior dimensions rather than relying on the outside size: a drawer that is only 2 inches deep may not clear a tall tote or the handle on a larger plane.
Build a simple drawer insert
For a custom fit, make a removable tray from 1/4-inch plywood or 1/2-inch solid stock. Use dividers to create separate bays, with the plane resting flat on its sole or on two narrow supports that keep the cutting edge clear of the bottom. Do not store a plane on its side where the iron can rub against a wall of the compartment. For a block plane, a small bay about 8 inches long and 3 to 4 inches wide is often enough, but check your own tool first.
Line the contact points with cork, felt, or thin leather if the tray is rough. Avoid thick, soft foam that can trap moisture or make the tool rock. A simple plywood divider is often sufficient when the plane is kept clean and the compartment is sized so the tool cannot slide around. Label each bay if you own several similar planes; that saves time without adding another organizer.
When wall storage makes sense
A wall rack is useful when you reach for the same one or two planes throughout the day and have limited drawer space. Mount it near the bench, away from the path of boards being carried and from doors or clamps that could strike the tools. Keep the rack high enough to avoid bench clutter but low enough that you can lift a plane down without reaching over your head.
Open racks are a poor fit for a shop that produces heavy sanding dust or has large seasonal humidity swings. If you choose one, store planes with the irons slightly retracted and cover the rack when the shop is dusty. An enclosed wall-mounted tool cabinet costs more and takes more room, but it provides a useful barrier against dust and casual bumps. It does not solve dampness on its own; a sealed, cold cabinet can still collect condensation.
Prevent rust and edge damage
Before putting a plane away, brush off shavings and wipe the body and iron dry. In a humid shop, use a light rust-preventive oil or wax on exposed metal, then wipe away any excess so it cannot transfer to wood. A small desiccant pack can help in an enclosed cabinet, but replace or recharge it as directed; an old saturated pack is not protection. Do not leave a damp rag in the drawer.
Retract the iron until the edge is safely behind the mouth, especially if the plane will move in a drawer or be carried. Retraction reduces the chance of nicking the edge, but do not force the adjuster or wind the iron back so far that it loosens unexpectedly. Keep spare irons in a sleeve or separate slot rather than loose beside the plane.
What to buy—and when not to
If you have two or three planes, a divided drawer you build from scrap plywood may be all you need. Spending on a dedicated cabinet makes sense when it adds protection, improves access, or keeps a growing collection organized—not simply because it is labeled for woodworking. For a mobile shop or shared workspace, a padded tool roll is useful for transport, but open it after use and let the tools dry before rolling it shut.
Before committing to any setup, test it with your largest plane and a block plane. You should be able to remove each tool in one motion, without lifting another tool first. If a plane slides when the drawer opens, add a divider or non-slip contact strip rather than packing the bay tightly. The best storage is the simplest arrangement that keeps the tools dry, separated, and ready to use.