What's inside
As an Amazon Associate I earn from qualifying purchases. This post may contain affiliate links at no extra cost to you.
Small workshop hardware is easy to underestimate. A box of screws takes little room, but a dozen partly used boxes, loose washers, and mixed fasteners can consume a drawer and slow down every repair. The choice between labeled bins and custom-fit drawers comes down to how often you handle a part, how many kinds you keep, and whether the storage has to move or stay put.
As an Amazon Associate we earn from qualifying purchases at no extra cost to you.



The quick choice
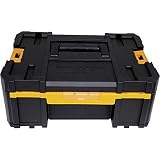
Choose labeled bins when you need visible, flexible storage for a growing assortment. They work well on a wall rack or shelf, and you can move one bin to the bench without unloading a drawer. Choose custom-fit drawers when you have many small hardware types, want a compact cabinet, and can keep the layout stable. Dividers reduce parts mixing, but a drawer only helps if its contents stay labeled and easy to reach.
For many home shops, the practical answer is a mix: bins for frequently used or bulky items, drawers for small quantities of screws, nuts, washers, and specialty fittings. You do not need a premium cabinet to get organized. A basic bin rack or a set of compartment organizers may be enough if your inventory is modest.
Labeled bins vs. custom-fit drawers
| Factor | Labeled bins | Custom-fit drawers |
|---|---|---|
| Access | Contents are visible; remove a bin to take it to the bench. | Open a drawer to scan several compartments at once. |
| Space | Use shelf or wall depth; large bins can waste space with small parts. | Pack many small categories into a cabinet footprint. |
| Flexibility | Easy to relabel, rearrange, or carry elsewhere. | Layout is less flexible, especially with fixed dividers. |
| Mixing risk | Parts can spill if bins tip or are overfilled. | Parts can cross compartments if dividers are loose or drawers slam. |
| Best fit | Frequent access, larger hardware, changing stock. | Small parts, stable categories, limited wall or shelf space. |
When bins make more sense
Bins are forgiving when your inventory changes. If you add a new screw length or decide to split a category by material, you can move labels and rearrange containers in minutes. Open-front bins are especially convenient for hardware used repeatedly at the bench. A bin about 4 to 6 inches wide is often large enough for a useful quantity of common fasteners without becoming awkward to lift.
The trade-off is that open bins collect dust and can spill when bumped. Keep them away from sanding and grinding areas, or use a cabinet with doors. For fine dust, a lid or closed-front storage is worthwhile; dust mixed into threads can make fasteners unpleasant to handle and may contaminate lubricated fittings. Bins mounted above shoulder height are also a poor place for heavy containers: a tipped bin can send hardware down onto the bench or floor.
If you want a low-cost start, a wall-mounted parts-bin rack is a reasonable category to consider. Check the bin dimensions and how securely the rack retains them. A bin that lifts off easily is handy at the bench, but less suitable where vibration or accidental bumps are common.
When custom-fit drawers pay off
Drawers make better use of cabinet space for small, low-volume items. A shallow drawer can hold dozens of categories without stacking containers, and a fitted divider layout makes a fastener type easy to locate. This is useful when you keep, for example, several screw diameters and lengths but only a small quantity of each.
“Custom-fit” can mean anything from adjustable plastic dividers to a fitted foam or printed insert. Adjustable dividers are cheaper and easier to change, but gaps can let small washers or short screws migrate between compartments. Test the layout by closing the drawer firmly a few times, then check whether anything crossed over. Avoid drawers so deep that hardware piles up; a second layer hides stock and makes counting unreliable.
Drawers are less convenient if you often carry parts across the shop. They also depend on sound slides and a cabinet that stays square. Overloading a shallow drawer or slamming it can shift dividers and scatter small parts. If you are buying a cabinet, pay attention to drawer depth, usable interior width, and the divider system—not just the advertised number of drawers. A small-parts drawer cabinet with adjustable dividers is a sensible starting point for a fixed hardware station.
Label for retrieval, not appearance
A label should answer the question you ask while working. For fasteners, include the type, diameter, length, and material or finish when those distinctions matter—for example, “machine screw, 1/4-20 × 1 in, stainless.” A label that only says “screws” is not useful once you have more than one kind.
Put labels where they remain visible when containers are stored. On bins, label the front and, if they are moved around, the side as well. On drawers, label the drawer front and use smaller labels inside the compartments. Include units consistently; mixing metric and inch sizes without marking them is a reliable way to pick the wrong part. Use a marker or label tape that survives oily fingers, and replace labels when categories change rather than leaving old descriptions underneath.
Set up a system that stays usable
Start by sorting hardware into broad groups—wood screws, machine screws, nuts, washers, nails, and fittings—then split only where you need to distinguish sizes. Do not create a separate compartment for every odd fastener you own. A category that contains two pieces can usually go in a labeled catch-all box until it earns dedicated space.
Put the most-used hardware between waist and shoulder height, close to the bench where you assemble or repair projects. Keep heavier stock lower, and store rarely used specialty items higher or farther away. If your shop has a dust collector or frequently runs sanding equipment, keep small hardware in closed drawers or lidded containers rather than on an exposed rack.
Use a compartment organizer with removable dividers for project hardware that needs to travel to another bench or job site. It is not a replacement for permanent storage: dividers in inexpensive organizers can loosen, and a dropped case may mix short parts across compartments. Before relying on one, fill it with representative hardware, close it, and tilt it gently over a clear surface to check for movement.
Finally, leave some capacity unused. A system filled to the last compartment becomes difficult to maintain when a new size arrives or a box of supplies needs sorting. Whether you choose bins, drawers, or both, reserve roughly one in five spaces for future stock and temporary sorting. That small amount of slack is cheaper than replacing a storage system that was organized too tightly from day one.