
Our Top Picks


What's inside
As an Amazon Associate I earn from qualifying purchases. This post may contain affiliate links at no extra cost to you.
The difference between a shop that produces consistent work and one that does not is usually jigs, not machines. A jig turns a skilled operation into a repeatable one, and most of them are made from scrap.
I learned that the slow way. For a long stretch I owned a perfectly decent saw and still could not get a small cabinet to close up square, and I spent most of that time reading about better blades and better fences. What actually fixed it was an afternoon spent making a plywood sled out of offcuts. The saw did not get more accurate that day. I just stopped asking it to do a job it was never set up to do.
As an Amazon Associate we earn from qualifying purchases at no extra cost to you.


Here is the reframe that matters: a jig does not add precision, it removes decisions. Every time you line a mark up by eye, hold a workpiece at an angle by feel, or read a tape, you add a decision that can go wrong. A jig makes that decision once, permanently, in plywood. The tenth part then comes out like the first — and it comes out that way when you are tired at nine on a Sunday night, which is when most mistakes actually happen.
What makes a jig worth building
Not every jig earns its storage space. Before cutting anything, I run four questions in this order, because they conflict and the order is how you break the tie.
- How often will I use it? Weekly use earns a carefully made, permanent jig. Twice-a-year use earns a rough one you accept will get scrapped.
- Does it have to match my machine? Anything referencing your mitre slots, your fence, your blade kerf or your saw’s baseplate must be built, because bought versions fit an average machine and yours is not average.
- How long is the setup? A jig needing ten minutes of fiddling loses to doing the job freehand, every time, no matter how clever it is.
- Where will it live? If the honest answer is “on top of the lumber rack behind the door”, build something smaller or do not build it.
Frequency usually wins the argument, but the machine-matching question is what decides build versus buy. That is the entire rule. The five jigs below all pass it.
1. Crosscut sled
The single most useful thing you can build for a table saw. A plywood base riding in the mitre slots with a fence squared perfectly to the blade. Every crosscut becomes square, supported and safe, and with a stop block, repeatable to the thousandth.
Build note: the five-cut method for squaring the fence is worth the twenty minutes. It gets you far closer than a square does.
What separates a good sled from a bad one is mostly restraint about size. Big sleds feel generous on paper, then you cannot lift them onto the saw one-handed, so they live under the bench and never get used. Size it for the parts you actually cut, which for most people means cabinet parts and small case sides rather than sheets. Keep the base thin, too — every extra eighth of base thickness is depth of cut you no longer have.
The runners matter more than the base. Hardwood runners are free and they move with the seasons, so they bind in humid weather and rattle in dry weather. UHMW plastic or milled aluminium runners cost a little and stay put, and the adjustable kind let you dial the fit back in later, which is what keeps a sled accurate for years rather than months. Fit them so the sled slides with a push, not a shove, then wax the slots.
Who it suits: anyone with a table saw, without exception. Who can skip it: if nearly all your crosscutting is long stock or site work, a mitre saw station with a long fence and stops will serve you better first.
T-track and hardware for jigs
T-track, hold-down clamps and knobs. Cheap hardware that makes shop-built jigs feel like bought ones.
2. Straight edge guide for the circular saw
A strip of plywood glued to a wider base, then trimmed with the saw itself so the base edge is exactly where the blade cuts. Line the edge up on your mark, clamp, cut. It turns a circular saw into a straight-line cutting tool and it costs one offcut.
Two details decide whether it works. First, stiffness: the strip your saw rides against has to be dead straight and stay that way, so take it from the factory edge of a stable sheet and check it against a long rule before the glue goes on. Second, the guide belongs to one saw. Trim it with the saw you own, write that saw’s name on it, and do not swap in a different saw later, because a different baseplate width moves the cut line and the guide silently stops telling the truth.
Make it a little longer than the longest cut you take regularly. A guide that falls a few inches short of a full sheet is a guide you will curse. Building two — a short one for cabinet parts, a long one for breaking down sheets — beats one compromise length. The most common mistake is clamping at one end only, so the far end creeps as the saw pushes against it.
Who it suits: anyone breaking down sheet goods without a table saw, or in a shop where sheets get cut on the driveway. Who can skip it: if you own a track saw and enough track, you have already bought this jig.
3. Drilling jig for shelf pins
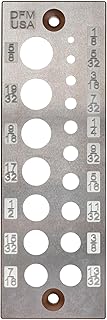
A strip of ply or hardboard with holes drilled at regular spacing and an index pin. Consistent shelf holes on every cabinet side, forever, without measuring twice per hole.
Copy the 32mm spacing used by commercial cabinet hardware and your jig will agree with the shelf standards, hinge plates and drawer slides you buy later. The index pin is the real trick: it drops into the last hole you drilled so the strip repositions itself up a tall side with no measuring at all, which is what stops error accumulating over a run of holes.
Where a shop-made version falls down is hole wear. Bare hardboard or ply lets the bit chew the holes oval after a few cabinets, and once they are oval your holes start to wander. Either treat the jig as a consumable and rebuild it, or fit metal bushings. Add a depth stop as well — a collar, or tape on a brad-point bit — because a shelf pin hole that breaks through the show face of a cabinet is not a repair you will be happy with.
Shelf pin jigs
Buying one is cheap enough that most people do, but a shop-made version from hardboard works identically.
4. Tapering jig
Table legs, angled sides, anything that is not parallel. A base that rides the fence with the workpiece held at the angle you need. Once you have one, tapered legs stop being intimidating.
There are two designs and they suit different people. A fixed jig is a piece of ply with your taper cut into one edge and a stop at the end: ten minutes of work, dead reliable, does exactly one taper. An adjustable jig with a pivot and a locking arm handles any angle but takes longer to set and adds one more thing to get wrong. If you build the same leg repeatedly, make fixed jigs and keep them labelled. If your work is all one-offs, adjustable earns its keep.
Either way, fit real hold-downs and a handle you can grip well away from the blade — the offcut from a taper is a wedge, which is precisely the shape that likes to catch and kick back. The mistake I see most is setting the angle from a protractor reading. Mark the taper on the actual workpiece instead, set the jig to those two marks, and you never have to trust a degree scale.
5. Story sticks
Not a jig exactly, but the habit that eliminates the most mistakes. Instead of measuring each part with a tape, mark the positions once on a stick and transfer them to every piece. No cumulative measuring error, no misread tape, no maths.
It costs a straight offcut and a knife. The discipline is what makes it work: mark one end FRONT or TOP so the stick can only be used one way round, keep different assemblies on different faces, write the project name on it, and keep it until the job is installed rather than the day it leaves the bench. The moment you cannot remember what a mark means, the stick has become worse than a tape.
Who it suits: everyone, and especially anyone fitting work into a house, where nothing is square or the size it claims to be.
Hardware: what to spend at each band
Jigs are mostly free material plus a little hardware, and hardware is where people either waste money or spoil a good jig.
- Budget: carriage bolts, T-nuts, plain knobs, wooden cams. Genuinely fine for jigs you set once and leave alone. Watch for soft knobs that round off under a spanner and threaded inserts that pull out of thin ply.
- Mid: aluminium T-track, hold-down clamps, flip stops. This is where most jigs should sit. Check the track profile matches common bolt sizes before you buy, or you will own a track nothing fits.
- Premium: adjustable runners and stops with fine adjustment. Worth it on the one or two jigs you touch weekly, wasted on everything else.
How to weigh it: spend on the parts that hold accuracy — runners, fence faces, stops — and economise on the parts that merely hold the workpiece.
Mistakes that quietly ruin shop-made jigs
- Building the jig before you have done the operation once by hand. You do not yet know what it needs to do.
- Never re-checking it. A sled that was square last winter should get a test cut before an important project, not after.
- Leaving critical settings unrecorded, so every use starts with reverse-engineering your own jig.
- Screwing into MDF edges, then wondering why the fence loosened.
Rules for good jigs
- ✔ Build from stable material — Baltic birch ply or MDF, not warp-prone stock
- ✔ Label it with what it does and any critical setting
- ✔ Store it where you use it, or it will not get used
- ✔ Rebuild rather than repair a jig that has lost accuracy
- ✔ Wax the running surfaces so they slide easily
Jigs I built and never used
- ✘ Elaborate multi-function jigs — complexity means slow setup
- ✘ Jigs for operations I do twice a year
- ✘ Anything requiring a manual to remember how it works
- ✘ Jigs built from construction lumber that warped within a season
FAQ
What is the best material for jigs?
Baltic birch plywood — stable, flat, and it takes screws in the edge without splitting. MDF is flatter still and cheaper, and it is fine for bases and fence faces, but it will not hold a screw in the edge and it swells if it gets damp, so keep it off a concrete floor.
Should I buy or build?
Build anything that needs to match your specific machine. Buy jigs that need precision machining, like dovetail jigs. The grey area is drilling jigs, where a bought one with hardened bushings outlives a shop-made one by a wide margin.
How accurate can a shop-made sled be?
More accurate than most mitre gauges, if you square the fence with the five-cut method. What limits it afterwards is runner fit and fence stiffness, not the plywood.
How do I know when a jig needs rebuilding?
When a test cut no longer matches what the jig promises and a single adjustment does not bring it back. Chasing accuracy through repeated shimming takes longer than cutting a fresh base from the same offcut pile that produced the first one.
Get jig hardware →