
Our Top Picks

What's inside
As an Amazon Associate I earn from qualifying purchases. This post may contain affiliate links at no extra cost to you.
For my first two years I thought I was bad at paring. I would lean into a chisel, get a fuzzy torn surface, and quietly file it under “needs more practice.” I was not bad at paring — my chisels were blunt, and I did not know what sharp actually felt like. The day I got a chisel genuinely sharp, half my technique problems disappeared. That is why I treat sharpening chisels and planes as the first hand tool skill rather than a chore attached to the real work. A dull tool does not only cut badly, it lies to you about your own ability.
Here is the part nobody tells you: sharpening is not a fine-abrasive problem, it is a flatness and repeatability problem. People buy the finest stone they can afford hoping it will rescue an edge that is geometrically wrong, then decide they are hopeless at it. An edge is only the intersection of two flat, polished surfaces. Get both flat, meet them at a consistent angle, and sharp happens on its own — with cheap abrasives or expensive ones. The other half is friction: a routine you can finish in two minutes gets used, while one that needs twenty minutes and a bowl of water gets put off until the tool is already blunt.
As an Amazon Associate we earn from qualifying purchases at no extra cost to you.



Step 1: flatten the back
An edge is where two flat surfaces meet. If the back of the chisel is not flat near the edge, no amount of work on the bevel produces a sharp edge. You can polish a bevel to a mirror and still get a ragged edge, because the second surface never turned up.
Do this once per tool, properly. Work the back on your coarsest abrasive until the area near the edge is uniformly scratched — you do not need the entire back flat, just the first inch. Then refine it through your grits. This is tedious, and you never have to do it again.
Two things go wrong here. Rocking — lifting your hands at the end of the stroke — rounds exactly the area you were trying to flatten, so keep pressure light and wrists locked. And a dished stone is a machine for producing a convex back, so check yours against a straightedge before you start.
Plane irons allow one shortcut: run the back on a thin steel rule so only a narrow strip at the edge gets polished. It works well on bevel-down bench planes, but not on chisels, whose backs must register flat on the work as you pare.
Step 2: establish the bevel angle
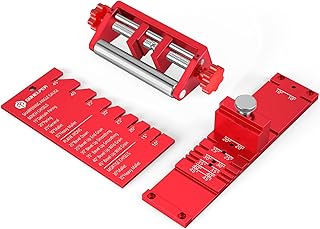
25 degrees for a primary bevel on most chisels, 30 for a harder-working edge or for plane irons in hardwood. Precision matters less than consistency — a repeatable 27 degrees beats a wandering 25. Low angles slice more easily and chip sooner; high angles survive mallet work and abrasive timber. If you want one number that never embarrasses you, take 30.
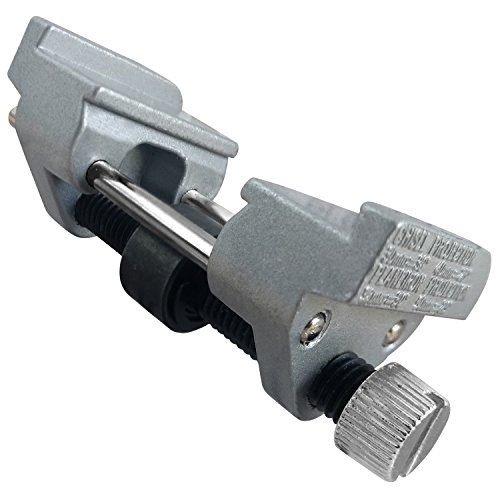
A honing guide is not cheating. It gives you consistency, which is what actually produces sharpness, and it is faster than freehand until you have real practice. What separates a good guide from a bad one is not price, it is whether it holds the blade square without a fight: a wide roller that tracks straight, jaws that clamp without twisting the blade as you tighten, and range enough for both a narrow chisel and a wide plane iron. A skewed blade gives an out-of-square edge, and squaring one back up is the repair that really costs time.
Skip the guide if you already sharpen freehand without thinking about it, or if your tools are curved — gouges are freehand work by definition.
Honing guides
Holds the blade at a fixed angle. The single biggest help for anyone struggling to get a repeatable edge.
Step 3: work through the grits
Coarse to remove metal and set the shape, medium to refine, fine to polish. In stone terms: roughly 1000 grit, then 4000, then 8000. Each grit removes the scratches of the last one — do not move up until they are gone.
A “microbevel” — a couple of degrees steeper on the final grit — saves a lot of time, because you only polish a sliver of steel rather than the whole bevel.
What you grind on comes down to four criteria that pull against each other:
- Cutting speed. Diamond cuts fastest and copes best with modern high-alloy steels; oil stones are the slowest and calmest.
- Staying flat. Diamond plates and paper on glass are flat by design; waterstones dish, so a flattening plate is part of the purchase, not an accessory.
- Setup friction. Soaking, oiling, draining. The setup you will bother with on a weekday evening beats the one that gives a finer edge on a good Saturday.
- Cost shape. Stones and plates are one payment with a long life; paper is nearly free to start and never stops costing.
Sharpening stones
A 1000/6000 combination waterstone covers most needs. Keep it flat — a hollow stone rounds your bevel.
The cheap alternative: sandpaper on glass
Wet-and-dry sandpaper stuck to a flat piece of glass or granite offcut works genuinely well and costs almost nothing. It is how I started and how I still sharpen when travelling. The downside is consumable cost over time.
The details decide whether it works. Use a substrate that is genuinely flat — float glass or a granite offcut, not MDF. Use silicon carbide wet-and-dry paper rather than woodworking sandpaper. Run roughly 400 through 2000 grit, and bin a sheet the moment it stops cutting, because glazed paper burnishes the steel and rounds your bevel while you feel productive.
It suits a beginner with a few tools and anyone not ready to spend before they know they like hand work. Skip it if you sharpen daily — the paper bill and the constant re-sticking will push you towards stones anyway.
Wet-dry sandpaper for scary sharp method
400 through 2000 grit on a flat surface. A complete sharpening setup for under $30.
Step 4: remove the burr and strop
As you sharpen, a burr forms on the opposite side — feel for it with a fingernail dragged away from the edge. When you have a burr along the full width, the bevel is done. Flip and take it off on the back, then strop on leather with compound to polish and align the edge.
Two cautions. Keep the tool flat when you remove the burr — tipping it up puts a tiny bevel on the wrong side and undoes step one. And strop trailing, away from the edge, with light pressure: leather is soft, and a hundred enthusiastic strokes will round the edge you just made.
What to buy at each price band
The cheapest honest setup
Wet-and-dry paper, a flat substrate, a basic guide and a scrap of leather on a board. It makes an edge every bit as sharp as an expensive kit, and it suits someone with a handful of chisels and one plane.
The middle, where most people should live
One combination waterstone plus a flattening plate, or a two-sided diamond plate. Good picks state their grit ratings, sit on a non-slip base, and support a plane iron across the full width. Bad ones are unrated “sharpening stones” of no stated grade and thin plates whose diamond coverage goes bald in a patch.
Spending more
More money buys speed and durability, not a sharper theoretical edge: bigger stones, a coarse diamond plate to spare your fine one, a heavier guide, a grinder for reshaping damage. Worth it if you maintain a lot of tools. If you own six chisels, put the money into a better chisel.
Mistakes that keep people blunt
- Buying a finer stone to fix a geometry problem — polish cannot rescue a rounded or out-of-square edge.
- Moving up a grit before the previous scratches are gone, then wondering why a mirror bevel still tears end grain.
- Leaning on the tool. Pressure is what dishes abrasives and rounds bevels; the abrasive does the cutting.
- Going freehand on day one and building a rocking motion into muscle memory.
- Overheating an edge on a grinder. Blue steel is dead steel: light passes, and stop before the tool is too hot to hold.
How to know it is sharp
- ✔ It shaves arm hair without pressure
- ✔ It pares end grain in pine cleanly, leaving a shiny surface, not a torn one
- ✔ The edge reflects no light — a dull edge shows a bright line
- ✔ It cuts paper cleanly held in the air
Habits that keep tools sharp
- ✘ Never let chisels touch each other in a drawer
- ✘ Never use a bench chisel as a screwdriver or pry bar
- ✘ Never sharpen only when it stops cutting — touch up before that
- ✘ Never let a stone stay hollow; flatten it regularly
FAQ
How often should I sharpen? A quick strop every few minutes of use; a full hone when stropping stops restoring the edge. The real trigger is the surface, not the clock: once the tool crushes fibres instead of slicing them, you are already late.
Water stones, oil stones or diamond? Diamond plates are fastest and stay flat. Water stones give the finest edge. Either works. Choose on the setup you will tolerate — if a bowl of water at the bench sounds like a reason not to sharpen, buy diamond.
Are expensive chisels worth it? Better steel holds an edge longer. But a sharp $15 chisel outperforms a dull $90 one, always. Spend on sharpening first and tools second.
Do I need a grinder? Only for reshaping: a chipped edge, a badly wrong angle, a secondhand tool someone abused. Coarse abrasive by hand handles the rest, slower but with no risk of burning the steel.
None of this is talent. It is one afternoon of flattening backs, one angle you can repeat, and a two-minute habit. Get that right and every edge tool in the shop improves at once.
See sharpening kit prices →