
What's inside
- What the ComMarker B6 is best at
- Marking area: the specification that changes the buying decision
- Setup and focusing process
- Material performance
- Software workflow and ease of use
- ComMarker B6 versus similarly equipped engravers
- Which B6 configuration fits your situation?
- Ownership realities and maintenance
- Value verdict
- Related Guides
As an Amazon Associate I earn from qualifying purchases. This post may contain affiliate links at no extra cost to you.
The ComMarker B6 laser engraver is a strong choice for buyers who need fast, permanent marking on bare metal in a compact desktop format, but its value depends heavily on choosing the right wattage and marking lens rather than simply buying the highest-power version.
As an Amazon Associate we earn from qualifying purchases at no extra cost to you.
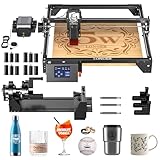
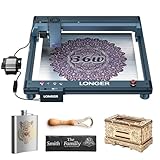

What the ComMarker B6 is best at
The B6 is a galvo-style fiber laser marker using a 1064 nm infrared source. Unlike a diode or CO₂ laser, it is designed primarily for metals and other materials that absorb this wavelength. Typical applications include serial numbers, logos, QR codes, text, jewelry personalization, tool marking, anodized aluminum, painted metal, and industrial identification plates.
It is not a universal replacement for a CO₂ machine. Bare wood, clear acrylic, leather, paper, and many plastics are better suited to a diode or CO₂ laser. The B6’s advantage is speed, fine detail, and a permanent mark on metal without requiring a large gantry or cutting bed.
Marking area: the specification that changes the buying decision
A standard ComMarker B6 package is commonly supplied with a small lens, often around 70 × 70 mm. Optional F-theta lenses can expand the working field to approximately 110 × 110, 150 × 150, or 200 × 200 mm, depending on the configuration and source power. Larger fields cover more area per pass, but they spread the available laser energy over a wider image and can reduce the finest practical detail.
| Typical B6 configuration | Approximate marking field | Best use | Main compromise |
|---|---|---|---|
| 20 W with small lens | 70 × 70 mm | Jewelry, tools, small plates, detailed logos | Several setups for larger work |
| 30 W with small or medium lens | 70 × 70 to 110 × 110 mm | General workshop marking and moderate production | Higher purchase cost than 20 W |
| 50 W with medium or large lens | 110 × 110 to 200 × 200 mm | Deeper marks, larger batches, thicker coated surfaces | More heat, cost, and enclosure requirements |
| Any B6 with rotary accessory | Depends on rotary diameter and lens | Rings, tumblers, cylinders, and pipes | Round objects need careful leveling and calibration |
These are configuration ranges rather than one fixed B6 specification. Confirm the supplied lens, source manufacturer, power, and included accessories before ordering. A 70 × 70 mm field covers only 4,900 mm², while a 200 × 200 mm field covers 40,000 mm²—more than eight times the area. That larger lens is useful for plaques and batch layouts, but it is not automatically better for tiny engraving.
Setup and focusing process
The B6 is simpler to install than a gantry laser, but it still requires careful alignment. The usual setup sequence is:
- Place the machine on a rigid, level surface. Vibration can affect small text, while an unstable stand makes height adjustments inconsistent.
- Install the galvo head and lens. Keep protective caps on until the lens is secured and avoid touching the optical surfaces.
- Connect the controller and computer. Use the supplied power and data connections, then install the supported marking software and driver.
- Set the work height. The B6 generally uses a red positioning preview and a focusing post, ruler, or dual-red-dot method depending on the package. Raise or lower the workpiece until the reference marks converge or the specified focus distance is reached.
- Test the perimeter at low-risk settings. Use the preview frame on scrap material before placing a valuable part under the beam.
- Run a small material test grid. Vary speed, power, frequency, and hatch spacing instead of guessing from a generic preset.
Focusing is the step most likely to cause disappointing results. If the workpiece is too high or low, marks can look wider, paler, or uneven across the field. A flat spacer or height gauge makes repeat jobs more consistent. For cylindrical pieces, the rotary axis must be level with the laser’s centerline; otherwise the design can drift or stretch as it wraps around the object.
Material performance
Where the B6 performs well
- Stainless steel: suitable for black marking, surface engraving, and deeper marking with appropriate settings.
- Anodized aluminum: produces crisp light-colored removal of the anodized layer.
- Painted or coated metal: useful for removing coatings to reveal the underlying surface.
- Brass and copper: markable, though reflective surfaces require conservative setup and correct parameters.
- Jewelry metals: capable of fine text and graphics when the lens, focus, and fixturing are appropriate.
- Engineering plastics: some dark plastics and laser-markable materials work well, but ordinary plastic can melt, discolor, or produce hazardous fumes.
Where it is the wrong tool
The B6 is not intended to cut wood, produce deep relief carving in plywood, or process large sheets. It may create limited effects on selected dark or treated nonmetals, but results vary substantially by formulation. If most of your work is wood signs, acrylic panels, leather goods, or paper, a diode or CO₂ laser is usually the more appropriate purchase.
Software workflow and ease of use
Fiber markers in this class commonly use EZCAD2-compatible workflows, while some configurations also support LightBurn through the appropriate hardware and license. EZCAD-style software is powerful for marking parameters, hatch patterns, serial numbering, QR codes, and production repetition, but its interface feels more industrial than consumer-oriented.
A practical workflow is to create or import vector artwork, position it inside the selected field, choose fill and hatch settings, set the material parameters, preview the outline, and then run a test on scrap. Keep separate parameter libraries for polished stainless steel, anodized aluminum, painted tools, and jewelry alloys. Reusing a setting from one metal on another is a common cause of weak marks, excessive heat, or unwanted discoloration.
LightBurn can be preferable for users who already design in that environment, but compatibility depends on the exact B6 controller and purchased license. Check the current ComMarker and LightBurn compatibility information for the specific revision rather than assuming every B6 package behaves identically.
ComMarker B6 versus similarly equipped engravers
| Option | Typical strength | Typical limitation | Best buyer |
|---|---|---|---|
| ComMarker B6 fiber marker | Compact metal marking with selectable wattage and lenses | Small standard field; enclosure and accessories may cost extra | Workshop users wanting a flexible desktop fiber system |
| Another 20–30 W desktop fiber marker | Comparable metal performance and often similar field sizes | Differences in software, support, source, and included rotary equipment | Buyers comparing total package value rather than headline power |
| 50 W desktop fiber marker | Faster production and more capability for deeper marking | Higher cost, greater heat management, and more demanding safety setup | Frequent users and small production businesses |
| Diode laser | Wood, leather, and coated materials at a lower entry price | Generally unsuitable for efficient bare-metal marking | Makers whose main work is organic materials |
| CO₂ laser | Large-area cutting and engraving of wood, acrylic, and leather | Not the natural choice for bare-metal identification | Sign makers and sheet-material users |
Which B6 configuration fits your situation?
- Occasional hobby use and a limited budget: choose a 20 W model with the standard small lens. It offers the lowest entry cost and enough capability for tools, tags, knives, and small aluminum parts.
- Regular workshop work: a 30 W version is the balanced choice. It provides more speed and headroom without the cost and power of a 50 W unit.
- Frequent batches or deeper marks: select 50 W, but budget for proper ventilation or an enclosed setup, fixturing, and a suitable lens.
- Large plaques or repeated layouts: prioritize a 150 × 150 or 200 × 200 mm lens, while accepting that the smallest details may be less forgiving.
- Rings, bottles, or cylindrical tools: reserve part of the budget for a rotary attachment and a stable jig. A rotary is valuable only if it can be aligned accurately.
Ownership realities and maintenance
The fiber source itself is not a routine consumable, but several parts need attention. The protective lens window can collect smoke and debris, especially when removing coatings. Inspect it regularly and clean it only with suitable optical-cleaning materials. Do not wipe a dirty lens dry, since particles can scratch the coating.
The galvo mirrors and focusing lens should be protected from dust. Keep the machine covered when idle, avoid placing oily workpieces beneath the head, and remove residue from the work area after each job. Rotary chucks, belts, and clamps are more likely to need adjustment than the laser source. Loose fixturing causes crooked logos and inconsistent focus long before the machine itself has a serious fault.
Safety is also part of the ownership cost. A Class 4 fiber laser can cause severe eye injury and can ignite materials. Use an appropriate interlocked enclosure, wavelength-rated protection, fume extraction, and local electrical and workplace safeguards. Never rely on the red preview light as eye protection.
Value verdict
General market pricing for desktop fiber markers varies widely by wattage, source, lens, enclosure, rotary attachment, and regional support, with entry configurations commonly in the low-thousands and higher-power packages reaching several thousand dollars. Compare the complete package, not the base machine price.
The ComMarker B6 offers good value when its compact format, metal-focused performance, and lens flexibility match the work. The 20 W version is sensible for occasional detailed marking; 30 W is the most versatile middle ground; and 50 W earns its premium mainly through production speed and deeper marking capability. Buyers who primarily work in wood or acrylic should spend their budget on a different laser type, while metal-focused workshops should treat the B6 as a capable system whose final value depends on optics, software compatibility, safety equipment, and repeatable fixturing.