
What's inside
As an Amazon Associate I earn from qualifying purchases. This post may contain affiliate links at no extra cost to you.
How to Use a Wood Planer: A Safe Step-by-Step Guide
To use a wood planer safely, prepare a flat reference face, set a shallow depth of cut, feed the board with the grain in the machine’s direction, and support both ends until the board has completely cleared the cutterhead.
A benchtop thickness planer is designed to make one face parallel to another and bring boards to a consistent thickness. It is not a substitute for a jointer: if a board is badly cupped, twisted, or bowed, the planer may reproduce that shape rather than flatten it. Joint one face first, use a sled for severely distorted stock, or buy already-flat boards.
As an Amazon Associate we earn from qualifying purchases at no extra cost to you.


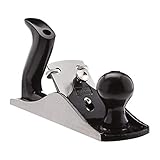
What a Wood Planer Is Used For
- Reducing rough-sawn lumber to a target thickness.
- Making several boards the same thickness for tabletops, frames, boxes, and furniture parts.
- Removing saw marks and light surface irregularities.
- Cleaning up glued panels after the adhesive has cured, provided the panel is flat and the glue line is not excessively proud.
- Producing accurately sized stock for joinery, such as rails, stiles, drawer parts, and cabinet components.
For most home workshops, a portable planer accepts boards roughly 12 to 13 inches wide and 6 inches thick, although the exact capacity depends on the machine. A helical or segmented-carbide cutterhead usually runs more quietly and leaves manageable tear-out compared with traditional straight knives, but replacement inserts are a consumable expense.
Planer Setup: Check These Things First
- Position the machine securely. Put it on a rigid stand or workbench with enough infeed and outfeed space. A 6-foot board may need several feet of clear support on both sides.
- Inspect the cutterhead and bed. Unplug the planer before opening covers or touching knives. Check that knives or carbide inserts are seated correctly and that the bed is clean.
- Set dust collection. Planing creates a large volume of chips. Connect a suitable dust collector or chip extractor, and do not allow the ejection chute to clog.
- Measure the board. Check thickness at several points with calipers or a reliable ruler. Mark the high spots and note the grain direction.
- Set the thickness gauge. Raise the cutterhead above the board, place the board on the bed, and lower the cutterhead until it just contacts the highest point. Then set the desired pass depth.
Before switching on, remove loose clothing, jewelry, and anything that could enter the feed rollers. Wear eye and hearing protection. Keep hands away from the opening, and never reach into the machine while it is plugged in—even if the motor has stopped.
How to Use a Wood Planer Step by Step
1. Prepare the reference face
Identify the face that will ride on the planer bed. It should be reasonably flat. If it rocks, has a pronounced cup, or is twisted, flatten it first with a jointer, hand plane, router sled, or a temporary sled. A planer makes the top face parallel to the bottom face; it does not reliably remove twist from a board placed directly on the bed.
2. Choose the feed direction
Feed the board with the grain running in the direction that presents the least resistance to the cutter. Inspect the edge: the grain should appear to slope down toward the end entering the planer, so the knives encounter a rising grain pattern rather than lifting it. If the grain direction is unclear, take a very shallow test cut from each end and keep the direction that produces less tear-out.
Do not confuse feed direction with the direction in which the machine pulls the board. You place the board on the infeed side, and the rollers move it through automatically. Once the board has engaged, do not push or pull against the rollers.
3. Set a conservative depth of cut
Start with approximately 0.5 to 1 mm (1/64 to 1/32 inch) per pass. Use shallower cuts—around 0.25 to 0.5 mm—on figured, knotty, narrow, or difficult-grain timber. Larger cuts increase motor load, noise, tear-out, and the chance of stalling.
| Work situation | Suggested first pass | Typical finishing pass | Why it helps |
|---|---|---|---|
| Softwood, straight grain | 0.75–1 mm | 0.25–0.5 mm | Good stock removal without overloading a portable machine |
| Dense hardwood | 0.25–0.5 mm | 0.15–0.25 mm | Reduces heat, chatter, and motor strain |
| Figured or reversing grain | 0.15–0.25 mm | 0.1–0.2 mm | Limits tear-out; a sharp cutterhead is essential |
| Final sizing pass | — | 0.1–0.25 mm | Leaves a more consistent surface and reduces snipe risk |
These are conservative starting points rather than universal machine limits. Never exceed the maximum depth stated in your planer’s manual. The machine’s maximum cut is often only practical on narrow boards and softwood; full-width hardwood usually requires less.
4. Make the first pass
Turn on dust collection and start the planer before feeding the board. Place the board squarely on the bed, keeping your hands to the sides rather than above the cutter opening. Let the infeed rollers take control. Support the board as it emerges, but do not lift it into the cutterhead or force it downward.
For long boards, use level infeed and outfeed supports. The supports should align with the planer bed, not slope upward or downward. An assistant can support the stock from a safe position, but should never pull the board while the rollers are engaged.
5. Measure and repeat
After each pass, measure the board at both ends and in the middle. Lower the cutterhead only after the board has stopped and you have confirmed the amount removed. Alternate faces only when both faces are already reasonably flat; otherwise, keep the reference face down until the opposite face is true.
For accurate sizing, calculate the target before starting. For example, if a board measures 26 mm and the target is 19 mm, remove 7 mm total. At 0.5 mm per pass, that requires about 14 passes, followed by one or two light finishing passes if needed. In practice, leave an extra 0.5 to 1 mm until the board has acclimated to the workshop, then make the final cuts after it has stopped moving.
How to Prevent Snipe
Snipe is a deeper cut at the beginning or end of a board, caused when only one set of rollers is gripping the work. It is common on portable thickness planers and is not always a sign of faulty adjustment.
- Use long, level infeed and outfeed tables or roller supports.
- Lift the front of the board slightly as it enters, then lift the trailing end slightly as it exits. Use gentle support; do not force the board.
- Plane several boards together when appropriate, with sacrificial boards at the front and rear of the group.
- Leave extra length and cut off the affected ends after planing.
- Check that the cutterhead, bed, and extension tables are aligned according to the manual.
Do not place your hands under the board to correct snipe. Support it from the sides or from underneath only where the machine design permits and your hands remain well clear of the feed opening.
Safety and Common Mistakes
- Do not plane metal, loose knots, screws, nails, or embedded grit. Inspect reclaimed lumber with a metal detector and remove fasteners before machining.
- Do not exceed the width or thickness capacity. Oversized stock can damage rollers, knives, or the motor.
- Do not take a deep cut to save time. Several light passes are usually faster than clearing a jam or repairing severe tear-out.
- Do not plane a short offcut casually. Follow the manufacturer’s minimum workpiece length; short pieces may not be held safely by both roller sets.
- Do not stack unrelated boards. Only gang-plane pieces when they are suitable for the machine and cannot shift or jam.
- Do not ignore grain direction. Reversing grain, knots, and interlocked grain may need a very shallow cut or a different finishing method.
Ownership, Maintenance, and Consumables
Chip buildup, dull knives, dirty rollers, and a wax-free bed are common causes of poor results. Unplug the planer before maintenance. Vacuum chips from the housing, clean resin from the bed and rollers with an appropriate cleaner, and apply a thin coat of paste wax or a manufacturer-approved lubricant to help boards slide. Keep lubricant away from surfaces that must remain clean for finishing.
Straight knives eventually need sharpening or replacement, while segmented carbide inserts can often be rotated to a fresh edge. A practical warning sign is not simply a dull-looking edge: watch for rising tear-out, burning, uneven thickness, or a motor that labors on cuts it previously handled easily. Replace damaged inserts immediately. Inspect the drive belt, roller condition, and chip ejection path periodically.
Final Accuracy Check
When the board reaches its target thickness, measure it at multiple points with calipers. Check for snipe, remaining cup, torn grain, and a consistent surface. If the board will be used in a panel, let it rest in the workshop before final sizing; changes in humidity can make freshly planed timber move. With a flat reference face, shallow cuts, correct feed direction, and controlled support, a thickness planer can produce repeatable stock without sacrificing safety or surface quality.