
What's inside
As an Amazon Associate I earn from qualifying purchases. This post may contain affiliate links at no extra cost to you.
Best Drill Press Vises for Accurate, Secure Drilling
The best drill press vise for most small-shop users is a 4-inch machinist-style vise with flat, parallel jaws, a pair of elongated mounting slots, and enough opening capacity for the work you actually drill. Choose wider jaws for broad stock, V-grooves for round material, and a purpose-built woodworking vise when protecting finished wood matters more than metalworking rigidity.
Compare the main vise types
There is no single best drill press vise for every bench. Jaw width describes how much of the workpiece the jaws contact; opening capacity is the largest gap between them. Neither figure alone tells you whether a vise will fit your drill press table or hold a particular workpiece securely.
As an Amazon Associate we earn from qualifying purchases at no extra cost to you.

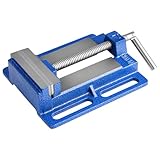
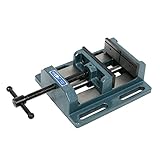

| Vise type | Typical jaw width | Typical opening | Useful features | Best suited to |
|---|---|---|---|---|
| Compact drill-press vise | 2–3 in. | 1.5–2.5 in. | Small footprint; slotted base | Light-duty drilling and small parts |
| General-purpose machinist vise | 4 in. | 3–4 in. | Rigid body; mounting slots; often V-grooved jaws | Mixed wood and metal shop work |
| Wide-jaw drill-press vise | 5–6 in. | 4–6 in. | Broader support; larger footprint | Wide stock and larger workpieces |
| Woodworking drill-press vise | About 4–6 in. | Varies by model | Softer or replaceable jaw faces; workholding designed for wood | Wood that could be marked by hard jaws |
These are common size ranges, not guarantees for any particular model. Check the manufacturer’s dimensions before buying: some listings give jaw width but omit opening, body height, weight, or the distance between mounting slots. Those details determine whether the vise fits your table and clears the drill press column.
Choose by the work you do
- Small parts, limited space, or occasional use: A compact 2- or 3-inch vise is easier to position and store. Its smaller jaws can make it less stable with broad stock, so support the work close to the drilling point.
- One vise for a mixed workshop: A 4-inch machinist-style vise is a useful middle ground. Look for a solid body, parallel jaws, mounting slots that match your table, and V-grooves if you drill rod or tubing.
- Wide boards or frequent larger work: Consider a 5- or 6-inch vise, but verify table size and slot spacing first. A heavy vise can take up space and may be awkward to reposition; a larger jaw does not automatically mean greater clamping force.
- Mostly woodworking: A woodworking-style vise with replaceable, non-marring faces is often the better choice. If you use a metalworking vise, add flat sacrificial pads—wood or suitable plastic—to protect the work and increase contact.
- Round stock or tubing: Choose jaws with a centered V-groove. The groove helps locate cylindrical pieces, but it does not make an unsecured workpiece safe: clamp the vise to the table and check that the stock cannot roll or lift.
For a “best drill press vise woodworking” setup, prioritize flat, broad jaw contact and protection against dents. Wood compresses and can split under concentrated pressure, so tighten only enough to prevent movement. For metal, firm clamping and repeatable alignment matter more; keep chips out of the jaws and avoid using soft pads when they would let a part shift.
Check fit and alignment before judging clamping force
Mounting slots are a practical buying criterion, not a minor detail. Measure the distance between your drill press table’s T-slots or mounting holes, along with their width. Compare those measurements with the vise’s slot length and width, and confirm you can reach the fasteners with the vise positioned where you need it. If the slots do not align, use a compatible table or a properly secured adapter plate rather than drilling improvised holes or relying on friction alone.
Alignment accuracy depends on more than the vise. Check that the jaw faces meet evenly, the moving jaw does not visibly skew as it tightens, and the fixed jaw sits square to the vise base. A swiveling base is convenient for angled work, but adds another interface that must be locked securely. For repeatable straight drilling, a non-swiveling base is simpler and usually easier to set up.
To assess alignment, place a small square against the fixed jaw and base, then close the jaws on a straight, flat test piece. Look for visible gaps or rocking. For closer work, indicate the fixed jaw with a dial indicator mounted to the drill press spindle: rotate the spindle by hand and compare readings along the jaw. This checks the vise relative to the spindle, but a drill press is not a milling machine; do not use a vise inspection as permission to side-load the spindle.
Size the vise to your stock
Measure the thickest piece you expect to hold, then add a little practical clearance. If your usual stock is 2 inches thick and the vise opens 2.5 inches, that leaves only 0.5 inch for positioning variation and any pads you add. A 3-inch opening provides more flexibility. Also check the vise’s body height: a tall vise can reduce the maximum distance between the drill bit and table, limiting how high a workpiece can be positioned.
For long pieces, jaw width is not a substitute for support. A 4-inch jaw may grip the drilling area securely, while the rest of a board still needs support at table height. Letting a long workpiece hang unsupported can twist it out of the jaws or catch it on the bit.
Setup habits that protect accuracy
- Clean the contact surfaces. Brush chips and dust off the table, vise base, and jaw faces. Debris under the base can tilt the vise; chips in the jaws can make a workpiece sit crooked.
- Position and fasten the vise. Align the slots, use suitable bolts and washers, and tighten both sides evenly. Recheck the position before drilling. Do not rely on the vise’s weight to resist bit torque.
- Seat the workpiece squarely. Bring it against both jaws and confirm it rests flat on the table or a parallel support. Use pads for finished wood, but keep them clean and equal in thickness.
- Clamp without crushing. Apply enough pressure to stop the part shifting, not so much that wood fibers collapse or a thin metal part bows.
- Recheck after adjustment. If you rotate the vise or change stock thickness, confirm the base bolts, jaw contact, and workpiece position again before starting the drill.
What wears, and how to keep the vise useful
On an inexpensive vise, the first clues of wear are often increased play in the moving jaw, a screw that feels rough, or jaws that no longer close evenly. Chips and rust can make the screw bind long before the body is worn out. Brush out debris after use, wipe exposed metal dry, and apply a light protective oil to unpainted surfaces and the screw as appropriate. Keep oil away from wood-contact faces and the workpiece.
Replaceable jaw faces and a serviceable screw are useful ownership features. Avoid hammering the handle to force a stuck part loose: that can damage the screw, jaw alignment, or base. If the jaws remain crooked after cleaning and tightening, or the base has cracked, do not trust the vise for secure drilling.
Bottom line
For a versatile workshop, start with a rigid 4-inch vise whose opening suits your stock and whose mounting slots fit your drill press table. Add V-grooves if round stock is common, choose a wider model for genuinely wide work, and favor protected or replaceable faces for woodworking. The right fit, a square setup, and secure table mounting usually matter more to accurate drilling than the biggest jaw width or the highest claimed clamping force.