What's inside
As an Amazon Associate I earn from qualifying purchases. This post may contain affiliate links at no extra cost to you.
A bandsaw creates a different dust-collection problem than a table saw. The blade runs through the work and carries fine dust into the lower cabinet, while the open cutting area throws chips forward and sideways. A small port on the cabinet may catch some of it, but it rarely captures dust at the point of release. A well-fitted hood mounted near the blade can make a much bigger difference to workshop air.
The best setup depends on your saw, the material you cut, and the capacity of your collector. A hood that seals too tightly can restrict access and create a safety hazard. One that sits too far from the blade will look useful but leave a cloud of fine dust around the cut.
As an Amazon Associate we earn from qualifying purchases at no extra cost to you.

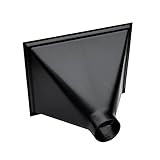

What a Bandsaw Dust Hood Does
A dust hood surrounds the lower blade area or sits behind the blade just below the table. Its job is to create a short path from the cutting zone to a dust-collection hose. The closer the opening is to the dust source, the less air volume you need to capture it.
This is different from simply connecting a hose to the factory cabinet port. The cabinet port helps collect dust that falls below the table, but it does little for dust thrown above the table. A hood can handle that upper stream while the original port collects material inside the cabinet.
For many saws, the most effective arrangement is a two-port system: a 4-inch hose connected to the cabinet and a second 2-1/2- or 4-inch hose connected to a blade-area hood. You may need a splitter, blast gates, or a collector with enough capacity to run both ports without a major airflow drop.
Main Hood Types
| Hood type | Best use | Advantages | Limitations |
|---|---|---|---|
| Under-table or lower-blade hood | Enclosed stands and cabinet saws | Good capture of dust dropping through the table; protected from knocks | Misses much of the dust created above the table |
| Behind-blade hood | General resawing and curved cuts | Close to the cutting zone and usually easy to install | Can interfere with blade guides, drift adjustments, or workpiece clearance |
| Adjustable upper hood | Fine dust and frequent blade-height changes | Can stay close to the work as the guide assembly moves | More expensive and easier to misadjust |
| Flexible magnetic or clamp-on hood | Occasional use or rented/shared workshops | No permanent modification and quick to reposition | May move from vibration and often has a smaller, less efficient inlet |
A purpose-built bandsaw dust collection hood is convenient, but a shop-made hood can work just as well if it is rigid, smooth inside, and positioned correctly. Plywood, acrylic, sheet metal, and heavy plastic are all practical materials. Avoid thin material that vibrates or collapses under suction.
Airflow, Hose Size, and Collector Capacity
Most bandsaw hoods work well with a 4-inch hose when connected to a real dust collector rather than a small shop vacuum. A 4-inch line can move roughly 350 to 600 CFM in a practical workshop installation, depending on hose length, fittings, filters, and collector performance. The exact number matters less than maintaining strong airflow at the hood.
A 2-1/2-inch hose is easier to route and may be adequate for a small benchtop saw, light cutting, or a short connection to a high-performance shop vacuum. It is usually a poor choice for a large saw producing heavy resawing dust. Small hoses lose airflow quickly through long runs, corrugated interiors, sharp bends, and restrictive adapters.
Do not judge a collector by its advertised maximum CFM alone. That figure is often measured with no hose or filter resistance. A collector rated at 1,200 CFM may deliver considerably less at the saw. Clean the filter regularly, keep the hose as short as possible, and open only the blast gate serving the machine when your collector is marginal.
For a typical 14-inch bandsaw, a 4-inch dust collection hose is the sensible starting point. Use grounded hose or a grounding wire if your system generates static buildup, but remember that grounding does not replace a proper fine-dust filter.
Positioning the Hood
Place the hood as close as practical to the blade without allowing the blade, guides, or workpiece to contact it. A gap of about 1/2 to 1 inch from the dust stream is a useful starting point. Move it closer if dust escapes; move it back if wide stock catches on the opening.
The opening should face the area where the blade exits the cut, not merely point at the blade from a distance. On many saws, the blade moves downward through the table, so a hood behind the blade and just below the table can intercept dust before it spreads. A lower cabinet port should remain open if it is part of the collection path.
Make the hood removable or hinged if you change blades often. A fixed box that blocks the lower blade guides will become annoying and eventually get left disconnected. Provide at least 1/2 inch of clearance around moving parts, and check the full range of the upper guide assembly before tightening the mounting hardware.
Common Failure Modes
The most common problem is a hood with too much open area. The collector then pulls air from the room instead of drawing a fast stream across the blade. Reduce unnecessary gaps, but do not fully enclose the cutting area. The blade must remain visible and accessible, and the hood must not restrict safe hand positioning.
Another failure is using a restrictive shop-vac adapter on a large cabinet port. The vacuum may produce strong suction at the nozzle but move too little air to capture a broad dust plume. If the hood becomes clogged quickly, check for a blocked filter, crushed hose, closed blast gate, or an undersized separator.
Fine dust can also escape through the lower cabinet seams. Seal large gaps with foam tape or flexible sealant, but leave access panels removable. A sealed cabinet improves collection; it does not make respiratory protection unnecessary.
Buying Checklist
Choose a hood with a rigid body, a smooth interior, a connection sized for your collector, and mounting hardware that will not loosen from vibration. Adjustable brackets are worth paying for when the saw is used for both thin scrollwork and thick resawing.
If you use the bandsaw occasionally and already own a capable shop vacuum, a basic clamp-on hood and short 2-1/2-inch hose may be entirely adequate. For daily use, hardwood cutting, or a large saw, spend more on a rigid hood and 4-inch ducting. A 4-inch blast gate also makes it easier to isolate the bandsaw and preserve airflow.
Finally, wear eye protection and use a properly fitted respirator when cutting dusty materials. Dust collection reduces airborne particles; it does not eliminate them. Keep the blade sharp, because a dull blade produces more heat, friction, and airborne debris while making the hood’s job harder.