
Our Top Picks


What's inside
As an Amazon Associate I earn from qualifying purchases. This post may contain affiliate links at no extra cost to you.
Cabinet work punished my first router in about a weekend. I bought a small trim router because it was cheap, then tried to run a 1/2″ rail-and-stile set through 3/4″ maple with it. The motor bogged, the bit chattered, and the joint gapped enough that I could see daylight through the door frame. That was the day I learned that the best router for cabinet making is not the one with the most accessories in the box, it is the one that can hold a heavy bit dead steady at a slow, controlled RPM without heating up.
Cabinets are a specific kind of work. You are cutting long grooves for dados and dust panels, rabbets for backs, profiles on door edges, hinge mortises, and if you build frame-and-panel doors, big vertical panel raisers that spin a lot of steel. Most of that happens either in a router table or on a straightedge, not freehand. That changes what matters. Below is how I sort the options, what I actually run in my one-car garage, and where I think people waste money.
As an Amazon Associate we earn from qualifying purchases at no extra cost to you.



What matters in a cabinet router, ranked
Here is the short version before I get into the weeds. I’ve ordered these by how much each one has actually affected my joinery quality, not by how much marketing gets aimed at them.
| Feature | Why it matters for cabinets | What I look for | |||
|---|---|---|---|---|---|
| Collet size | 1/2″ | shanks flex far less on tall panel and stile bits | 1/2″ | collet, ideally with a 1/4″ | adapter |
| Motor power | Rail-and-stile and panel bits load the motor hard | 2-1/4 HP class minimum for table work | |||
| Variable speed | Big-diameter bits must run slower or they burn | A real dial, not two fixed settings | |||
| Base style | Table work wants fixed base, mortises want plunge | Combo kit with both bases | |||
| Above-table adjustment | You will make dozens of micro height tweaks | Through-the-base hex adjustment | |||
| Dust collection | MDF and plywood dust is the worst part of cabinet work | Ports on both bases, not an afterthought | |||
| Soft start | Heavy bits torque the router out of your hands | Electronic soft start plus feedback |
Notice what is missing from that list: cordless. I own cordless tools and love them for trim routers and edge work, but for a table-mounted cabinet router I still want a corded motor. Runtime and sustained torque under load matter more to me than dragging a cord across the shop floor.
Fixed base, plunge, or both
If you build cabinets you will eventually want both, which is why combo kits are such good value. The fixed base is what lives in the router table, and it is what I grab for edge profiles because the center of gravity sits low and it does not wobble on a narrow door stile. The plunge base earns its keep on hinge mortises, stopped dados in cabinet sides, and inlay work where you have to start the cut in the middle of a board.
My honest mistake here: I bought a plunge-only router first because it seemed more capable. It is more capable, but it is worse at the thing I do most. A plunge base in a router table is awkward to adjust, the springs fight you, and the taller stance makes freehand edge routing feel tippy. If your budget only allows one router right now and you plan to build doors, buy the fixed base and add plunge later.
2-1/4 HP Variable Speed Router Combo Kit (Fixed + Plunge)
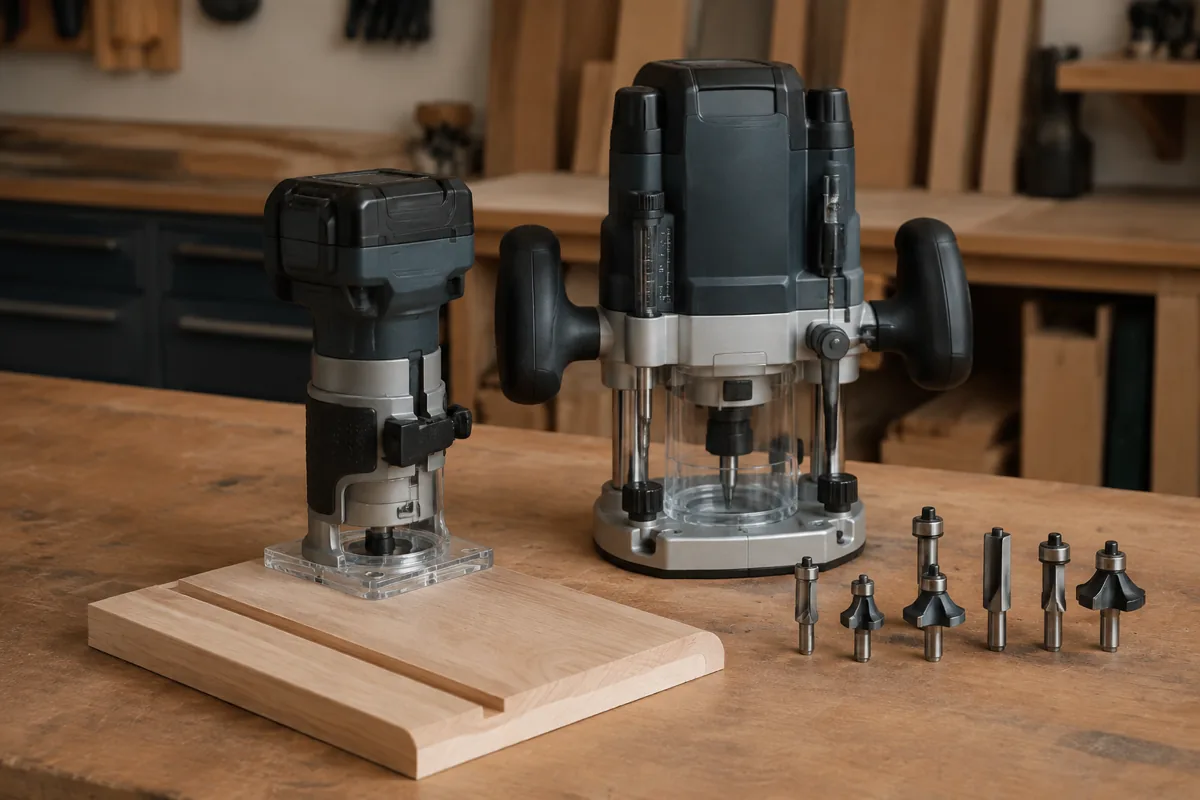
This is the sweet spot class for a garage cabinet shop. A mid-size 2-1/4 HP combo kit is powerful enough to hang in a router table for rail-and-stile work, light enough to use handheld for edge profiles, and the two bases mean you are not buying a second router just to cut hinge mortises. Look for through-the-base height adjustment and a genuine variable speed dial. Check that a 1/2″ collet is included rather than optional.
Why I stopped trying to raise panels with a mid-size router
A 3-1/4″ or larger vertical panel raiser is a heavy chunk of carbide. Spun in a 2-1/4 HP motor at appropriate speed it will do the job, but only in several shallow passes and only if you are patient. My mid-size router got hot enough on a batch of eight door panels that I started taking breaks between them, which is a bad sign.
If door building is your main thing, a 3 to 3-1/4 HP router dedicated to the table is the upgrade that actually changes your day. It does not flinch, the cut quality is better because the bit is not deflecting, and you can take slightly heavier passes without burning. The trade-off is real: those motors are heavy, loud, expensive, and useless handheld. In a small garage you are dedicating shelf space and money to one job.
- ✔ 1/2″ shank support means less bit deflection and tighter joints
- ✔ Variable speed lets you run big bits safely slow
- ✔ Combo kits cover both table and freehand duties
- ✔ Corded motors hold torque through long panel passes
- ✘ Big 3 HP motors are heavy, loud, and table-only
- ✘ Combo kits cost more up front than a single base router
- ✘ Good dust collection usually means extra fittings you buy separately
- ✘ Cheap variable speed circuits can fail before the motor does
The router table is half the tool
I spent a long time blaming my router for results that were actually the table’s fault. A flexing top, a fence that does not stay parallel, or an insert plate that sits a hair proud will ruin a rail-and-stile joint no matter what motor is underneath. Cabinet joinery is fussy about coplanarity because the whole point is that rails and stiles meet flush.
Two things I would do differently if I started over. First, I would buy or build the table before choosing the router, so I could match the insert plate and lift to the motor instead of shimming my way out of a mismatch. Second, I would spend on a router lift earlier. Reaching under a table to set depth by feel, then test cutting, then reaching under again, is where my Saturdays used to go. A lift turns that into a few turns of a crank from above.
For dados and long grooves in cabinet sides, I still prefer handheld routing against a clamped straightedge over the table, because moving a 4×8 sheet across a small table in a garage is a wrestling match. That is a garage-shop constraint, not a rule. If you have space and outfeed support, the table is more accurate.
Compact Trim Router with Variable Speed
Do not skip this one. Once you have a big router living in the table, a compact palm router becomes the tool you reach for constantly: roundovers on face frames, flush trimming edge banding and solid edging, hinge mortises with a template, chamfers on shelf edges. Battery versions are genuinely good here since the loads are light. It will not raise panels and should not try.
What I actually run, and my buying order
My setup is unglamorous: a mid-size variable speed combo kit that spends most of its life bolted under a shop-built table, plus a compact trim router that never gets put away because I use it every session. When I build a run of doors I take extra passes and accept that it is slower than a dedicated 3 HP setup. That is the compromise I chose because floor space in a one-car garage is worth more to me than speed on the two or three door projects I do a year.
If you are starting from nothing and building cabinets, the order I would buy in is: mid-size 1/2″ variable speed combo kit first, a decent table and quality bit set second, a compact router third, and a dedicated big motor with a lift only if door production becomes a real part of what you do. Buying bits before the second router pays off more than most people expect, because a dull or cheap rail-and-stile set makes a good router look bad.
One more thing on bits. Cabinet work leans heavily on matched sets, straight bits, and flush trim bits, and those get used hard in plywood and MDF. Abrasive sheet goods dull carbide faster than hardwood does. Budget for sharpening or replacement rather than assuming a set is a one-time purchase.
FAQ: best router for cabinet making
Can I build cabinets with only a compact trim router? You can build carcasses and face frames with one if you are patient, using a template for mortises and a straightedge for grooves. What you cannot reasonably do is run 1/2″ shank rail-and-stile or panel-raising bits, because trim routers take 1/4″ shanks and do not have the torque. If your doors are slab or shaker built with a table saw and dado, a trim router plus a saw covers a surprising amount.
Do I need a router lift, or is above-table adjustment enough? Above-table hex adjustment through the base plate is genuinely usable and it is what I lived with for years. A lift is faster, repeatable, and less fiddly for the many small height changes cabinet joinery requires. Treat it as a quality-of-life upgrade rather than a requirement, and spend on bits and a flat table first.
What speed should I run big cabinet door bits at? Slower than you think. Large-diameter bits have high rim speed at a given RPM, so panel raisers and big stile bits belong near the low end of the dial while small straight bits can run near the top. Follow the bit manufacturer’s stated maximum RPM for that specific cutter, take shallow passes, and let the chip clear. Burn marks usually mean too fast, too slow a feed, or a dull bit.
Cabinet routing is one of those areas where the tool choice is less about horsepower bragging and more about matching the machine to the joints you actually cut. Get the collet size and variable speed right, put it in a flat table, and the rest is technique.
Check prices on Amazon →