
Our Top Picks
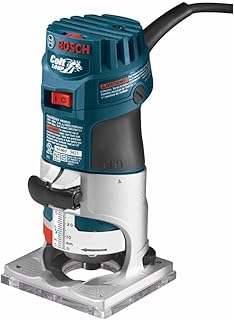
 BOSCH PR20EVS Colt 1.0 HP Variable-Speed Palm Router35 in9.41 x 7.43 x 4.7 inches3.3 poundsCheck on Amazon


What's inside
As an Amazon Associate I earn from qualifying purchases. This post may contain affiliate links at no extra cost to you.
The first router I bought was a big 2-1/4 HP plunge combo kit, and it sat in the box for about four months because it scared me. It was heavy, loud, and the manual had a section about kickback that I read twice and then decided to go do something else. The tool that actually taught me to route was a cheap trim router I picked up later, and that is why I tell anyone asking about a palm router for beginners to start small. A compact router is easier to control with one hand, it takes small bits that remove small amounts of material, and small mistakes are cheaper to fix than big ones.
The problem is that shopping for one is genuinely confusing. Every brand sells something called a trim router, compact router, or palm router, and the spec sheets all look similar. Meanwhile the thing that actually determines whether you like the tool is stuff nobody puts on the box: how the depth adjustment feels, whether the base plate is clear enough to see your line, and whether the LED throws a shadow right where you are looking. Here is how I’d sort through it.
As an Amazon Associate we earn from qualifying purchases at no extra cost to you.



Why a Palm Router For Beginners Beats a Full-Size Router
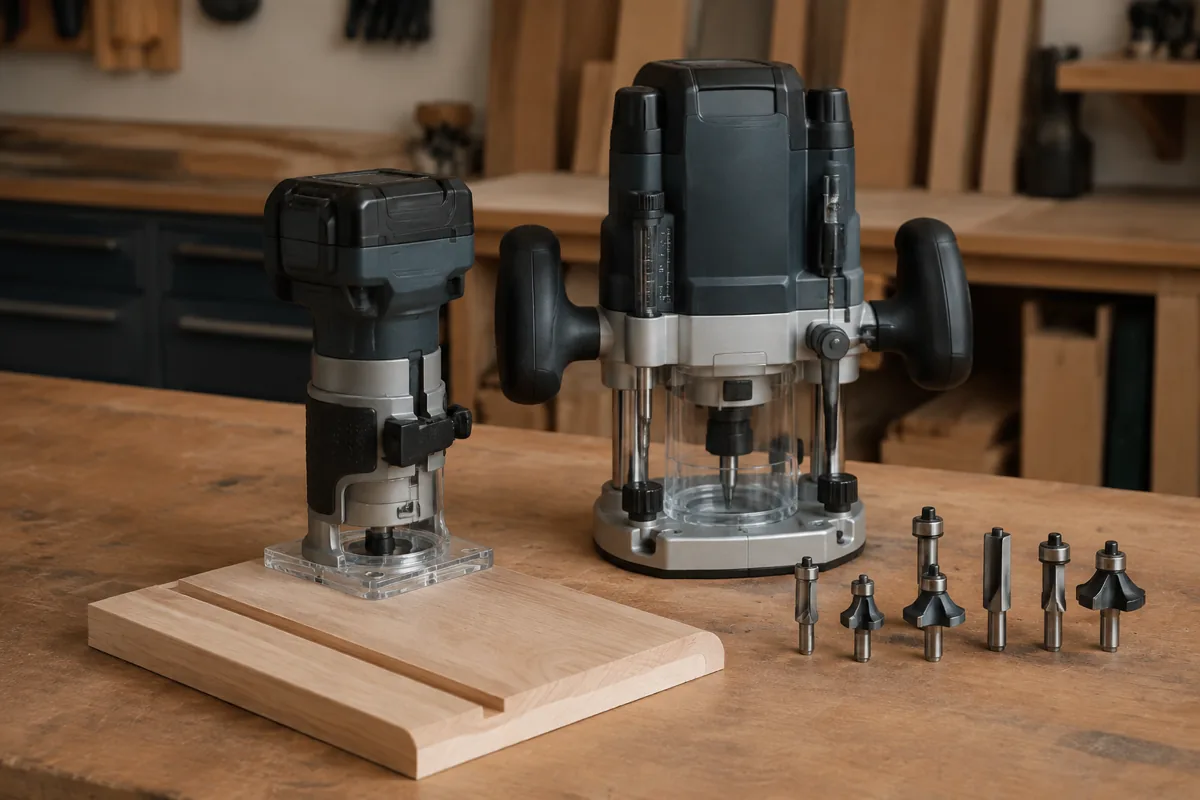
A palm router is a fixed-base router with a motor in the 1 to 1-1/4 HP range that accepts 1/4 inch shank bits. That limitation is a feature when you are learning. You physically cannot chuck up a giant panel-raising bit and get yourself in trouble. The bits you can use are round-overs, chamfers, small straight bits, flush trim bits, and small dovetail and slot cutters, which happens to be about 90 percent of what a hobby woodworker actually needs.
The one-handed grip matters more than I expected. With a big router you are managing a lot of mass and torque with two handles, and the tool wants to walk. With a palm router your hand is right on top of the base, so you feel it bite and you feel it wander. You develop feed-rate instincts faster. I made worse cuts on my big router for a year longer than I should have, purely because I could not feel what it was doing.
The trade-off is real, though. A palm router will bog down in dense hardwood if you get greedy with depth of cut. Routing a deep mortise in white oak with a 1/4 inch shank spiral bit is slow, multi-pass work, and you can smell the motor working. If your project list is full of big dadoes, raised panels, or heavy template work, you will eventually want a second, larger router. Most beginners do not start there.
Corded Or Cordless: The Decision That Actually Matters
This is where I see people overthink and underthink at the same time. Corded compact routers are cheaper, lighter in the hand once you ignore the cord, and never need charging. Cordless models built on existing platforms like DeWalt XR, Milwaukee M12 and M18 FUEL, Makita LXT and CXT, or Ryobi ONE+ cost more and add battery weight up high, which changes the balance a little.
My honest position: if you already own batteries in a system, buy the bare-tool cordless one. Routing is a fussy, get-up-and-move-around task. You round over the edge of a board, then check it, then flip it, then chase a spot you missed. A cord snagging on the corner of your bench during that dance has ruined more of my edges than any technical failure. If you own no batteries at all, buy corded and put the savings into bits and a proper edge guide.
One thing cordless models get right more often is the brushless motor with soft start and electronic speed control. Soft start on a small router is not just comfort, it keeps the tool from twisting out of your hand on startup, which is a genuinely startling thing to happen the first time.
| Feature | Corded compact | Cordless compact |
|---|---|---|
| Typical price tier | Lower | Higher, before you add batteries |
| Balance in hand | Better, weight is low | Slightly top-heavy with a big pack |
| Runtime | Unlimited | Fine for edge work, watch it on long template runs |
| Best for | Bench-bound work, router tables | Job-site trim, moving around a project |
| Soft start | Common on better models | Nearly standard on brushless models |
Compact Cordless Trim Router (Bare Tool)
If you already have a battery platform, the bare-tool route is the cheapest way into a good router. Look for brushless, variable speed, a clear sub-base, and a depth ring with fine adjustment rather than just a sliding clamp. Ignore the highest RPM number on the box, it tells you almost nothing about usable power.
The Features Worth Paying For, And The Ones That Are Noise
Depth adjustment is the whole tool. A good compact router has a rack-and-pinion or threaded ring adjuster that moves the motor in small, repeatable increments, with a cam lock that clamps it without shifting. Cheap ones use a friction clamp and a slide, and setting a 1/16 inch round-over becomes a guessing game where every adjustment loses your reference. I would pay a real premium for a good adjuster and skip almost every other feature to get it.
Variable speed is worth having. You slow down for larger diameter bits and for plastics and laminates that melt, and you run small bits fast. Dual LEDs matter more than single because a single light casts a hard shadow on one side of the bit, which is exactly where your pencil line lives.
Clear polycarbonate sub-bases are underrated. Seeing your layout line through the base is the difference between confident freehand work and squinting. Also check what accessory bases exist for the model: an offset base, a tilt base, and a plunge base turn one tool into three. Plunge bases for palm routers are limited in travel but perfectly good for stopped dadoes, hinge mortises, and inlay work.
What I consider noise: the exact horsepower rating, since it is measured inconsistently and every tool in this class is roughly equivalent. Also dust collection ports. They exist, they help a bit on edge profiling, and they will not save you from a shop full of fine chips. Plan on a shop vac and a broom either way.
- ✔ One-handed control builds real feel for feed rate
- ✔ 1/4 inch bits are cheap and widely available
- ✔ Doubles as a small router table motor
- ✔ Accessory bases add plunge, offset, and tilt capability
- ✔ Light enough that you actually reach for it
- ✘ Bogs down in deep cuts and dense hardwood
- ✘ 1/4 inch shanks flex and deflect more than 1/2 inch
- ✘ Small base is tippy on narrow edges without an offset base
- ✘ Dust collection is mediocre at best
Bits, Setup, And The Mistakes I Actually Made
Buy fewer, better bits. A carbide-tipped 1/8 and 1/4 inch round-over, a 45 degree chamfer, a flush trim bit with a bearing, and a couple of straight bits will cover your first year. The cheap 30-piece sets are mostly filler profiles you will never use, and the ones you do use dull fast and burn. Burning is not a technique problem you can outwork, it is usually a dull bit or too slow a feed.
Two mistakes I repeated enough times to be embarrassed about. First, routing the whole profile in one pass. On a 1/4 inch round-over in maple that gives you chatter, burn marks, and sometimes a chunk torn out at the grain change. Two or three shallow passes take an extra 90 seconds and look better. Second, routing the wrong direction. On outside edges you move the router counterclockwise around the workpiece so the bit rotation pushes back against your feed. Go the other way and the router self-feeds, sprints along the edge, and you are now holding a small angry machine. I cracked a walnut box lid learning that.
The other thing nobody told me: do end grain first, then long grain. Routing the long-grain edge last cleans up the blowout you get at the corners of end-grain passes. That single sequence change fixed most of my chipped corners.
Starter Router Bit Set, 1/4 Inch Shank
Look for solid carbide or carbide-tipped bits with sealed bearings, sold in a small set of profiles you will genuinely use. A six-piece set from a reputable maker will outlast a bargain thirty-piece kit and leave cleaner cuts. Replace bearings rather than whole flush trim bits when they get gummy.
How I’d Spend My Money In A Small Garage Shop
If I were rebuilding my shop from scratch on a tight budget, I would buy a mid-tier corded compact router with a good depth adjuster, add an edge guide and an offset base, and spend the rest on four good bits. That package handles round-overs, chamfers, flush trimming, hinge mortises, and light inlay work, which is most of what a furniture and box builder does.
If I had a battery platform already and a little more room in the budget, I would take the brushless cordless version instead, mostly for the freedom of movement and the soft start. Either way I would resist buying a full-size router until a specific project demands it. Buying the big tool first is exactly the mistake I made, and it delayed my learning by about a year.
Compact Router Accessory Bases And Edge Guide
An edge guide turns freehand dado work into repeatable joinery, and an offset base keeps the tool from tipping on narrow stock. Confirm compatibility with your specific router model before ordering, since these are not universal across brands.
FAQ
Is a palm router powerful enough to be my only router? For most hobby work, yes, for a good while. It handles edge profiling, flush trimming, small dadoes, hinge mortises, and light template work. You will want a bigger router when you start cutting deep mortises in hardwood, raising panels, or running long template passes where the small motor gets hot and slow.
Can I mount a palm router in a router table? Yes, and plenty of small shops do. Fixed bases usually accept a table insert plate, and above-table depth adjustment on the better models makes it workable. The limitation is the 1/4 inch collet and the motor size, so keep the bits small and the passes shallow. It is a fine small-parts table, not a production setup.
What speed should I run? Small diameter bits like a 1/8 inch round-over want high speed, and larger diameter bits want it slower because the tip is traveling faster at the same RPM. Start near the top of the range for small bits, back off a step or two for anything over about an inch in diameter, and slow down further for plastics and laminate to avoid melting the edge.
Start small, take shallow passes, and go counterclockwise on outside edges. That advice would have saved me a walnut lid and a lot of sanding.
Check prices on Amazon →