
What's inside
- Table Saw Workbench Plans: The Short Version
- Choosing the Right Footprint for Your Shop
- Plan A: The Compact Build (60 × 36 in)
- Plan B: The Mid-Size Build (84 × 42 in)
- Plan C: The Full Cabinet (96 × 48 in)
- Leveling, Outfeed Support, and Clearance Details
- Decision Matrix: Which Plan Fits You?
- Material Options: Plywood vs. MDF vs. Steel
- Build Sequence and Common Mistakes
- FAQ
- Related Guides
As an Amazon Associate I earn from qualifying purchases. This post may contain affiliate links at no extra cost to you.
Table Saw Workbench Plans: The Short Version
The best table saw workbench plans build a single rigid box—typically 36–48 inches deep and 60–96 inches wide—that drops your saw’s table flush with the surrounding top, adds an outfeed surface 36 inches or longer behind the blade, and leaves at least 8 feet of clear infeed/outfeed room. The plans below cover three footprints sized to common shop layouts, with full dimensions, material options, and leveling details so you can pick one and start cutting this weekend.
Choosing the Right Footprint for Your Shop
Before committing to a workbench with table saw plans, measure the clearance around where the bench will sit, not just the bench itself. The bench holds the saw; the air around it holds the lumber.
As an Amazon Associate we earn from qualifying purchases at no extra cost to you.
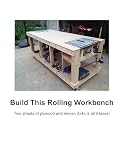

| Plan | Bench Size (W × D × H) | Min. Room Size | Best For | Material Cost Range |
|---|---|---|---|---|
| Compact (Plan A) | 60 × 36 × 35 in | 10 × 12 ft | Contractor/hybrid saws, single-car garage | $250–$450 |
| Mid-Size (Plan B) | 84 × 42 × 35 in | 12 × 16 ft | Hybrid or cabinet saw, hobbyist shop | $400–$650 |
| Full Cabinet (Plan C) | 96 × 48 × 35 in | 16 × 20 ft | Cabinet saw, dedicated shop, built-in dust collection | $600–$900 |
These ranges assume plywood construction; hardwood tops or steel framing push costs higher. All three workbench plans with table saw integration use the same frame logic, so dimensions scale predictably.
Plan A: The Compact Build (60 × 36 in)
This is the most requested table saw workbench plan because it fits a garage where a car still needs to park. The saw sits at one end of the bench; the remaining ~30 inches of top works as assembly space or jointer staging.
Cut List and Structure
- Frame: 2×4 or 3/4-in plywood box construction; legs doubled 2×4s at each corner plus two mid-span supports.
- Saw bay: Sized to your saw plus 1/8 in on each side for adjustment. For most contractor saws that’s roughly 27 × 20 in.
- Top: Two layers of 3/4-in plywood (BC or better) glued and screwed, or one layer ply topped with 3/4-in MDF for a flatter, sacrificial surface.
- Outfeed: A hinged 36 × 24 in drop-leaf on folding brackets, or a fixed extension if the car doesn’t need the space.
The critical detail: the saw’s table surface must sit flush with the benchtop within 1/32 in. Build the saw cradle low, then shim the saw up—it’s far easier to add shims than to plane down a cradle.
Plan B: The Mid-Size Build (84 × 42 in)
Plan B adds a full-width cabinet base under the saw and a fixed outfeed section, making it the better choice if you rip 8-foot sheet goods regularly.
- Layout: Saw centered at 40 in from the left edge, leaving a ~44 in infeed wing and a 36 in outfeed section.
- Storage: Two banks of drawers (four 4-in and two 8-in deep) plus a center cavity that doubles as a dust-collection plenum with a 4-in port.
- Top: 3/4-in Baltic birch ply with a replaceable 1/4-in hardboard skin—swap it when the surface gets chewed up instead of rebuilding.
- Rip capacity note: If your fence rail extends past the table, build the bench to support the rail’s full length, not just the saw body.
Plan C: The Full Cabinet (96 × 48 in)
Plan C treats the workbench for table saw plans as permanent shop furniture. It’s built from 3/4-in plywood carcasses joined with pocket screws or dadoes, fitted with heavy-duty locking casters only if the floor allows it—on a level slab, fixed leveling feet are more stable than any caster.
- Full-width outfeed table integrated flush with the saw, 40 in deep behind the blade.
- A miter saw or router-table bay at the far end, sharing the same top plane.
- A central dust-collection bay sized for a shop vacuum or small collector underneath.
Leveling, Outfeed Support, and Clearance Details
Leveling the Assembly
Garage floors slope toward drains, typically 1/8 in per foot or more. Install six to eight adjustable leveling feet (5/16-in lag-style or T-nut levelers), one at each corner plus mid-spans. Level the empty frame first with a 4-ft level diagonally in both directions, then set the saw and shim it flush to the top. A long rip of MDF laid across the saw table and benchtop makes an instant flushness gauge—any rock means a shim is needed.
Outfeed Support Rules of Thumb
- Length: The outfeed surface should be at least half the length of the longest board you routinely rip, minimum 36 in. For 8-ft sheet goods, 40–48 in of outfeed plus a roller stand at the end is the practical setup.
- Height: Outfeed must be flush or 1/32 in below the saw table—never above, or the workpiece catches and kicks.
- Miter slots: Rout relief channels in the outfeed aligned with the saw’s miter slots if you use a crosscut sled, or the sled will hang up.
Clearance Requirements
| Zone | Minimum Clearance | Comfortable Clearance |
|---|---|---|
| Infeed (in front of blade) | 6 ft | 8–10 ft |
| Outfeed (behind blade) | 6 ft | 8–10 ft |
| Sides | 2 ft | 3 ft (for fence rail access) |
| Overhead | No shelving or lights under 7 ft in the rip path | |
If you can’t hit the 6-ft minimums, consider a mobile base so the saw pulls away from the wall for long rips—this is the standard workaround in single-car garages.
Decision Matrix: Which Plan Fits You?
| Your Situation | Recommended Plan | Why |
|---|---|---|
| Garage shared with a car, occasional weekend use | Plan A on locking casters | Mobility beats permanent footprint; drop-leaf outfeed folds away |
| Dedicated garage bay, weekly use, sheet goods | Plan B, fixed feet | Fixed outfeed removes setup friction; drawer storage keeps accessories at hand |
| Full-time shop, cabinet saw, jigs and sleds | Plan C | Mass damps vibration; integrated dust bay and second tool bay save floor space |
| Jobsite saw that moves between sites | Skip the bench—use a folding stand | Any built-in defeats the saw’s portability |
Material Options: Plywood vs. MDF vs. Steel
| Material | Cost per 4×8 Sheet | Flatness | Durability | Notes |
|---|---|---|---|---|
| BC/sanded plywood (3/4 in) | $45–$70 | Good | High; resists screws, moisture-tolerant | Standard frame and top choice |
| Baltic birch (3/4 in) | $80–$120 | Excellent | Very high; void-free edges | Best for Plan C carcasses and drawer boxes |
| MDF (3/4 in) | $35–$50 | Excellent | Sags under load; swells if wet | Use only as a top skin, never structural |
| Steel tube frame + ply top | Varies (~$150–$300 in steel) | Depends on welds | Highest; impervious to moisture | Worth it only if you already weld |
A practical hybrid used by most builders: plywood frame, double plywood top, sacrificial hardboard skin. Total materials for Plan A run around $300 at typical 2026 lumber prices.
Build Sequence and Common Mistakes
- Cut and assemble the leg frames and stretchers; check square on both diagonals.
- Add leveling feet, set the frame in position, and level it empty.
- Build the saw cradle 1/4 in below final saw height; bolt the saw in.
- Shim the saw flush to the installed top, checking with a straightedge in both directions.
- Attach the outfeed surface and cut miter-slot reliefs if using a sled.
- Wire a switched outlet to the bench; dust collection last, once everything else fits.
Mistakes to avoid: Building the saw opening too tight (saws expand slightly in humid weather), routing a dado stack groove into the top without a sacrificial skin underneath, skipping mid-span supports so the top sags under a heavy cabinet saw, and—most common—setting the outfeed a hair high. A high outfeed causes more kickback-adjacent stalls than almost any other bench flaw.
FAQ
Can I use these plans for a job-site saw? Yes, but build a cradle that grips the saw’s base rather than bolting it down, so you can still pull the saw out for site work.
What height should the finished bench be? 34–36 in for most people; match your other benches. Your elbows should bend slightly when feeding stock—if you’re taller than 6’2″, go 37–38 in.
Do I need casters? Only if you can’t meet the clearance minimums permanently. Fixed, leveled feet are always more stable; casters are the compromise for shared space.
Plywood or solid wood edging on the top? Add a hardwood or plywood edge band—bare ply edges chip quickly and catch stock during rips.